Crochet Beautiful Toadstool
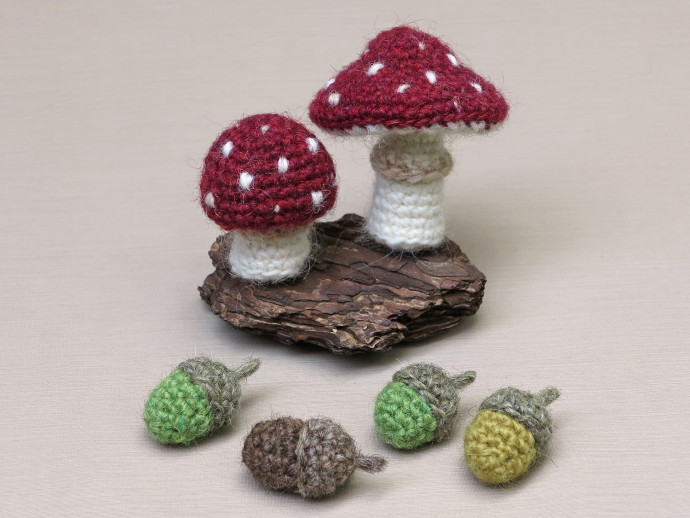
Crocheting a beautiful toadstool can be such a delightful and rewarding project! With just a hook, some yarn, and a sprinkle of creativity, you can bring these whimsical creatures to life with your own personal touch. The fluffy white cap and charming red stem make for a magical combination that adds a touch of enchantment to any space. Whether you're a seasoned crocheter or a newbie looking for a fun challenge, crafting a crochet toadstool is a great way to relax and let your imagination soar. So, grab your materials, follow a pattern or create your own, and enjoy the cozy and magical journey of bringing a little piece of fairyland into your home.
This pattern is written in standard American crochet terms. It’s useful to read it before you start. If you use the recommended yarn, your toadstools will be 9 cm / 3.5 inch high (wide version) and 7 cm / 2.8 inch high (small round version).
For these toadstools you’ll need worsted weight yarn and an E US/3.5 mm crochet hook. You’ll need three colours of (Lètt Lopi) yarn: red (1409), sheep white (0051) and barley (1419). A small amount of each colour will do. You will also need fibrefill to stuff the toadstools.
Abbreviations: ch = chain, sc = single crochet, st = stitch, sl st = slip stitch, hdc = half double crochet stitch, BLO = work in back (inside) loops only, s2tog = invisible decrease
The toadstools are worked in the round/ spirals. You can use a stitch marker to mark the beginning of a round. Move it up each time you start a new round. About changing colour: always change colour in the last loop of a stitch, so the loop on the hook you end with is the new colour. That means the next stitch is in the new colour, not the one you changed in.
Instructions
These toadstools are made in one piece. You start with the red colour to create the top. The first round of the white inside of the toadstool you will work in the back loops (BLO) only to create a nice folding line. In this round you decrease the number of stitches by half to create a flat inside; the dc’s & trebles will create the spores. After these rounds you will make a new folding line by working in BLO again, and then you work your way down to create the stems.
Round toadstool
Start in red, change colour to white and straw when indicated.
1. magic ring of 6 = 6
2. 2 sc in each around = 12
3. (sc in next 3, 2 sc in next) x 3 = 15
4. (sc in next 4, 2 sc in next) x 3 = 18
5. (sc in next 5, 2 sc in next) x 3 = 21
6-8. sc in each around = 21
9. (sc in next 6, 2 sc in next) x 2, sc in next 6, sc in next, sl st in white in BLO in same = 24, cut red and continue in white.
You have made that white sl st in the back loop to create the neatest colour change possible. Count the sl st as a st. I experimented and this little trick creates an almost straight red edge with as small a bump as possible.
Stuff the first part of the toadstool. Stuff flexibly, leaving a little hole in the middle. Don’t just put the stuffing in but push it against the sides and mould the outside. The hole that is left in the middle you can use to shape the toadstool.
Special stitch instruction for dc dec, this is worked in BLO: yarn over (yo) and insert your hook into next st, (yo) and draw the yarn through the st, insert the hook into next st, yo and draw the yarn through the st, yo and draw the yarn through 3 loops on the hook, yo and draw the yarn through the remaining 2loops on hook.
10. in BLO:ch 2, dc dec x 12 = 12 (the ch 2 you only do in this round)
11. in 3rd ch from hook in BLO: sc in each around = 12
12. in BLO: sc in each around = 12
13-14.sc in each around = 12
15. (sc in next 3, 2 sc in next) x 3 = 15
16. in BLO: (sc in next 3, s2tog) = 12
Now you can stuff the rest of the toadstool. It is important to stuff it flexibly and to shape the cap correctly by pushing the spores (dc stitches) inwards with both thumbs as you can see in the image below. When you stuff the stem, keep that shape in mind.
17. s2tog x 6 = 6, sl st and leave a very long yarn end for sewing and embroidering the little white dots.
Sew the hole closed by putting the needle from the inside out through all the outside loops of the 6 st, clockwise. If you do it correctly, you can now pull the end and it will close the gap. Weave in the end so you’ll have a nice flat bottom. Don’t cut the remaining the yarn end but leave it long for now. After you’ve created the straw-coloured skirt around the stem, you will use the white yarn end to shape the toadstool and create the white dots.
The little skirt in straw
Find the first front loop of round 11 (the front loops closest to the stem) and attach your yarn to it with a sl st; sc in same, ch 1 & dc in next, sc in next, ch 1 & dc in next, dc in next, sc in next, ch 1 & dc in next, sc in next 2, ch 1 & dc in next, dc in next, sc in next, sl st in 1st st and leave a long yarn end to add some straw coloured spots to the cap.
Finishing
To finish this lovely toadstool, use the white yarn end to secure the bottom of the cap that was pushed inwards while at the same time embroidering the spots:
Step 1. First sew a stitch into the bottom of the cap between the front loop of rounds 10 and 11 and let the yarn enter above it somewhere in the red cap. Pull the yarn as tight as necessary and sew a stitch into the cap. Now make the dot as big as you like.
Step 2. When the dot is the size you like, sew the yarn back to the white bottom of the cap without tension on the strand and take one stitch to secure the yarn.
Repeat steps1 & 2 all the way around so the bottom of the caps stays shaped a bit inwards and there are plenty of white dots. If you like you can also add a few straw-coloured dots, that’s up to you.
Wide toadstool
Start in red, change colour to white and straw when indicated.
1. magic ring of 6 = 6
2. 2 sc in each around = 12
3. (sc in next 3, 2 sc in next) x 3 = 15
4. (sc in next 4, 2 sc in next) x 3 = 18
5. sc in each around = 18
6. (sc in next 2, 2 sc in next) x 6 = 24
7. (sc in next 3, 2 sc in next) x 6 = 30
8. (sc in next 4, 2 sc in next) x 6 = 36
9. (sc in next 5, 2 sc in next) x 5, sc in next 5, sc in next, sl st inwhite in BLO in same = 42, cut red and continue in white,like you did for the round toadstool.
Special stitch instruction for treble dec, worked in BLO: yarn over (yo) 2 times and insert your hook into next st, (yo) and draw the yarn through the st, insert the hook into next st, yo and draw the yarn through the st, yo and draw the yarn through 3 loops on the hook, yo and draw the yarn through the remaining 3 loops on the hook.
For the hdc tog: yarn over (yo) and insert your hook into next st, (yo) and draw the yarn through the st, insert hook into next st, yo and draw the yarn through the st, yo and draw the yarn through the 4 loops on hook.
10. in BLO:ch 3, treble dec x 21 = 21 (the ch 3 you only do in this round)
11. in 4th ch from hook: (hdc in next 5, hdc tog) x 3 = 18
Stuff the first part of the toadstool like you stuffed the round version.
12. (sc in next, s2tog) x 6 = 12
13. in BLO: sc in each around = 12
14-15. sc in each around = 12
16. in BLO: sc in each around = 12
17-20. sc in each around = 12
21. (sc in next 3, 2 sc in next) x 3 = 15
22. sc in each around = 15
23. in BLO: (sc in next 3, s2tog) x 3 = 12
Now you can stuff the rest of the toadstool, like you did for the round version. For this toadstool it’s also important to push the spores inwards as much as possible.
24. s2tog x 6 = 6, sl st and weave in yarn end.
The little skirt in white and straw
Hold your toadstool upside down and attach the yarn as in the round version to the last front loop of round 11. (It’s the last because you are holding the toadstool upside down.)
1. sc in each front loop around, change colour to straw in last st.
2. sc in next, dc in next, 2 dc in next, sc in next 2, ch 1 & dc in next, dc in next, hdc in next, sc in next 2, hdc in next, sc in next, sl st in 1st and weave in yarn ends.
Finishing
Finish this toadstool like the small round one, but attach a new, long strand of white yarn close to the stem and use that to shape the toadstool and add the dots. In the image below you can see how I arranged my toadstool’s little dots.
You can make as many of these as you like; try making one in orange or browns. Enjoy Autumn!


