Crochet Witch Hat Wine Bottle Toppers
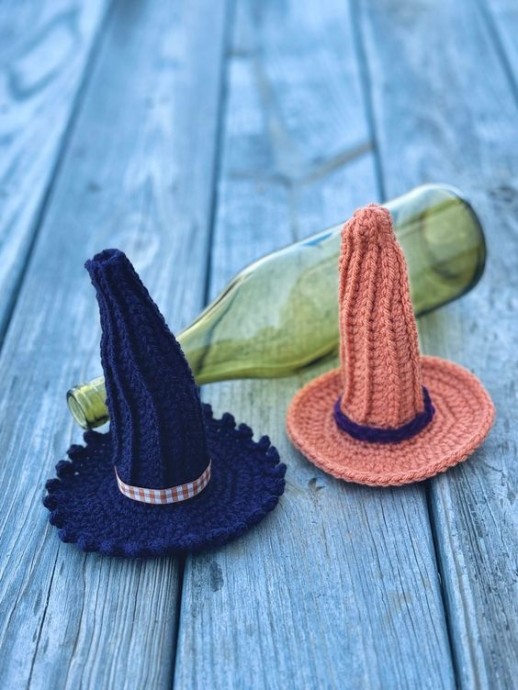
Crochet Witch Hat Wine Bottle Toppers are a delightful and charming way to dress up your wine bottles for a Halloween party or gathering. These whimsical creations add a touch of magic to your table setting and are sure to bring smiles to your guests' faces. Handcrafted with care and attention to detail, these adorable toppers feature intricate crochet work in the shape of a witch's hat, complete with a tiny brim and pointy top.
What you will need for the Witch Hat Wine Bottle Topper crochet pattern
- Worsted weight (#4) yarn
- 38 yds
- 4.00 mm (G) hook
- Yarn needle
- Scissors
- OPTIONAL for band: Ribbon (3/8”, 1/4” or 1/2”) or #5 yarn, 6.5 mm (K) hook
Pattern Notes
* Advanced beginner pattern.
** Written in US crochet terms.
* Finished size = 6” tall x 5.25” across the brim.
** Gauge: After completing Row 4 = 6” tall x 1.6” wide at the widest point.
* Stitch count is only listed on each round when there is a change.
** The top of the hat is worked in rows and then the brim is finished by working in the round.
* Color changes: work sc or Link Stitch until 2 loops remain on hook. Pull new color through, drop previous color, stitch is complete.
Stitch Key
ch = chain
dc = double crochet
FLO = Front Loop Only
hdc = half double crochet
rep = repeat
Rnd(s) = Round(s)
sc = single crochet
sc inc = single crochet increase
sk = skip
slst = slip stitch
st = stitch
Instructions
Ch 26.
Row 1:
slst in 2nd ch from hook and next 4, sc in next 6, hdc in next 6, dc in next 8, ch 1, turn. (25 st)
Row 2:
slst across, ch 1, turn.
Row 3:
slst FLO in next 5, sc FLO in next 6, hdc FLO in next 6, dc FLO in next 8, ch 1, turn.
Rows 4 – 13:
rep Rows 2 & 3.
Row 14:
rep Row 2.
Bring sides together with Row 1 behind Row 14. Slst together by working through the loops of beginning ch and front loop of Row 14, ch 1. (25 slst)
Do not finish off, continue with brim.
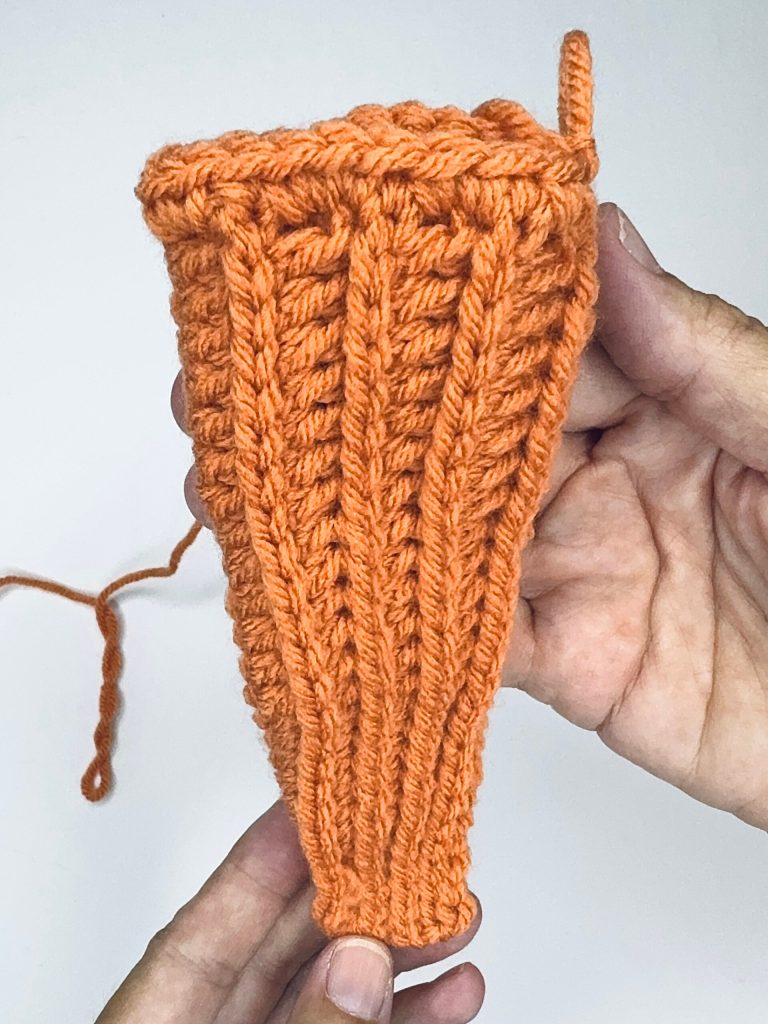
Brim:
Rnd 1:
work 20 sc evenly around edge, slst to join to 1st sc, ch 1. (20 sc)
Rnd 2:
sc in each st around, slst to join to 1st sc, ch 1.
Rnd 3:
*sc inc, sc in next 3; rep from * around, slst to join to 1st sc, ch 1. (25 sc)
Rnd 4:
*sc inc, sc in next st; rep from * around to last st, sk last st, slst to join to 1st sc, ch 1. (36 sc)
Rnd 5:
*sc inc, sc in next 3; rep from * around, slst to join to 1st sc, ch 1. (45 sc)
Rnd 6:
*hdc inc, hdc in next 4; rep from * around, slst to join to 1st hdc, ch 1. (54 sc)
Rnd 7:
*hdc in in each st around, slst to join to 1st hdc, ch 1.
Rnd 8:
slst in each st around, slst to join to 1st slst.
OPTIONAL – Rnd 8: *Picot, slst in next 2; rep from * around, slst to join to 1st Picot.
Finish off, weave in ends.
Close top:
Turn hat inside out so that the wrong side is facing you. With yarn needle and an 18” piece of yarn, weave in and out of sts around top edge. Cinch closed and finish off.
Turn right side out and add band.
BAND OPTIONS –
RIBBON – Cut a 7″ piece of ribbon, wrap around Rnd 1 of brim to measure circumference, glue together, once dry slide down the hat and place around the bottom where it meets the brim.
#5 Bulky yarn – with 6.50 mm (K) hook, chain 20 (or 6.5″ long), slst to 1st ch, weave in ends and slide down the hat and place around the bottom where it meets the brim.

