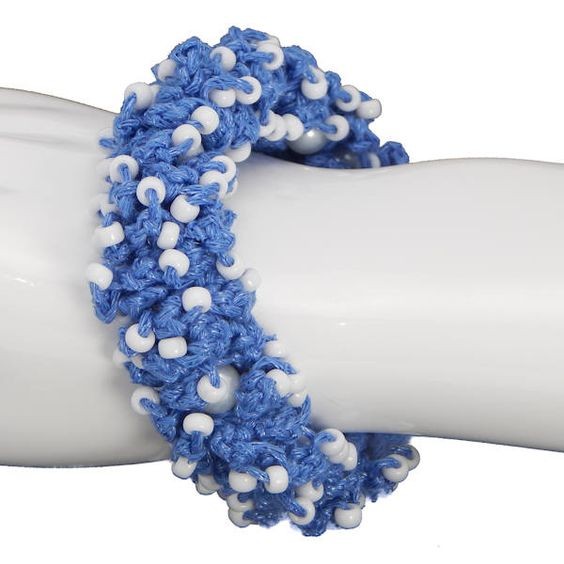
Crochet Loopy Beaded Bracelet

- Bernat Cool Crochet, cotton/nylon yarn in Denim.
- 144 white size 6 Seed beads, e beads or 4mm beads with 1.5-2mm hole
- 19 round beads or pearls 8mm.
- 1 lobster claw or magnetic clasp
- 1 and a half coils of silver colored bracelet memory wire
- Size F/5 or 3.75mm aluminum crochet hook
- Tapestry needle and fine needle that fits through Size 6 Seed beads
- Memory Wire Cutters
- Round Nose Pliers
Creating a Crochet Loopy Beaded Bracelet is a delightful and rewarding project that combines the charm of crocheting with the elegance of beaded jewelry. To make this charming accessory, start by selecting your favorite colored yarn and a mix of beads that complement your style. The process involves crocheting a series of loops while adding beads into each stitch, creating a beautiful textured look.
Materials Needed
Yarn Thickness: 2mm
Gauge: 6sc = 1"
Finished Size: Fits an adult 7¼" wrist but can be adjusted to fit any wrist while it is being made.
Skill Level: Intermediate
Instructions
Step 1: String on all of the 144 size 6 seed beads first.
Step 2: *Ch2, pull up a bead, ch3. Slst in 5th ch from hook. Repeat from * until you use up all of your 144 beads. Ch1 to secure. Fasten off, weave ends into work. Set aside.
Step 3: With your round nose pliers, make a small loop at one end of your memory wire going with the curve of the wire. Make this loop big enough to latch your clasp to.
Step 4: Place an 8mm bead onto the memory wire. Push it all the way to the loop you just made.
Step 5: *Run your memory wire through 8 of the stitches where you made your slip stitches on your crochet work. Slip on another 8mm bead. Repeat from * until all of your 19 round 8mm beads are used up and your crochet work is all on the memory wire.
Step 6: To finish your bracelet, push your crochet work tight against the first bead and loop. Trim your memory wire so the straight end is about an 1/8" away from the loop when you try it on your wrist. You need this space to allow for the clasp. My clasp and 2 loops took up 3/4" of space. You want your bracelet to float on your wrist but not dangle. Make a small loop on your other end making sure the loop is big enough to fit the loop part of your clasp on the loop. Close the loop up tight once your clasp is attached. Fluff up the loops of the crochet work and adjust it so it is evenly dispersed on your wire.


