Crochet Fall Pumpkin


Create your very own autumn-themed decoration by crafting a charming pumpkin using the art of crocheting. Embrace the cozy vibes of fall by selecting warm, earthy yarn colors to bring your pumpkin to life. With a crochet hook in hand, follow a simple pattern to form the shape of the pumpkin, adding texture and dimension with different stitches.
This pumpkin is worked as a (sort of) rectangle, which is then stitched together to make a pumpkin.
This version of the pattern ends up being about 2.5 inches wide, and 2 inches tall (including stem) using worsted weight yarn and size E hook.
ALL stitches are worked in the BACKLOOP!!
Leaving a long tail, Ch 13.
Row 1: Sc in 2nd ch from hk, sc in next 2 sts, hdc in next st, dc in next 4 sts, hdc in next st, sc in last 3 sts. Ch 1, turn.
Row 2: Sc in 2nd ch from hk, hdc in next st, dc in next 8 sts, hdc in next st, sc in last st. Ch 1, turn.
Repeat rows 1 and 2 eight times, (you should have completed rows 1 and 2 nine times) and fasten off.
When you have finished, take the starting chain's tail to stitch the ends together, the starting chain to your last worked row. Then stitch the side closest to that thread closed.
The trick is to only stitch to the "bump" part of the ridges. I'll post a picture up of what I mean when I make my next pumpkin.
Circle the side a few times, so that when you pull it tightly, it is closed. You will pull the thread through to the top to tie a knot later.
Now is the time to stuff the pumpkin and put in any bead decorations. Then take the thread from fastening off the last row, and stitch the top of the pumpkin in the same manner described for the bottom. Once you are finished, pull one of the remaining threads through the pumpkin to the other end to tie a knot.
Don't worry, the stem will cover this knot.
To make the stem: (no longer need to work in back loop only)
ch 4 and sl st to form ring.
Row 1: Sc 5 in loop. sl st with first sc. Ch 1.
Row 2-4: Sc in each ch. sl st with first sc. Ch 1. (You may do additional rows to increase the length of the stem)
Row 5: (sc, ch 2, sc) in each sc, the last one ending with a sl st. Fasten off.
Now stitch the stem to the pumpkin to finish your masterpiece!
No comments
Write a comment
- Recipes
-
 Vegan Lemon Pasta
-
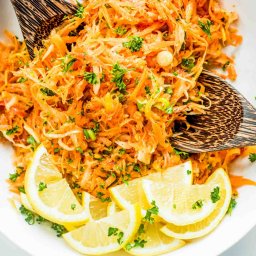 Easy Grated Carrot Salad with Lemon Vinaigrette
-
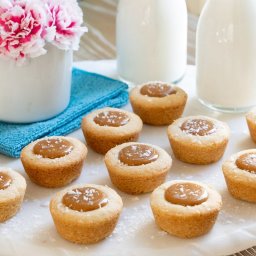 Ridiculously Easy Salted Caramel Shortbread Bites
- Funny Pictures
-
 Funny Pics of the Day
-
 Funny Pics for Your Scrolling
-
 Some Pics to See When You’re Bored
- Crochet Ideas
-
 Crochet Baby Loafers
-
 Crochet Crop Top
-
 Crochet Easter Sheep and Duck Egg Bags
- Lifehacks
-
 Crochet Sunburst (Sunflower) Granny Square Pattern
-
 How to Crochet the Plaid Stitch Photo Tutorial
-
 How To Crochet The 3-Colored Crosshatch Stitch Tutorial
- DIY
-
 DIY Seashell Hair Pins
-
 Crochet Smiling Flowers
-
 Crochet Glasses Pouch
- Knitting Ideas
-
 Simple Knitted Easter Egg
-
 Knitted Mosaic Shawl
-
 Knitted Beautiful Tank Top