Crochet Breath Of Spring Cowl
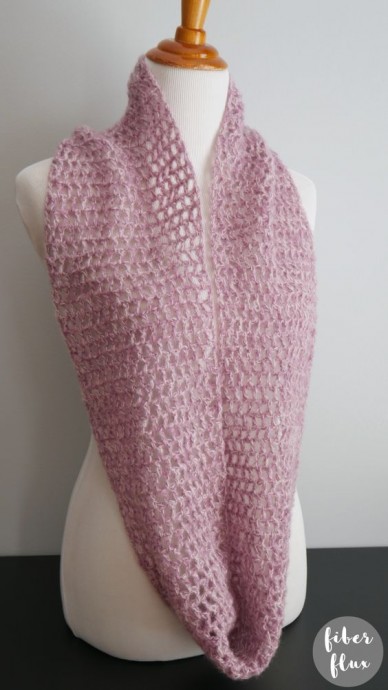
Experience the beauty of spring with this stunning crocheted cowl that will add a touch of elegance to any outfit. The intricate design and delicate stitches create a lightweight accessory that is perfect for transitioning from the cool days of winter to the warmer days of spring. The pastel colors and floral motifs evoke the essence of the season, making it a must-have piece for your wardrobe.
Materials:
- H (5.0 mm) crochet hook
- 247 yards of fingering weight or similar weight yarn (I used 2 balls held together of Trinity Cashmere from Yarn Citizen (by Jimmy Beans Wool) in the “Peony” and “Heather” colorways)
- Yarn/tapestry needle
- Scissors
- Measuring Tape
Sizing:
- 60 inch circumference
- 8 inches wide
Pattern Notes:
- Stitch multiple is any odd number.
- To change the width, simply adjust the multiple of your starting chain.
- To change the circumference, work more/less rows before seaming.
Breath Of Spring Crochet Cowl Pattern:
- Ch 35 (to change the width, chain any odd number)
- Row 1: Work a dc in the 5th ch from the hook. *ch 1, skip 1 ch, 1 dc in the next ch. Rpt from * to the end of the row.
- Row 2: Chain 4 and turn. Work a dc in the first space (ch 1 space from previous row), then ch 1. Next *(dc, ch 1) in each space (ch 1 space from previous row). Repeat from * to the end of the row. To finish the row, work a dc into the topmost chain of the turning chain from the previous row.
- Repeat row 2 until cowl measures 60 inches from starting edge or until desired length.
- Do not cut yarn and move onto the seaming part. If you like, you can leave it unseamed and have a more traditional scarf too!
Finishing & Assembly:
- Stack the two ends and work a slip stitch into each stitch and space across.
- Fasten off yarn.
- Weave in ends and it is ready to wear!
No comments
Write a comment


