Crochet Fluffy Bucket Hat

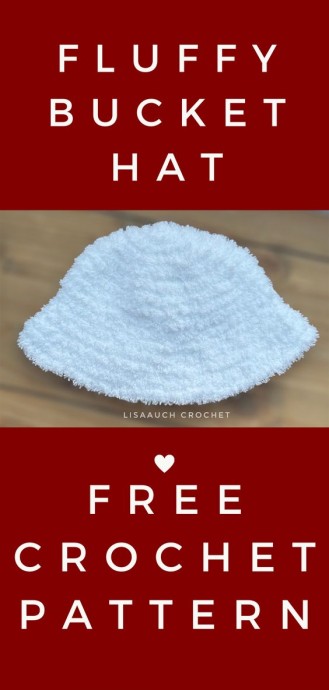
Imagine a cozy and stylish accessory that adds a touch of charm to any outfit - the Crochet Fluffy Bucket Hat. This unique hat is handcrafted with soft, fluffy yarn that creates a plush texture, making it not only fashionable but also incredibly comfortable to wear. The bucket hat design offers a trendy twist on a classic style, perfect for those looking to make a statement with their headwear.
Materials you will need to crochet the fluffy bucket hat
5.00 mm Crochet hook (*AF) (I crochet loosely so you may find you need to switch up the hook size
Yarn - Little Dreams Boutique From B&M (Bulky / 12 ply (7 wpi) (*AF))
Working with this yarn is NOT easy! I find that the more i used it the more I could 'feel' where the stitches were.
If you are really struggling you could run a second strand of 4ply yarn alongside using the fluffy yarn to help you SEE the stitches.
CROCHET abbreviations
- US Crochet terms USED
- HDC - half double crochet Stitch
NOTE: The Chain at the beginning of the round DOES NOT count as a stitch
Rnd 1: 10 hdc in the 3rd chain from hook. slst to join, (10hdc sts)
Rnd 2: Ch2, 2 hdc in each stitch around. slst to join (20sts)
Rnd 3: Ch2, *2hdc in the next st, hdc in the next* repeat from * to * around slst st join
Rnd 4: Ch2, *2hdc in the next st, hdc in the next 2sts* repeat from * to * around, slst to join
Rnd 5: Ch2, *2hdc in the next st, hdc in the next 3sts* repeat from * to * around, slst to join
Rnd 7: Ch2,*2hdc in the next st, hdc in the next 5sts* repeat from * to * around, slst to join
MEASURE ACROSS THE CIRCLE HERE
Measure the circle diameter (across the middle of the circle edge to edge) this should measure your hat size diameter - for a woman's medium I had 7.5 inches across(TO make the Hat BIGGER You can continue increasing in the established pattern until you have reached the CROWN Diameter for your size)
Once you have reached the diameter of the hat size you are making, work in Rounds on these stitches WITHOUT increasing until your desired hat Length is achieved (7.5 inches for my hat)
How to Make the Middle of the Bucket Hat
COntinue working evenly in hdc in each stitch around until you reach the MID EAR HEIGHT of your size
BRIM of the Bucket Hat :
Rnd 1: Ch2, *2hdc in the next st, hdc in the next 7 sts* repeat from * to * around, slst to join
Rnd 2: Ch2, *2hdc in the next st, hdc in the next 8 sts* repeat from * to * around, slst to join
Rnd 3: Ch2, *2hdc in the next st, hdc in the next 9 sts* repeat from * to * around, slst to join
OR Continue in the established pattern until your preferred brim length is reached


