Create Your Own Stylish Crochet Top: A Step-by-Step Guide for Beginners and Experts

Crocheting a simple top is a wonderful way to add a personal touch to your wardrobe while unleashing your creative side! With just a hook and some beautiful yarn, you can create a stylish and unique piece that will make heads turn. Whether you are a seasoned crocheter or just starting out, this project is perfect for adding a handmade flair to your outfit.
So gather your supplies, relax, and enjoy the process of crafting your very own crochet simple top - your closet will thank you for it!Difficulty
Project-Level: Easy
Materials
- Weight: 4 Medium
- Ice yarns 100% Acrylic, 100g, 210 mt, weight #3 DK, Color: Beige and Gray
- For this sample, I used 3 skeins or any weight #3 yarn of your choice
- Hook: US Size H-8 (5 mm)
- Yarn Needle, Scissors, Measuring Tape
Sizes
This sample is: Size S/M (21” tall, 20” wide)
Stitch Key
- Ch = Chain
- Sc = Single Crochet
- Dc = Double Crochet
- Tr = Treble Stitch
Notes
The pattern is worked in Rows.
Beginning ch3 does count as 1st st.
I used two colors; you can choose to use more or just one color.
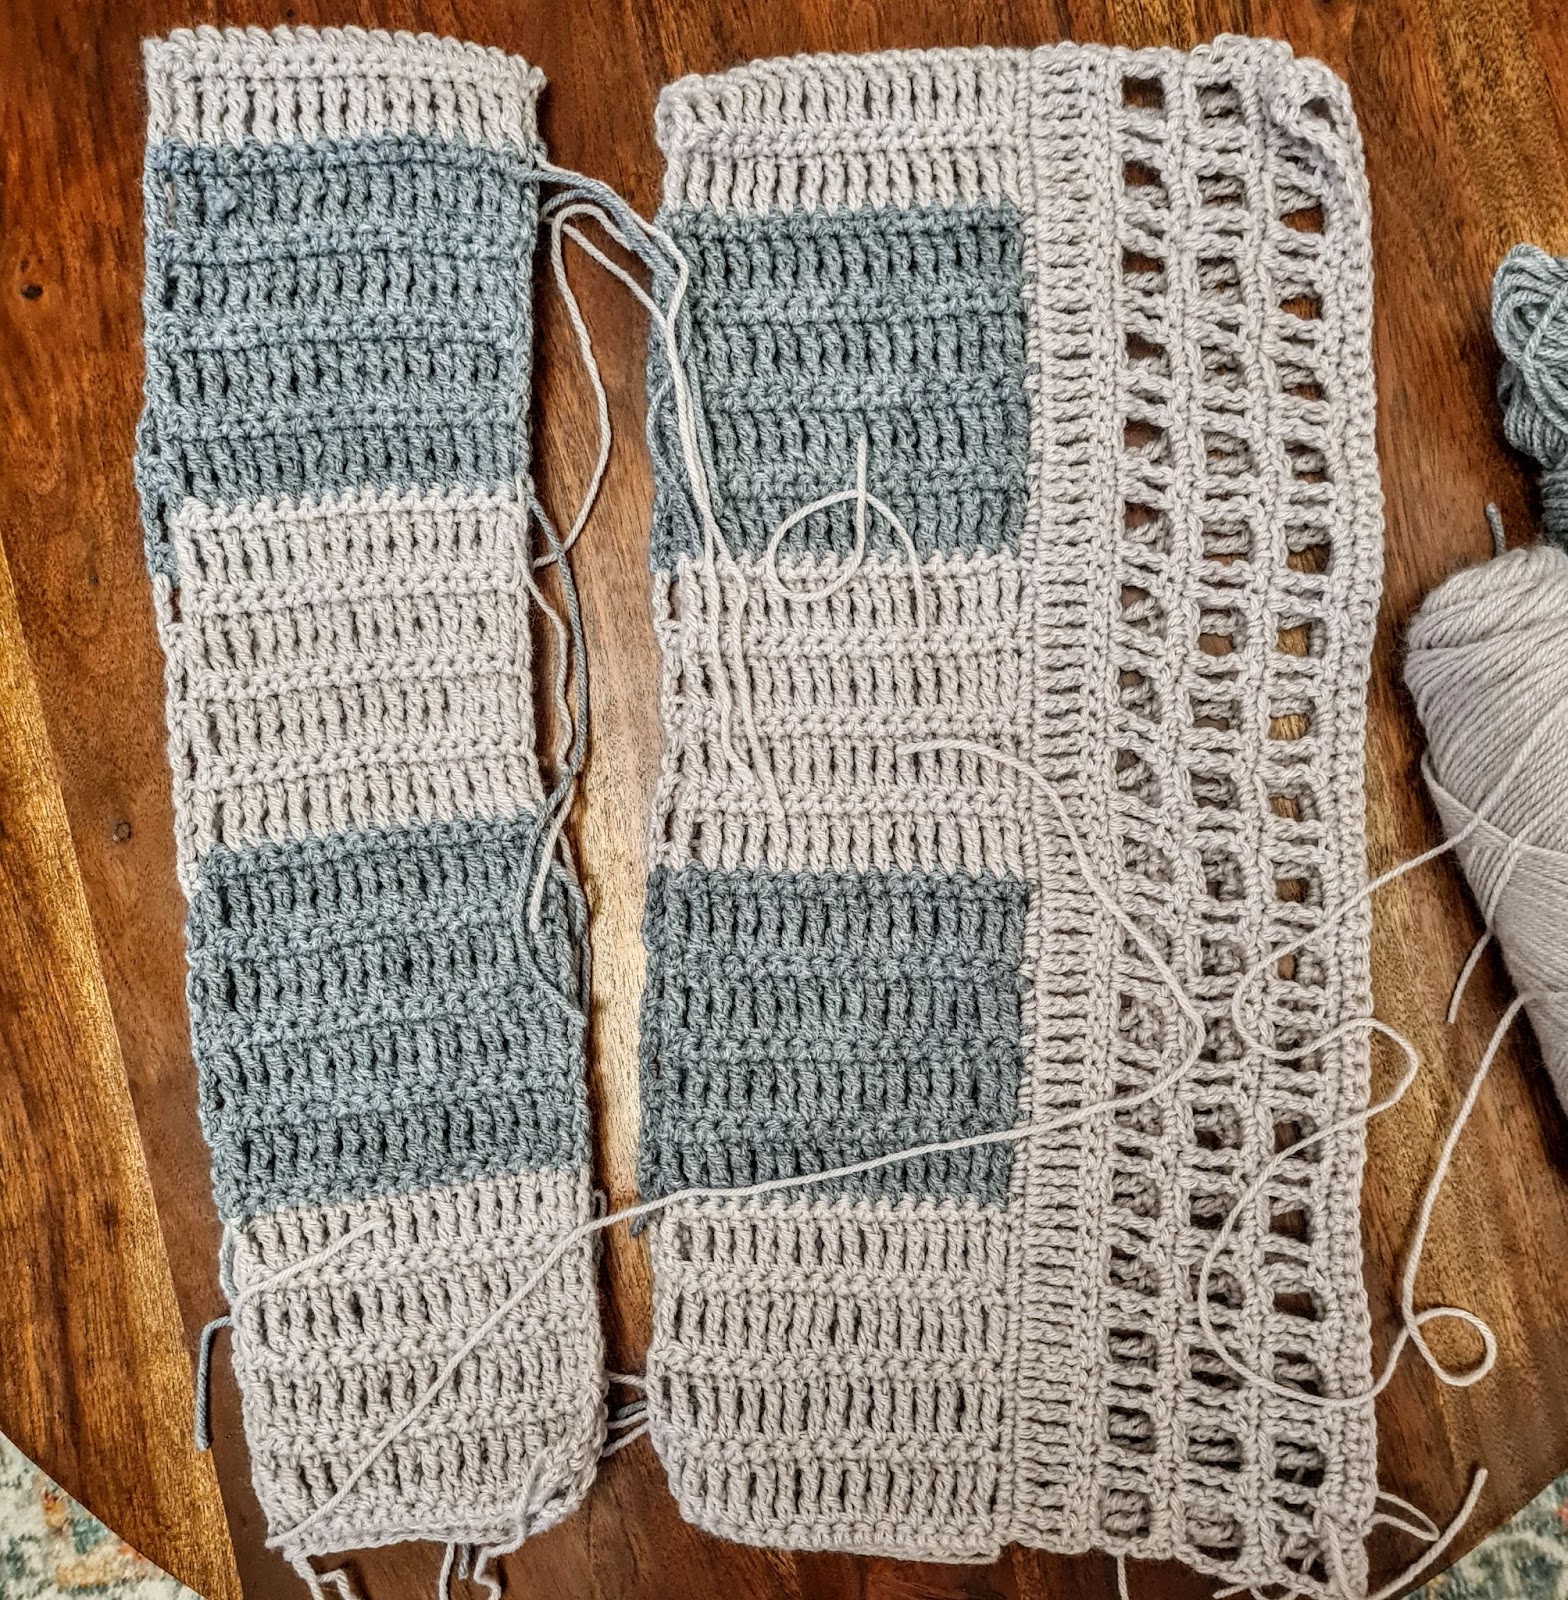
This pattern is made with two exact rectangle panels joined together.
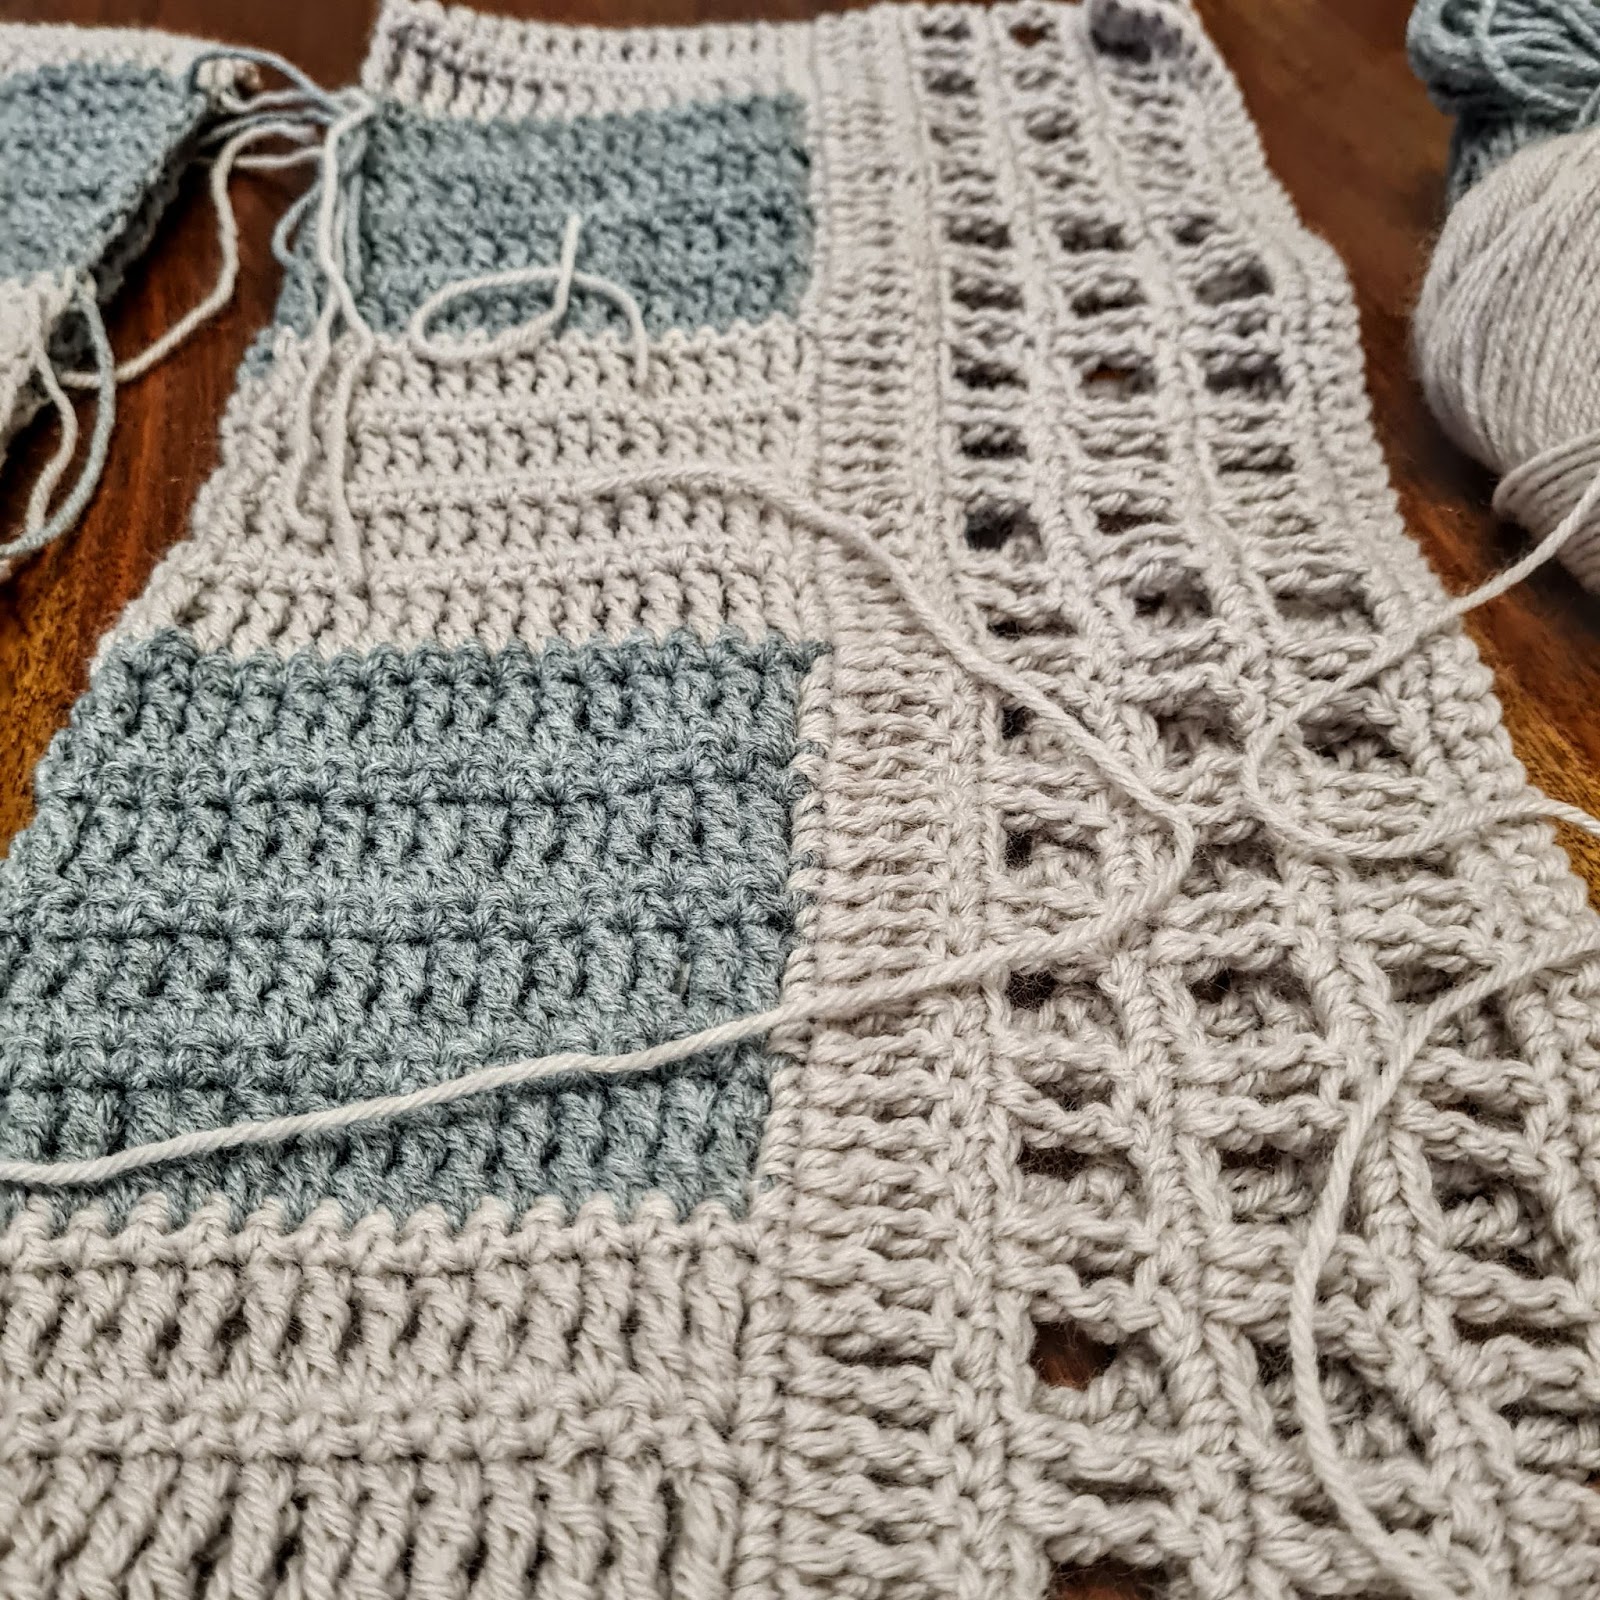
Each panel is made in two parts - The first is crocheted vertically and the second horizontally.
If changing colors, make sure to have a changing technique.
You can decide on the width and length of the top by adding multiples of chains at the foundation and row repeats.
Instructions
We will make two identical panels, each panel will be made in two parts.
Part One
Foundation chain: chain 17 +1
Row 1: Starting in the 2nd chain from the hook, work 1sc in each ch to last ch, turn your work (17)
Row 2: ch3 (counts as 1st tr), tr 1 in next st and in every st across to end of row, turn your work (17)
Row 3: ch1 (does not count as st), sc 1 in 1st st from hook, sc 1 in next st and in every st across to end of row, turn your work.
Row 4+5: Repeat Row 2+3
Row 2 and Row 3 are the pattern repeats for the first part of our panel - I made 4 repeats and changed color every 4 repeats.
You can continue with one color.
In total, you need 36 Row 2+Row 3 repeats - make sure you end with a sc row.
If you wish to make this top longer, just add rows of the pattern repeat.
You can rotate the panel on the side and continue OR fasten your yarn, weave in ends and cut.

Part Two of Panel
Row 1: Lay your work flat right side up, work 1 sc on each sc st and 2sc on each tr st along the right side.

Row 2: ch3 (counts as 1st tr), tr1 in next st and in every st across to end of row, turn your work.
Row 3: ch1 (does not count as st), sc 1 in 1st st from hook, sc 1 in next st and in every st across to end of row, turn your work.
Row 4: ch3 (counts as 1st tr), tr1 in next st, *[ch 2, skip 2 st, tr 1 in next st, tr 1 in next st]*, repeat from * to * to end of row - try to end with 2 tr, if you have only one space skip only 1 st at the last repeat.
Row 5: ch1 (does not count as st), sc 1 in 1st st from hook, sc 1 in next st and in every st across to end of row, turn your work. Make sure to sc in each ch and st from the previous row. Count your stitches to make sure you have the same amount.
Repeat Row 4+5 two more times for a total of three times.
Finishing
Sew two panels together on both sides from the bottom leaving space for an arm hole, and join at the center leaving a V-neck as deep as you wish.
You can leave the sides open to form a poncho.
You can add fringes or tassels at the bottom of the top for more detail.
Cut your yarn and weave in the ends.
Enjoy!

Does any one transfer knitted patterns to crochet patterns?