CrochetMenScarvesHatsGlovesSweatersCardigansSocksOther clothingWomenScarvesHatsGlovesShawls and cover upSweatersCardigansSocksSlippersBagsOther clothingChildrenScarvesHatsGlovesSweatersCardigansSocksSlippersOther clothingHomeBlankets and plaidsRugsHome decorationsPetsSchemesKnittingOther hand-madeChat
Crochet Rustic Rose Granny Square Poncho

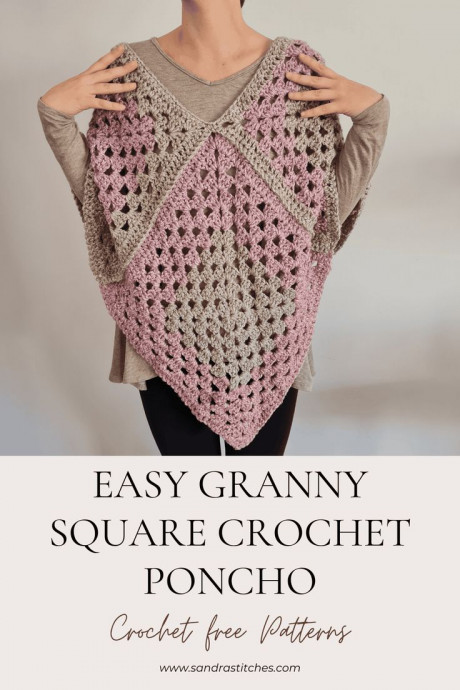
The Crochet Rustic Rose Granny Square Poncho is a charming and cozy addition to any wardrobe, perfect for adding a touch of handmade flair to your outfit. With its classic granny square design and intricate rose detailing, this poncho exudes a rustic charm that is simply delightful. The warm and earthy tones used in the design make it versatile to pair with a variety of outfits, making it a stylish and practical choice for staying cozy in style.
Whether you're out for a casual stroll or enjoying a cozy night in, this poncho is sure to be your go-to piece for a touch of handmade warmth!Materials
Weight-5-Bulky
Kartopu, Melange Wool 100 gr, 80 % Acrylic,20% wool, 170 m, Color K9002 (brown) ( 2 Skeins)
Kartopu, Melange Wool 100 gr, 80 % Acrylic,20% wool, 170 m, Color K9005 (pink) ( 2 Skeins)
or any weight #5 yarn of your choice
Hook: US Size L-11 (8 mm)
Yarn Needle, Scissors, Measuring Tape
Gauge
10 st X 5 rows
Sizes
Can be modified as you wish by adding more rounds
This sample is: 24” high from the V to the bottom and 35” wide, Size M/L for women
Stitch Key
Ch = Chain
Sc = Single Crochet
Dc = Double Crochet
SlSt = Slip Stitch
Notes
The pattern is worked in rounds
Ch3 does count as st at the beginning of each row
Do not turn work at the end of each round
You can work this pattern with one color or multiple as you wish- I used two colors
This pattern is worked with 4 identical granny squares joined together ( joining instructions below)
If changing colors make sure to have a changing technique
You can decide on the size of the squares by adding rounds
Instructions
A Granny Square- Make 4
Chain 4, Sl st to 1st Ch to form a circle
Round 1: Ch3, Dc 2, Ch 2, Dc3, Ch2, Dc 3, Ch2, Dc3, Ch2, Sl st to 3rd Ch of 1st., do not turn work
Round 2: Ch3, Dc2 in prev Ch2 space ( this will prevent us from slip stitching to the next Ch2 space ), Ch1,*[(Dc3+Ch2+Dc3) in next Ch2 space, Ch 1]* , repeat from * to * one more time to form the corners, finish last corner with Dc3 Ch2 and Sl st to next Dc . You should have 4 corners with Dc3+ Ch2+Dc3 in each and a Ch1 space between them.
Round 3-9: Repeat Round 2, working Dc3 in each Ch1 space and Dc3+Ch2+Dc3 in each corner.
You should have a square with 7 Dc3 clusters on each side +( Dc3+Ch2+Dc3) on each corner
Round 10: Ch3, Dc1 in next st, Dc1 in next and in every st around including the Ch1 spaces – (Dc3 + Ch2+Dc3 in each corner), a total of 35 Dc’s on each side + (Dc3 + Ch2+Dc3 in each corner)
This sample has 10 rounds you can change colors where you wish I decided to play with the colors and changed in different rounds on every square
Construction
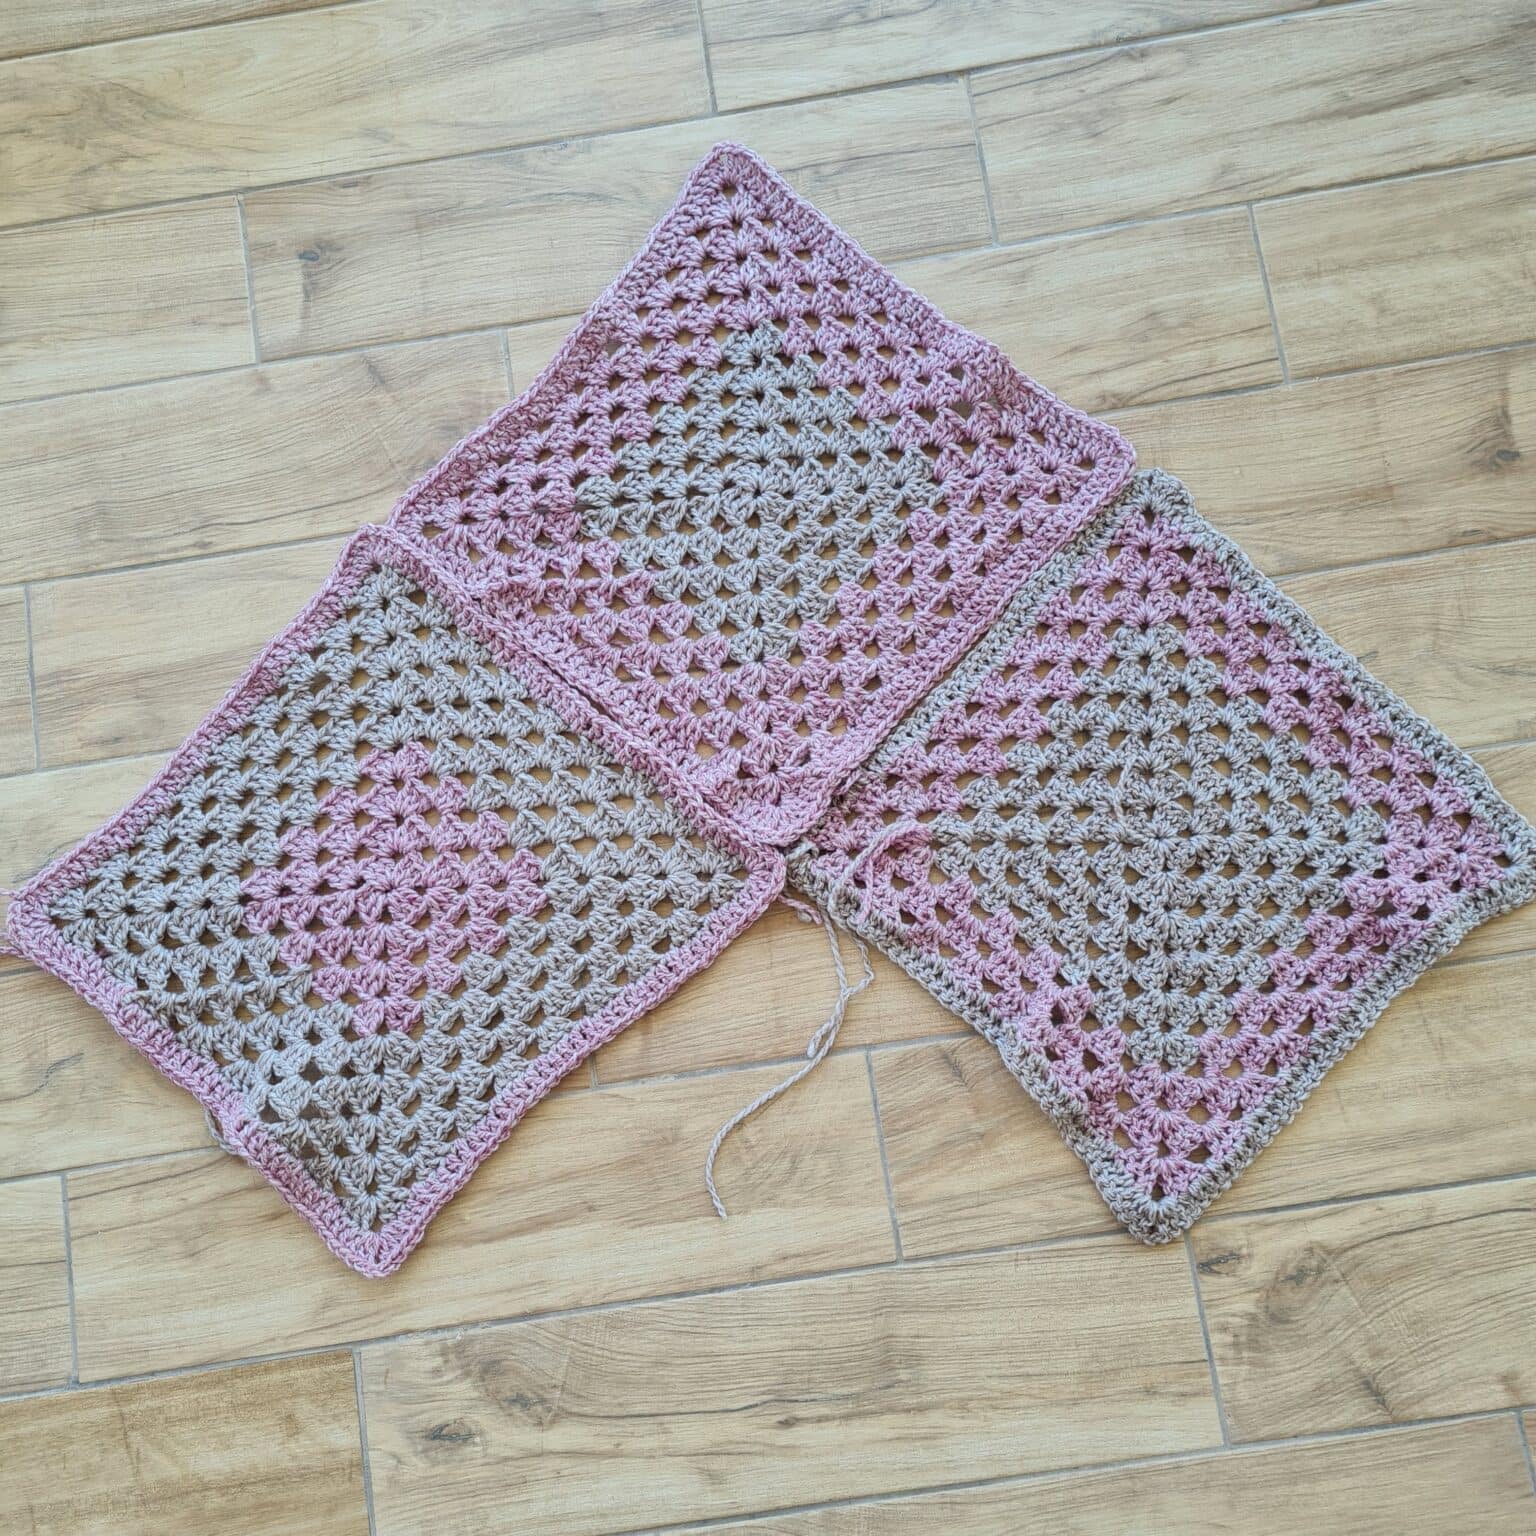
Place 3 squares as shown in the photo
Join with Sc1 on each side.
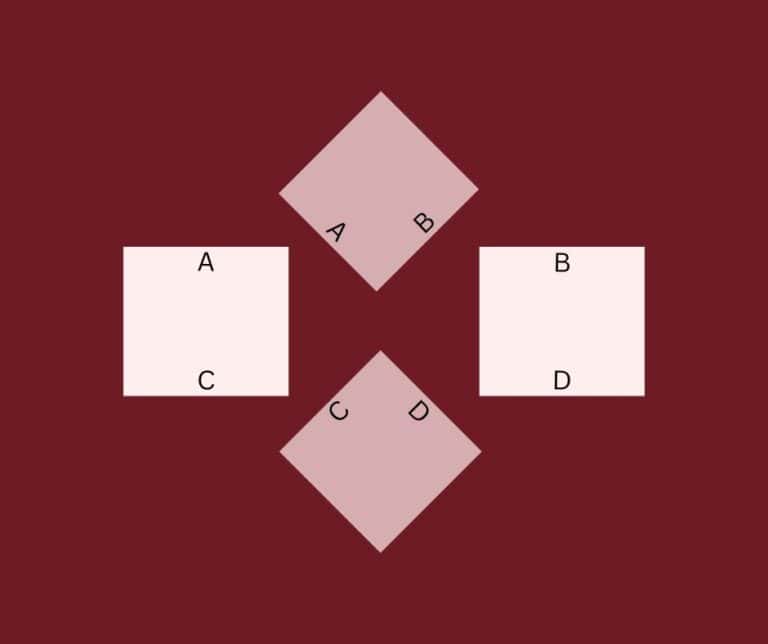
Fold and join the last square as shown on the drawing


Finishing
Sc1 in every st of the neck hole, Sc2 when you reach the V on the front and back.
Cut your yarn and weave in the ends.
You can add tassels, fringe or beads/
Enjoy!
No comments
Write a comment
