CrochetMenScarvesHatsGlovesSweatersCardigansSocksOther clothingWomenScarvesHatsGlovesShawls and cover upSweatersCardigansSocksSlippersBagsOther clothingChildrenScarvesHatsGlovesSweatersCardigansSocksSlippersOther clothingHomeBlankets and plaidsRugsHome decorationsPetsSchemesKnittingOther hand-madeChat
Crochet Lemon Pie Top

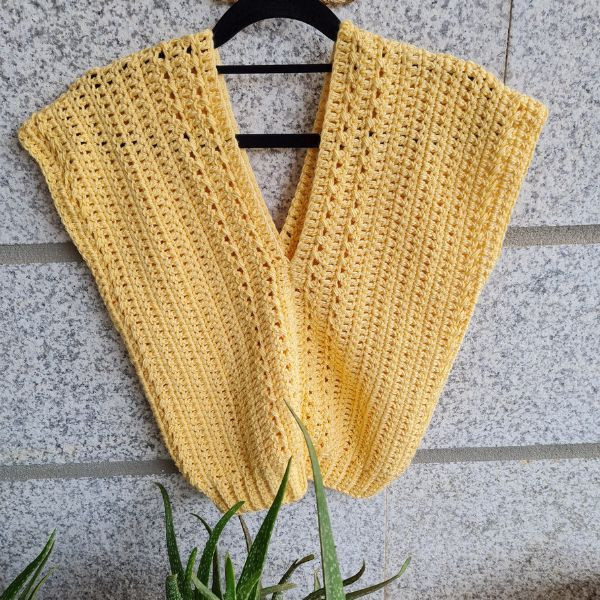
The Crochet Lemon Pie Top is a delightful addition to any wardrobe, bringing a pop of cheery color and a cozy touch. With its intricate crochet design and vibrant lemon-yellow hue, this top is perfect for adding a fun and playful twist to your outfits. The soft fabric and flattering fit make it a go-to choice for both casual outings and special occasions.
Whether paired with your favorite jeans for a laid-back look or dressed up with a skirt, this top is sure to brighten your day and bring a smile to your face.Difficulty
Project-Level-Easy
Materials
Any weight # 4 yarn of your choice approx 600 yards
Hook: US Size H-8 (5 mm)
Weight-4-Medium
Yarn Needle, Scissors, Measuring Tape
Sizes
This sample is a S/M women’s size ( 8″ width X 36″ long)
Stitch Key
Ch = Chain
St = Stitch
Dc = Double Crochet
Yo = Yarn over
Specialty Stitch
Blosc = Back loop only Single Crochet: Insert hook into the next st (but only in the back loop). YO, pull back through that st (2 loops on hook), YO, pull through all 2 loops on hook.
Notes
This pattern is written in US terminology
This pattern is worked in rows
This pattern consists of two identical panels joined to form the top
Ch1 at the beginning of the row does not count as a stitch
This pattern uses pattern repeats.
You can adjust this pattern to any size by adding chains and rows
You can work this pattern with one color or multiple as you wish- I used multiple colors
If changing colors make sure to have a changing technique and weave your ends in.
This pattern calls for multiples of even # + 1
Instructions
Panel ( make 2) Chain 121
Row 1: Sc1 in 2nd ch from hook, sc in 6 more ch, (this will become the bottom of the top and we will repeat at the end of the row), dc 1 in every ch up to the last 7 ch, sc 1 in last 7 chains, ch 1 and turn work (120)
Row 2: Blosc in 7 st from prev row, dc 1 in next st, sk 1 st, dc 1 in next st, dc 1 in first st you skipped ( cross st), repeat until last 7 sc from prev row, blosc in last 7 st, ch 1 and turn work (120)
Row 3: Blosc in 7 st from prev row, dc 1 in next st, dc in every st across up to final 7 st, blosc in final 7 st, ch 1 and turn work (120)
Row 4+5: repeat row 2+3 (120)
Row 6: Blosc in 7 st from prev row, sc 1 in every st from prev row up to last 7, blosc in last 7st, ch 1 and turn work (120)
Row 7-22: repeat row 3+6 (120)
Row 23: Blosc in 7 st from prev row, dc 1 in next st, sk 1 st, dc 1 in next st, dc 1 in first st you skipped ( cross st), repeat until last 7 sc from prev row, blosc in last 7 st, ch 1 and turn work (120)
Row 24: Blosc in 7 st from prev row, dc 1 in next st, dc in every st across up to final 7 st, blosc in final 7 st, ch 1 and turn work (120)
Row 25: Final row: sc all across to end of row (120)
Construction
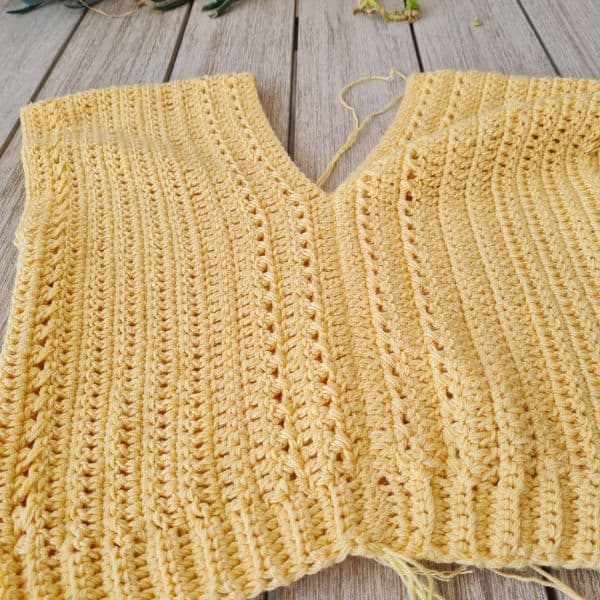
Lay your two identical rectangles side by side- right side up – fold each one in half facing you.
Now you should have a v-neck and back shape.
Measure from shoulders to center how open you wish the top to be on your chest and mark it as well as the back.
Measure 17 cm on the sides for armholes and mark using stitch markers.
Sew all parts together!
Finishing
Secure yarn, weave in ends, and cut yarn

No comments
Write a comment
