Crochet Mia Headband Pattern

The Crochet Mia Headband: A Stylish and Cozy Accessory
The Crochet Mia Headband is a charming accessory that adds a touch of style and coziness to any outfit. With its soft yarn and lovely design, it's perfect for keeping your ears warm on chilly days or adding a playful flair to your look. Whether you're out for a stroll in the park or meeting friends for coffee, the Crochet Mia Headband is a versatile and delightful accessory that will surely make you stand out in the best way possible. Go ahead and rock that cute headband with confidence!
Materials Needed
- 4mm (G/6) Crochet Hook
- 5mm (H/8) Crochet Hook
- 65yds [75yds, 85yds] MillaMia Naturally Soft Aran (87yds/50g) – “Mist/225” (1 [1,1] skeins)
- Tapestry Needle
Finished Sizes
The pattern is made for a Child size, with changes for Teen and Adult sizes in brackets.
- 6 – 12 Yrs (Child): Headband Circumference 19.5″ (49cm), Headband Width 2.75” (7cm)
- Teen: Headband Circumference 20.5″ (52cm), Headband Width 3” (7.5cm)
- Adult: Headband Circumference 21″ (53cm), Headband Width 3.25” (8cm)
Gauge
20 stitches + 18 rows = 4″/10cm in back loop single crochet
Stitches & Abbreviations
- st(s) – stitch(es)
- ch – chain stitch
- sl st – slip stitch
- sc – single crochet
- dc – double crochet
- sc2tog -single crochet 2 together
- camel sc – camel single crochet
Camel Single Crochet (camel sc)
Insert hook in the next st, but not through the front OR back loop, but instead an extra loop that is behind the st. Yarn over (YO), pull up a loop (2 loops on hook). YO, and pull through 2 loops on hook.
Single Crochet 2 Together (sc2tog)
Insert your hook into the next stitch. YO, pull back through that stitch (2 loops on hook). Insert your hook into the next stitch. YO, pull back through that stitch (3 loops on hook). YO, pull through all the loops on your hook.
Skill Level
This is an “Easy” level crochet pattern (includes “How-To” photos). You must be familiar with basic crochet stitches and techniques. Directions are written so that they are easy to read and follow. All patterns are in English and written in standard US terms.
Pattern Instructions
Note
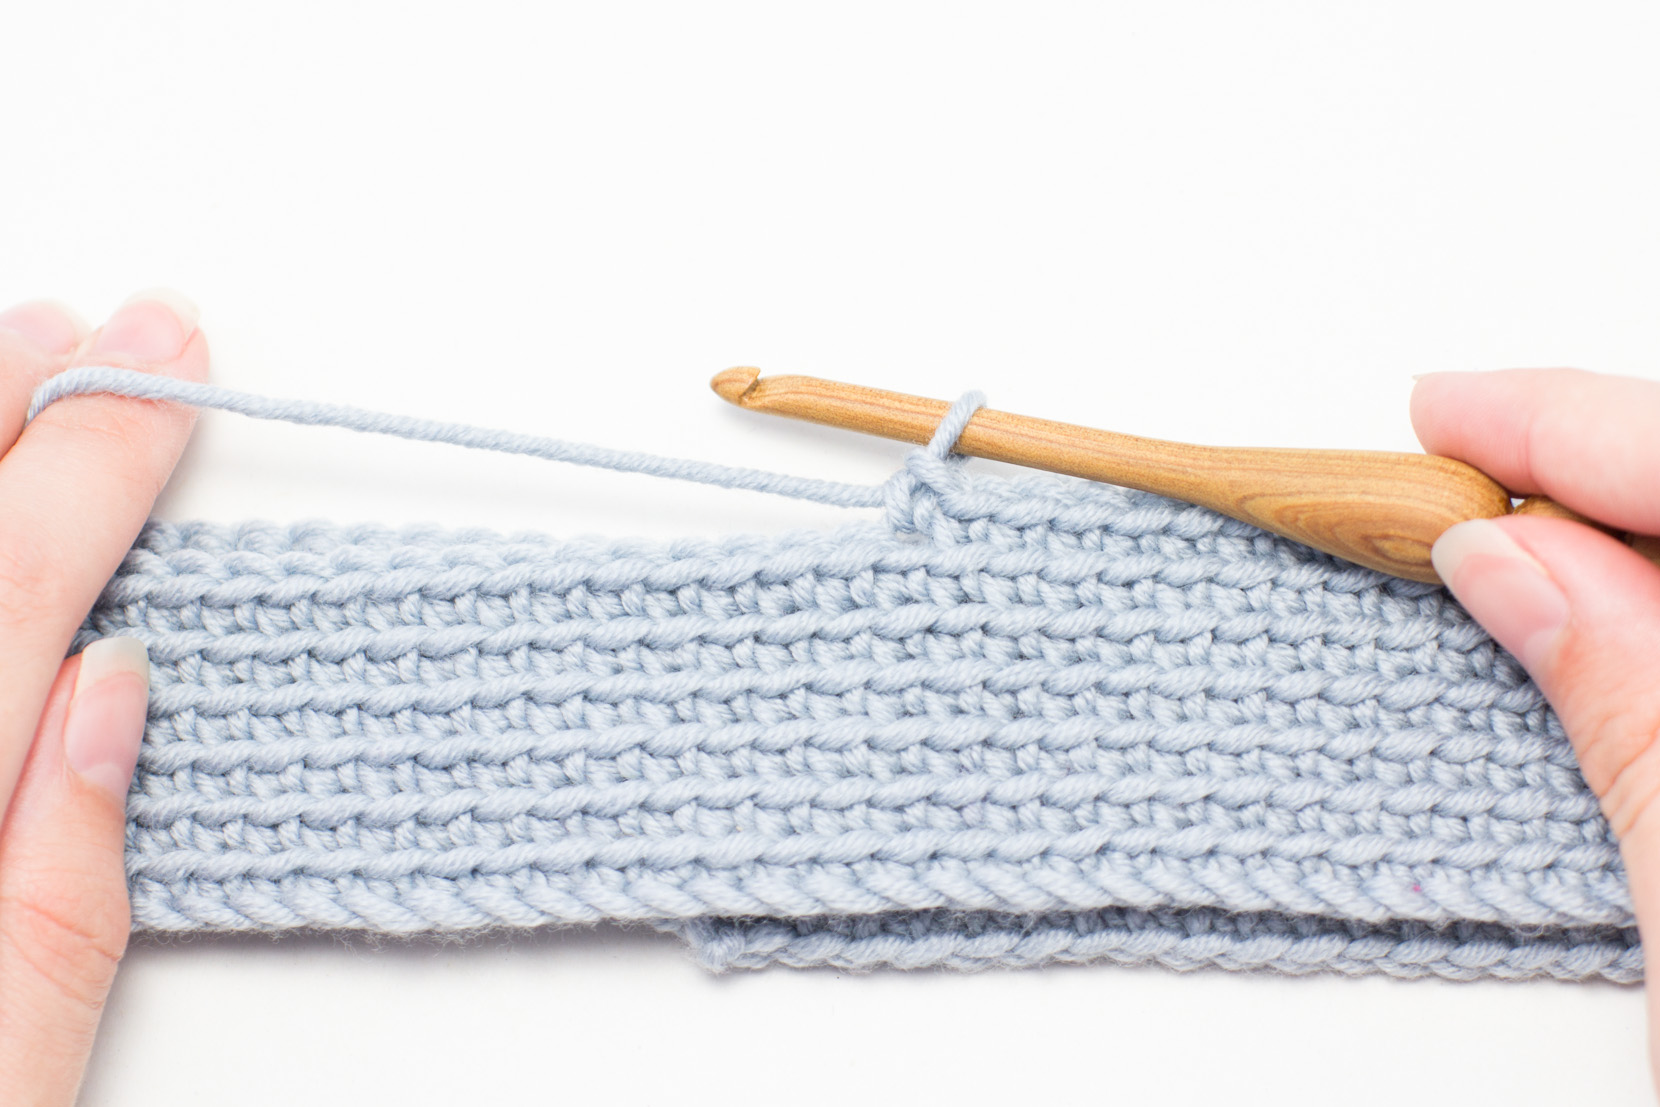
The body of this headband is worked in the round (rnd), from bottom to top. The flower is worked in the rnd and seamed to the front of the headband. It is imperative to check gauge and maintain an even tension throughout to ensure the correct finished size.
Headband
Ch82 [87,90] using aran yarn and 5mm hook.
Row 1: Sl st in 1st ch to form a circle. Ch1, 1 sc in same st, 1 sc in next 81 [86, 89] sts. Do not sl st in 1st hdc of this rnd. (82 [87,90] sts)

Rnd 2 – 10 [12,13]: Start crocheting in 1st st from the previous rnd. 1 blsc in next 82 [87,90] sts. Do not sl st in 1st hdc of this rnd. (82 [87,90] sts)
Rnd 11 [13,14]: Start crocheting in 1st st from the previous rnd. 1 blsc in next 82 [87,90] sts. Sl st in 1st st of this rnd. (82 [87,90] sts) Fasten off, and weave in loose ends.

Cinched Section
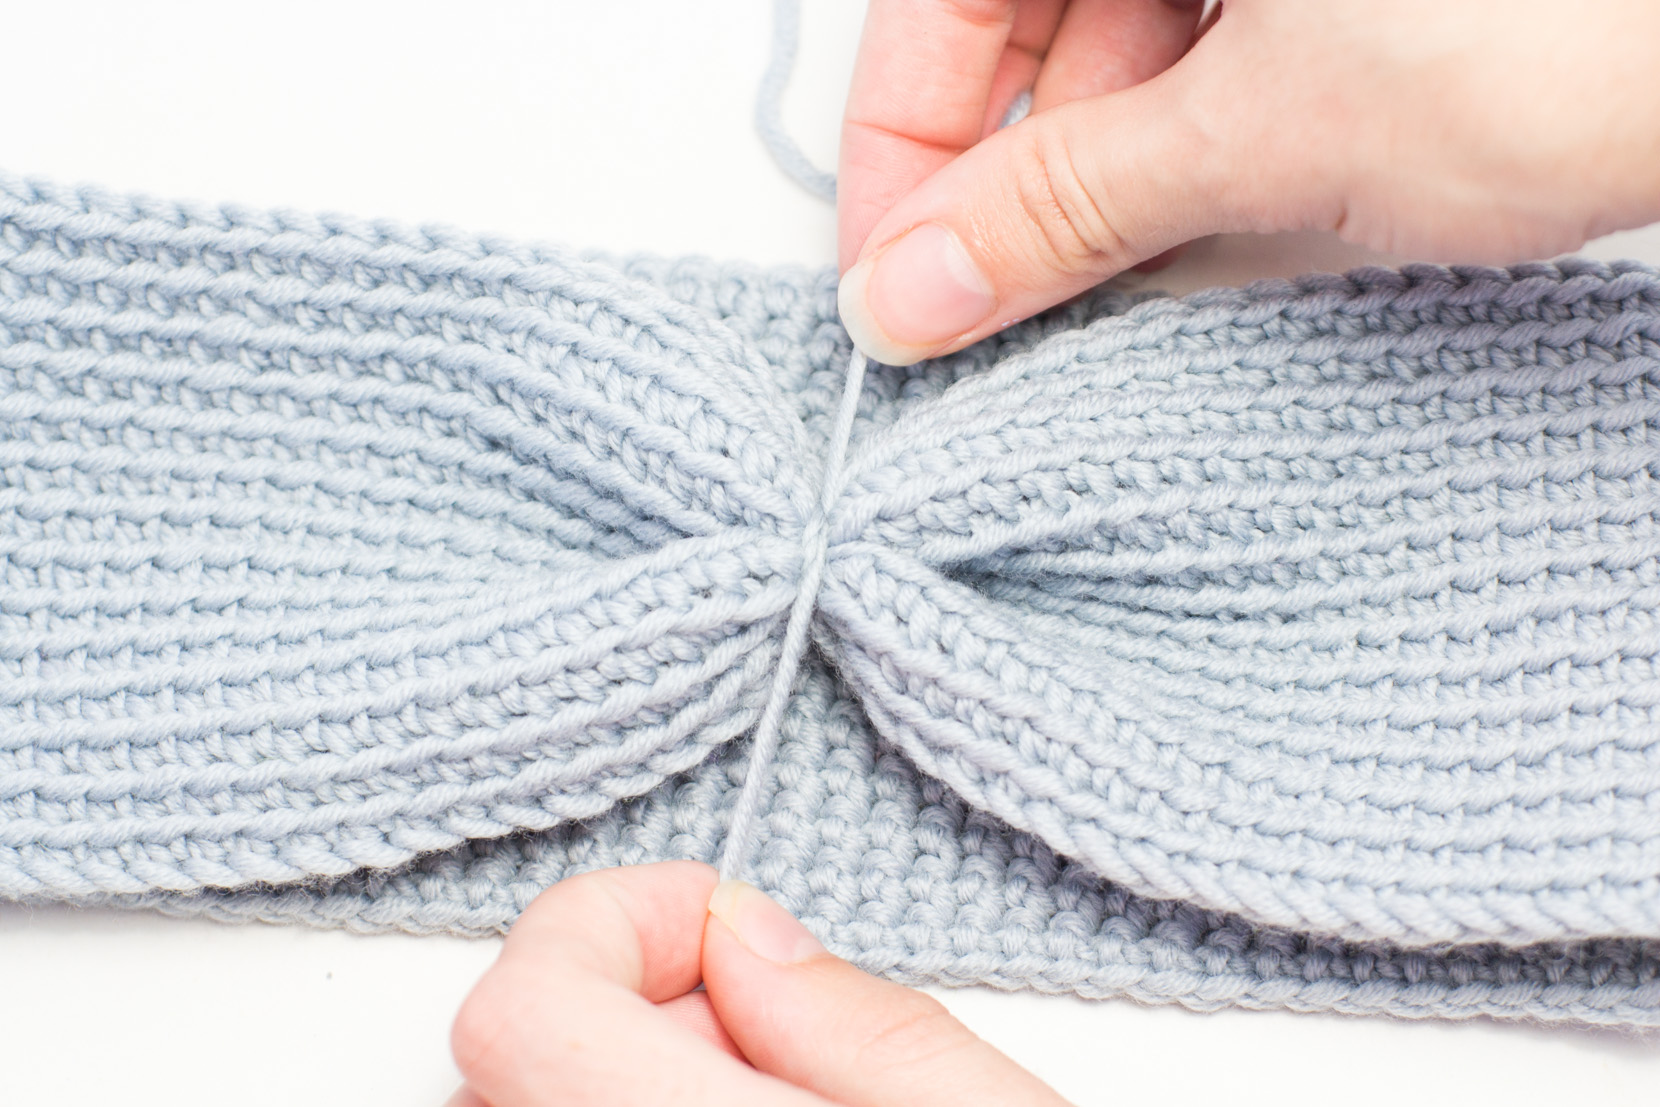
Taking the headband, pinch together the front of the headband, and tie/wrap some yarn around this cinched section. Fasten off, and weave in loose ends.
Rose
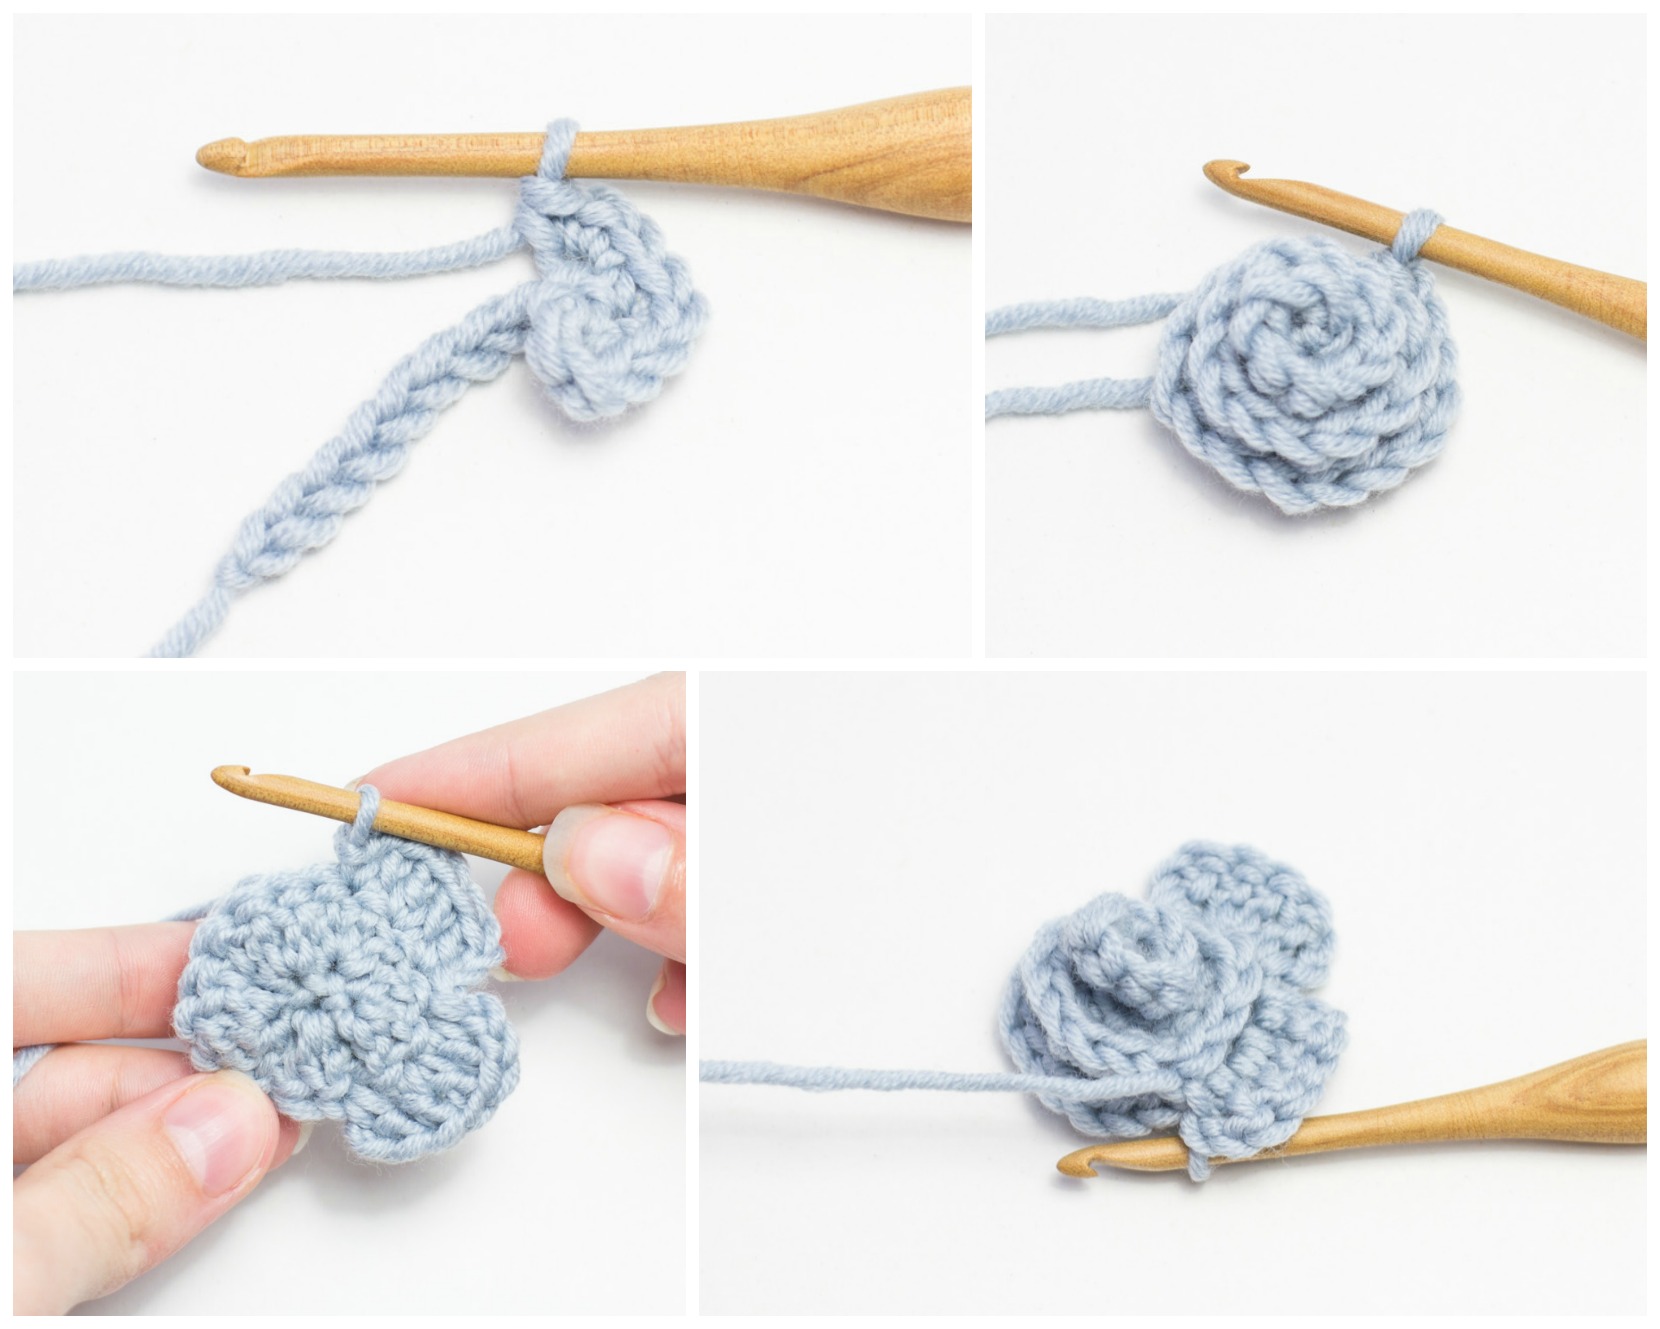
Ch13 using aran yarn and 4mm hook.
Rnd 1: 3 sc in 2nd ch from hook. 3 sc in next 2 sts. 3 hdc in next 3 sts. 3 dc in next 6 sts. Sl st in 23rd st of this rnd to create a circle. (36 sts [15 sts in circle])
Rnd 2: Ch2, turn work (you will now be working in the ‘circle’). 1 dc in same st. 2 dc in next st. 1 dc in next st, ch2, sl st in same st. Sl st in next st, ch2, 1 dc in same st. 2 dc in next st. 1 dc in next st, ch2. Insert the hook in the same st, but ALSO through the 17th st of ‘rnd 1’, YO and pull back through both sts, then create a sl st. *Sl st in next st, ch2, 1 dc in same st. 2 dc in next st. 1 dc in next st, ch2, sl st in same st. Repeat from the * 3 times.
Fasten off, and weave in loose ends.
Using the tapestry needle, sew the rose onto the headband, on top of the ‘cinched’ section.

