Crochet Simple Shirts: A Complete Guide for Fashionable Handmade Creations
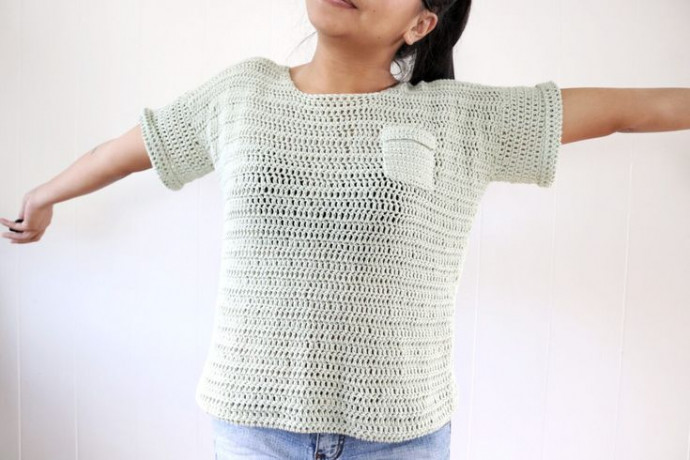
Crochet simple shirts are the perfect way to add a touch of handmade charm to your wardrobe! These versatile pieces can be customized with different colors and stitches, allowing you to showcase your unique style. Whether you're a beginner or an experienced crocheter, creating a simple shirt is a fun and rewarding project that can be enjoyed by crafters of all levels.
So grab your crochet hooks and yarn, and get started on making a cozy and stylish addition to your clothing collection!Materials:
- 3.50mm crochet hook
- Cotton DK (Paintbox Yarns) XS:685 yds, S:730 yds, M:822 yds, L:965 yds, XL: 1,096 yds
- Scissors
- Darning needle
Gauge:
15 dc x 9 rows = 4’ x 4’
Abbreviations:
Bust size:
Ch – chain XS:28-30(S:32-34, M:36-38, L:40-42, XL:44-46)
Sc – single crochet
Dc – double crochet
Dc2tog – double crochet 2 together
St(s) – stitch/stitches
Special Notes:
- This pattern is written in US terms
- The front and back panels are made in rows, turn after each row
- It is best to highlight your respective size in the pattern before you start working
- Photo above is a size small pictured on a 5.1” female with a bust of 34 and weight of 125lbs
- Photos are provided to help you along the way. Enjoy!!
Front Panel:
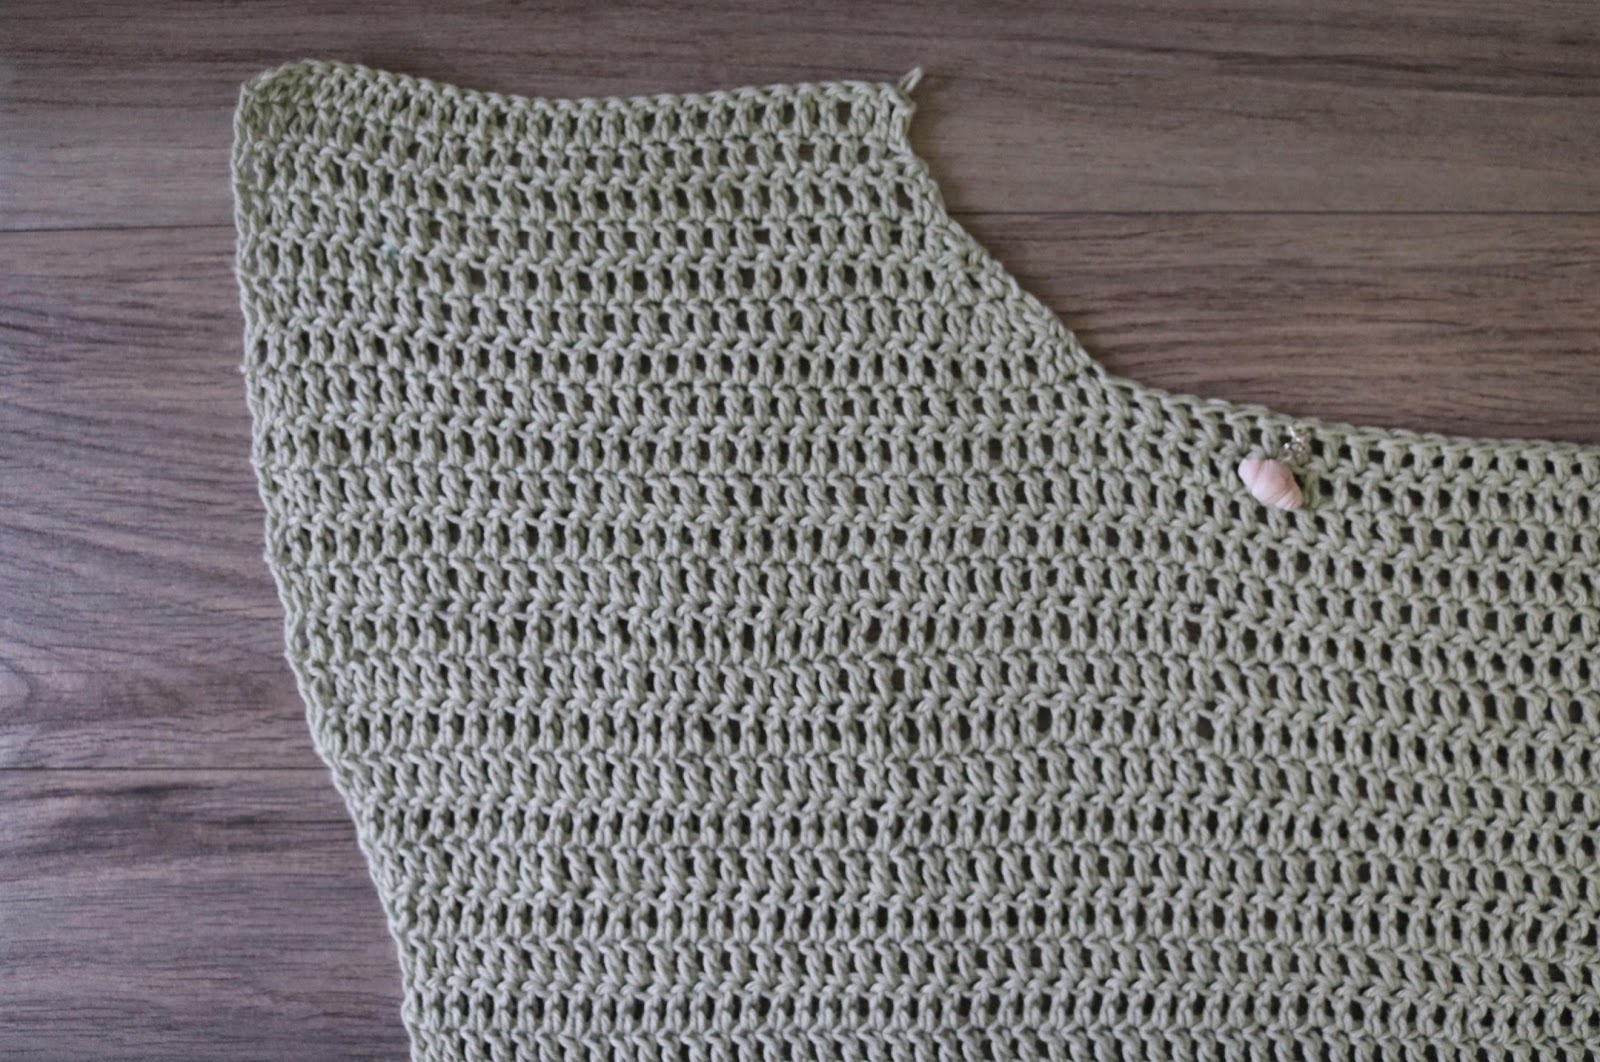
Ch 69(76, 91, 106, 121)
R1: dc into 3rd ch from hook (serves as the first and second dc), dc into next 66(73, 88, 103, 118) ch (68, 75, 90, 105, 120 sts)
R2: ch 2 (serves as first dc), dc into next 67(74, 89, 104, 119) st (68, 75, 90, 105, 120 sts)
R3-24(26, 26, 28, 28): repeat row 2 (68, 75, 90, 105, 120 sts per row)
You are now going to be increasing on both sides
R25(27, 27, 29, 29): ch 2, dc into same st, dc into next 64(73, 88, 103, 118) st, 2dc (70, 77, 92, 107, 122 sts)
R26(28, 28, 30, 30): ch 2, dc in next 69(76, 91, 106, 121) st (70, 77, 92, 106, 121 sts)
R27(29, 29, 31, 31): ch 2, dc into same st, dc into next 68(75, 90, 104, 119) st, 2dc (72, 79, 94, 108, 123 sts)
R28(30, 30, 32, 32): ch 2, dc in next 71(78, 93, 107, 122) st (72, 79, 94, 108, 123 sts)
R29(31, 31, 33, 33): ch 2, dc into same st, dc into next 70(77, 92, 106, 121) st, 2dc (74, 81, 96, 110, 125 sts)
XS, S, and M Only. R30(32, 32)-35(38, 38): ch 2, dc into next 73(80, 95) st (74, 81, 96 sts per row). Jump to neckline
R34(34): ch 2, dc into next 109(124) st (110, 125 sts per row)
R35(35): ch 2, dc into same st, dc into next 108(123) st, 2dc (112, 127 sts)
R36(36): ch 2, dc into next 111(126) st (112, 127 sts)
R37(37): ch 2, dc into same st, dc into next 110(125) st, 2dc (114, 129 sts)
L Only. R38-43: ch 2, dc into next 113 st (114 sts). Jump to neckline.
R38: ch 2, dc into next 128 st (129 sts)
R39: ch 2, dc into same st, dc into next 127 st, 2dc (131 sts)
R40: ch 2, dc into next 127 st (131 sts)
R41: ch 2, dc into same st, dc into next 129 st, 2dc (133 sts)
R42-47: ch 2, dc into next 132 st (133 sts)
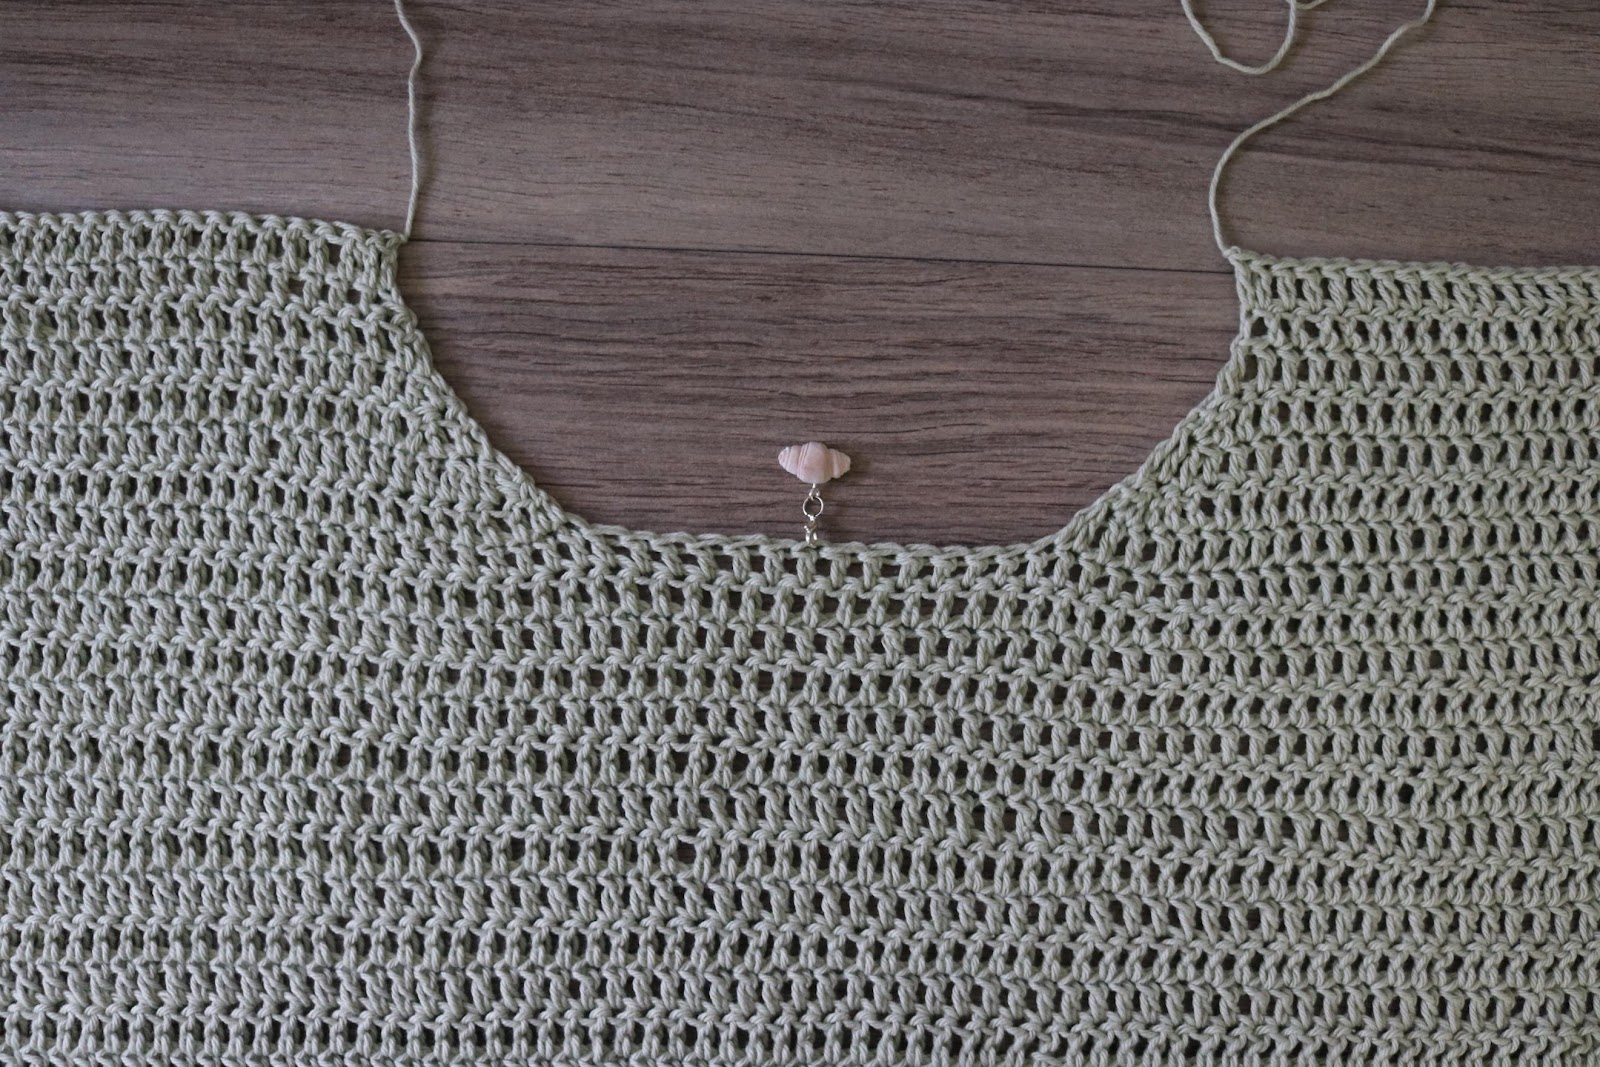
You are now working on the neckline, decreasing near midline. Turn after each row
R36(39, 39, 44, 48): ch 2, dc in next 30(31, 39, 46, 55) st, dc2tog (32, 33, 41, 48, 57 sts)
R37(40, 40, 45, 49): dc2tog, dc2tog, dc into next 28(29, 37, 44, 53) st (30, 31, 39, 46, 55 sts)
R38(41, 41, 46, 50): ch 2, dc into next 25(26, 34, 41, 50) st, dc2tog, dc2tog (28, 29, 37, 44, 53 sts)
R39(42, 42, 47, 51): dc2tog, dc in next 26(27, 35, 42, 51) st (27, 28, 36, 43, 52 sts)
R40(43, 43, 48, 53): ch 2, dc in next 24(25, 33, 40, 49) st, dc2tog (26, 27, 35, 42, 51 sts)
R41-42(44-45, 44-45, 49-50, 54-55): ch 2, dc in next 25(26, 34, 41, 50) st (26, 27, 35, 42, 51 sts)
Repeat R36-42(39-45, 39-45, 44-50, 48-55) on opposite side of neckline
Fasten off
Back Panel
Ch 69(76, 91, 106, 121)
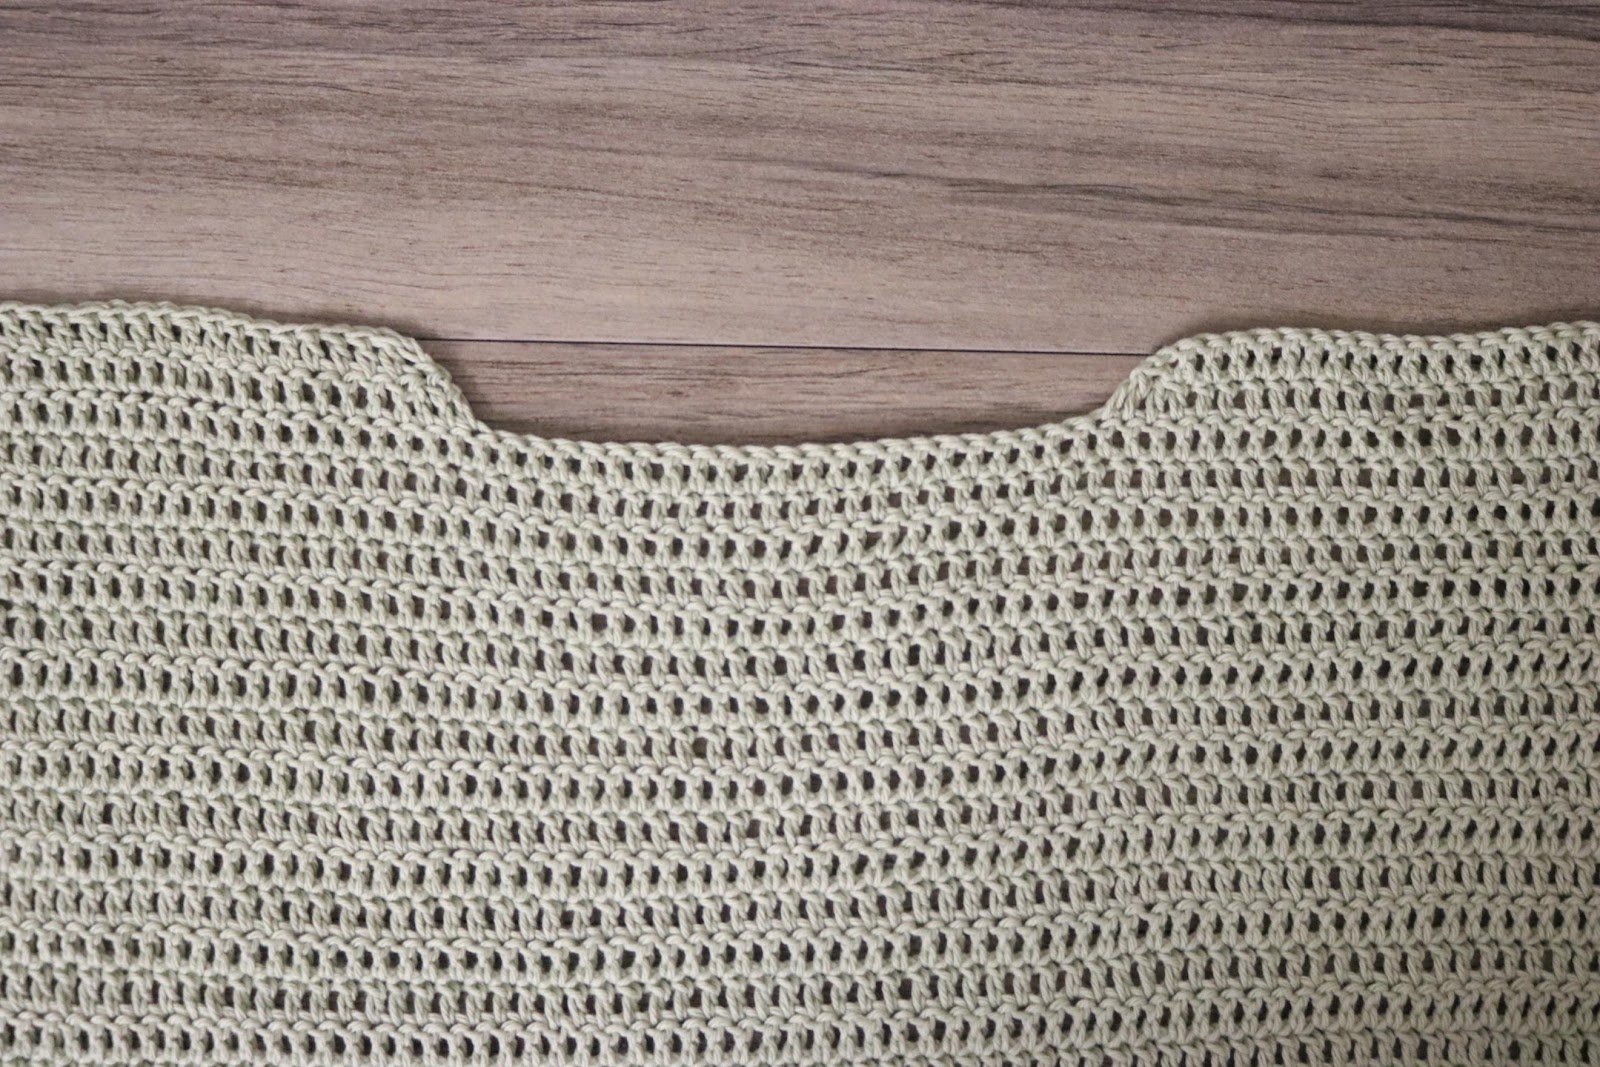
R1-35(38, 38, 43, 47): repeat instructions from front panel
R36(39, 39, 44, 48)-40(43, 43, 48, 53): ch 2, dc into next 73(80, 86, 113, 132) st (74, 81, 96, 114, 133 sts)
R41(44, 44, 49, 54): ch 2, dc in next 23(24, 32, 39, 48) st, dc2tog, dc2tog (26, 27, 35, 42, 51 sts)
R42(45, 45, 50, 55): ch 2, dc in next 25(26, 34, 41, 50)st (26, 27, 35, 42, 51 sts)
Fasten off
Assembly:
Seam along sides of the two panels to the bottom end of the arm (first 29, 31, 31, 36, 40 rows from the bottom). Seam along the top of both panels.
Sleeves:
Attach yarn to bottom opening of arm hole. You will now begin working in rounds.
Round 1-8(10, 10, 12, 12): ch 2, dc around armhole 50(54, 54, 54, 58) st, slst to top of ch 2 (52, 55, 55, 55, 59 sts including ch per round)
Fasten off, repeat on opposite side
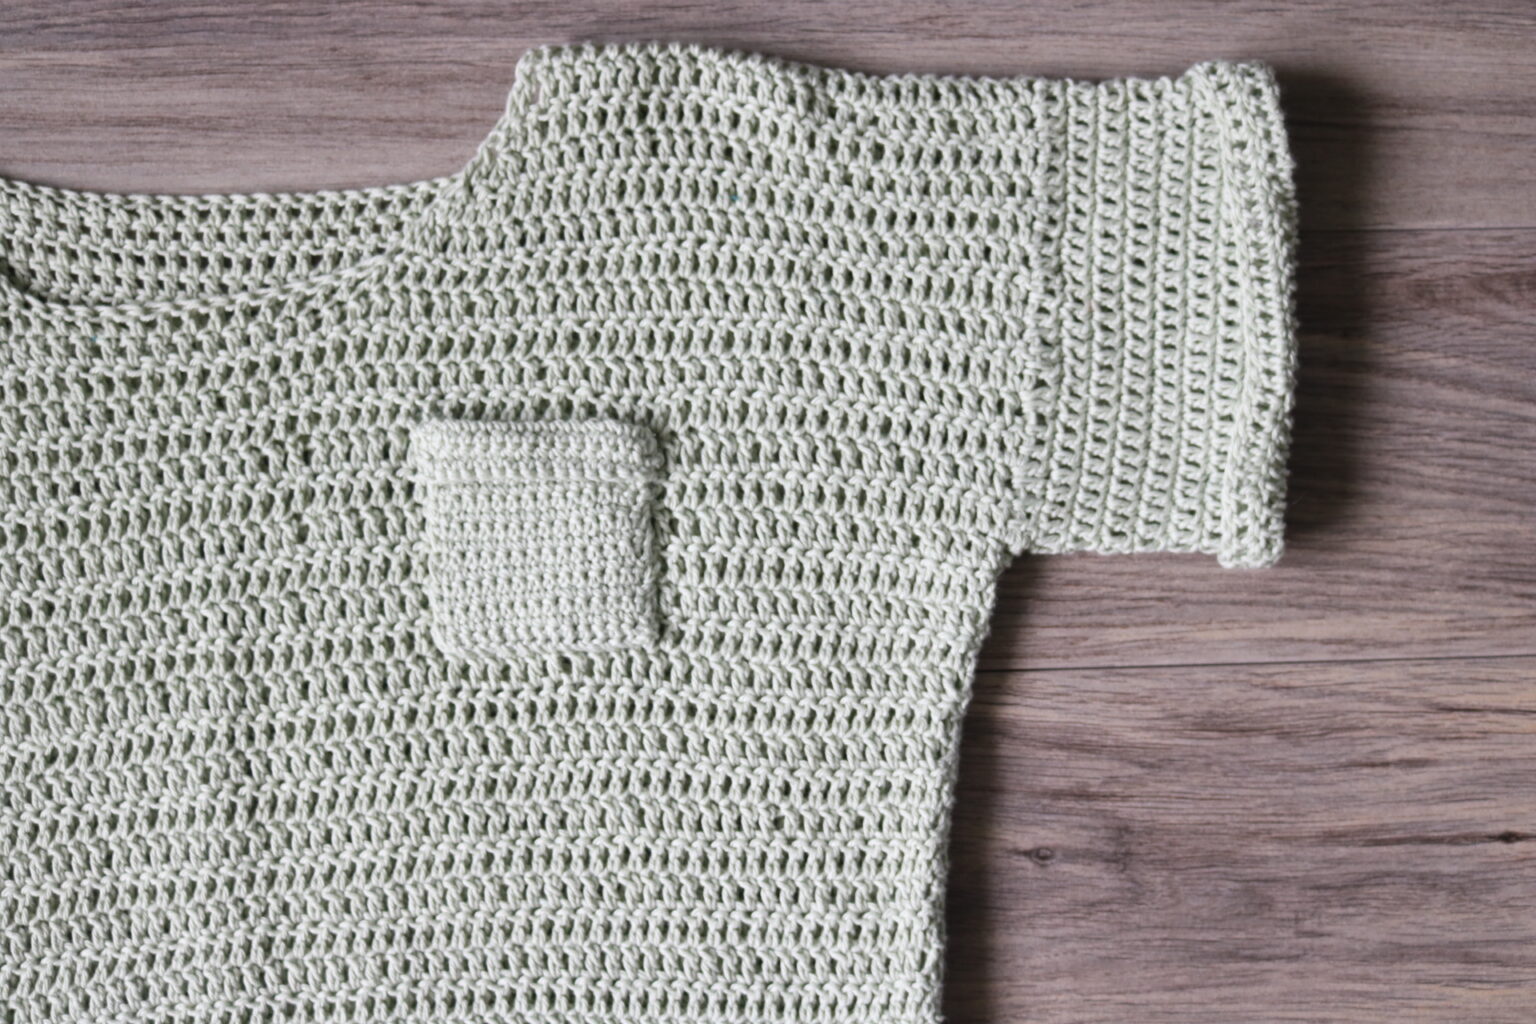
Pocket (can be adjusted by adding st and rows as desired)
You are working in rows
Ch 15(15, 20, 20, 23) +1
R1: sc into second ch from hook (counts as first and second sc) sc into next 13 (13, 18, 18, 21) ch (15,15, 20, 20, 23 sts)
R2-20(20, 25, 25, 28): ch 1, sc into next 14(14, 19, 19, 22) st (15, 15, 20, 20, 23 sts)
Fasten off with a long tail. Flip around two rows towards you. Use the long tail to sew up the two rows then work your way back down the around the bottom and opposite side of the pocket piece to the left chest portion of your front panel. Keep the top (folded portion) of the pocket piece open.
