CrochetMenScarvesHatsGlovesSweatersCardigansSocksOther clothingWomenScarvesHatsGlovesShawls and cover upSweatersCardigansSocksSlippersBagsOther clothingChildrenScarvesHatsGlovesSweatersCardigansSocksSlippersOther clothingHomeBlankets and plaidsRugsHome decorationsPetsSchemesKnittingOther hand-madeChat
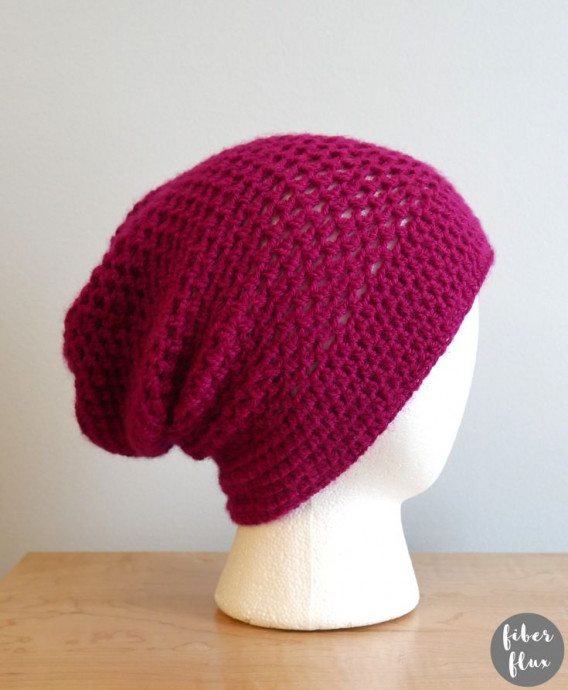
Crochet Slouch Hat

Crochet slouch hats are a cozy and stylish accessory perfect for adding a touch of warmth and charm to any outfit! With their relaxed fit and trendy look, they are ideal for keeping you both comfortable and fashionable during the cooler months. Whether you're heading out for a casual day or just want to elevate your loungewear game, a crochet slouch hat is a versatile piece that can easily complement your personal style. So, grab your favorite yarn and hook, and get ready to create a cute and comfy hat that will become your new go-to accessory!
Materials:
- H (5.0 mm) crochet hook
- 191 yards of light/#3 weight yarn (I used 1 ball of Amigo from Hobbii in the “Dark Magenta” (#52) colorway
- Yarn/tapestry needle
- Scissors
- Measuring Tape
Sizing:
- 18 inch circumference
- 11 inches tall
Pomegranate Crochet Slouch Hat Pattern Notes:
- Easily change the hat circumference by adjusting the starting chain (multiple is any even number, see pattern below for information)
- Change the height of the hat by working more rounds of the main part of the hat. You can make it as slouchy as you like!
Pomegranate Crochet Slouch Hat Pattern:
- Ch 76 (to change the circumference, work the chain in any even multiple)
- Join with a slip stitch in the furthest chain from the hook. (Be careful not to twist the chain before you join).
- Round 1: Ch 2, then work a hdc into each chain around. Join with a slip stitch in the second chain up to close the round.
- Rounds 2-6: Ch 2, then work a hdc into each stitch around. Join with a slip stitch in the second chain up to close the round.
Note: as an option if you want your brim to be a little wider, you can keep going and work more rounds of the brim.
- Round 7: Ch 3 (counts as a hdc + 1 chain) Next, *skip the first stitch, then work a (hdc, ch 1) into the next stitch. Repeat from * around. Join with a slip stitch in the second chain up to close the round.
- Round 8: Ch 3 (counts as a hdc + 1 chain) In the first space work a (hdc, ch 1). *In the next space, work a (hdc, ch 1). Repeat from * around. Join with a slip stitch in the second chain up to close the round.
- Repeat round 8 as many times as you like until the hat is as tall as you like! For a more fitted (less slouchy) top, work less rounds. For a slouchier look, work more rounds. For the hat pictured, I worked until the total hat height was about 11 inches tall.
- After working the last round, fasten off and leave a tail about 24 inches long and continue to the next section to close the top of the hat.
Seaming The Top & Finishing The Hat:
- Turn hat inside out.
- Using the tail, seam along the top edge of the hat with a running stitch.
- Pull tightly (but gently so the yarn doesn’t snap) to cinch up the top of the hat.
- Add a few stitches across the cinched part to “lock” it into place.
- Secure with a strong knot.
- Weave in all ends.
- Turn hat right side out and your hat is ready to wear!
No comments
Write a comment
