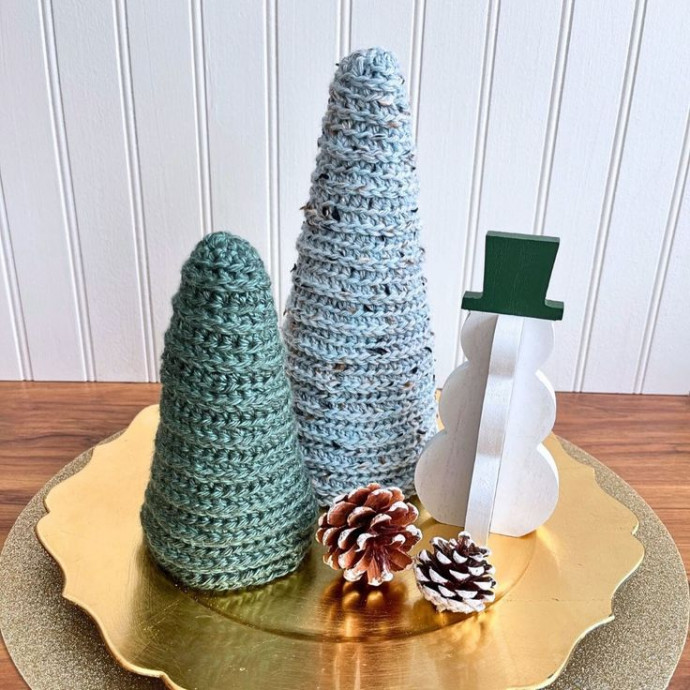
Crochet Evergreen Cone Tree Project

Creating a Crochet Evergreen Cone Tree is a fun and festive project that will surely add charm to your holiday decor! This delightful tree can be personalized with your favorite yarn colors and embellishments, making it a unique and eye-catching piece. With a few basic crochet stitches and some patience, you can whip up this adorable cone tree in no time.
Whether you're a seasoned crocheter or just starting out, this project is perfect for anyone looking to add a touch of handmade beauty to their home during the holiday season. So grab your hook, pick out some cozy yarn, and get ready to bring some cozy cheer to your space with this lovely Crochet Evergreen Cone Tree!Materials:
- YARN:
- #4 Worsted Weight, Lion Brand Heartland or We Crochet Brava Tweed or suitable substitute, 30 (55, 95) yards
- TOOLS:
- US Size (H/8) 5.0 mm crochet hook or hook size that works best with your specific yarn and tension
- Yarn Needle
- Scissors
- Stitch Marker
- Craft Styrofoam Cones (see heights below) or a tester suggestion from Valerie – make your own paper cones
Sizes:
- Small (Medium, Large)
Dimensions:
- (height) – 4.25 (6, 9)”/10.75 (15.25, 23) cm; bottom diameter – 2 (3, 4)” / 5 (7.5, 10) cm
Stitches/Abbreviations: US Terms
- ch – chain
- sl st – slip stitch
- sts – stitches
- blo – back loop only
- sc – single crochet
- hdc – half double crochet
- Special Stitch:
- 3rd loop of a hdc = a horizontal bar on the back of a hdc stitch in which to work rather than working into the top of the stitch like normal
Notes:
- This is worked from the top down.
- This is worked in a continuous spiral; the first stitch of the round will need to be marked with a stitch marker to keep track of the beginning of the round.
- Depending on the texture of your foam cones, you may want to keep the plastic on it or rewrap it so it does not catch and snag the yarn.
Instructions – Tabletop Evergreen Tree:
Small (Medium, Large)
Create a magic ring
Round 1: Ch 1, work 10 hdc into the ring, do not join.
NOTE: The following rounds (besides the last 3) will include 2 increases randomly placed in each round. This is to bypass counting in each round. To make an increase just work 2 hdc sts in the same st, you will evenly space out the increases in each round, make sure an increase is not worked on top of an increase from the round below it. This helps minimize the look of any increases in the final project.
Round 2: Hdc in first (mark with st marker and continue to move the st marker to the first st of the next round to keep track of the beginning of each round), hdc in each st around, be sure to add 2 increases somewhat evenly spaced in the round, do not join. 12 sts
Round 3: Working in the blo, hdc in first, hdc in each st around, be sure to add 2 increases somewhat evenly spaced in the round, do not join. 14 sts
Round 4: Working in the 3rd loop of the hdc, hdc in first, hdc in each st around, be sure to add 2 increases somewhat evenly spaced in the round, do not join. 16 sts
Rounds 5-12 (18, 28): Repeat Rounds 3-4. Here you can adjust the number of rounds needed for your cone heights before moving to the non-increase rounds. If you fit test the tree onto the cone, there should be about 3/4-1” of the bottom of the cone visible before moving to the non-increase rounds.
NON-INCREASE ROUNDS
Round 13 (19, 29): Working in the blo, hdc in first, hdc in each st around, do not join. 32 (46, 66) sts
Round 14 (20, 30): Working in the 3rd loop of the hdc, hdc in first, hdc in each st around, do not join.
Last Round: Working in the blo, sc in first, sc in each st around to last st, sl st in last st, sl st in first st of the round.
Fasten off and weave in ends. Insert craft foam cones or paper cones for the trees to stand.
