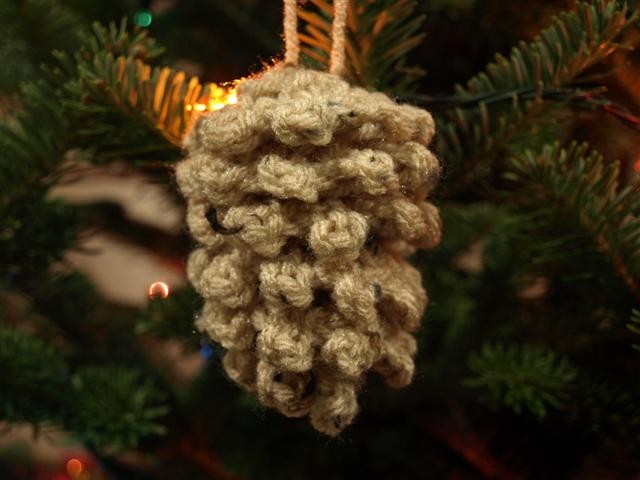
Crochet Pine Cone

Crochet pine cones are a delightful and charming addition to any home decor or crafting project. With their intricate design and cozy feel, they bring a touch of nature indoors in a creative way. Whether you're a beginner or an experienced crocheter, making these tiny pine cones can be a fun and rewarding activity.
You can experiment with different yarn colors and textures to personalize your pine cones and make them truly unique. Display them in a bowl as a whimsical centerpiece, hang them as ornaments, or even use them to embellish gifts. The possibilities are endless, and the process is sure to put a smile on your face as you create these adorable little crochet pine cones.Pine Cone
Size: approximately 3 inches
Materials:
- I used Red Heart Super Saver Buff Fleck (be sure not to use a yarn that is too soft or too thin for this pattern)
- Size G Hook
Gauge: Not important
Abbreviations: sc = single crochet, ch = chain, st = stitch, sl st = slip stitch, dc = double crochet
- Ch 15
- *dc in 3rd ch from hook, ch 3, sl st in first chain of the ch 3 you just did* Repeat this step 3 more times in the same “3rd ch from hook” stitch.
- Repeat step 2 in each of the remaining chains of the original ch 15.
- At the end of the last dc in the last ch don’t do the ch 3 or sl st. Just finish off after the last dc. Leave the yarn tail long enough so that you can weave it to the top center of the pine cone. Tie it to the beginning yarn tail. That creates the hanger!
This detail photo shows the original ch 15, the first dc and the ch 3

This detail photo shows the nub that is made with the sl st in the ch 3

This detail photo shows the first four dc’s that are in the third ch from the hook

As you work you will be creating a spiral. The spiral becomes a pine cone!

Yes, it is the only ornament on our tree so far. This weekend we finish our decorating!

