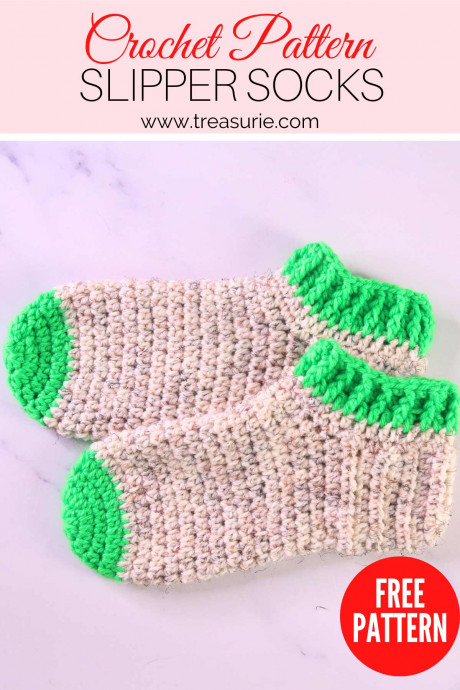
Crochet Slippers Socks

Crochet slippers socks are not only cozy but also incredibly stylish for keeping your feet warm and trendy at the same time! These handmade wonders are the perfect accessory for lounging around the house or showing off your creative flair to the world. With a wide range of colors, patterns, and designs available, you can easily find a pair that suits your personality and fashion sense.
So, whether you're curling up on the couch with a good book or padding around the house on a lazy Sunday morning, crochet slipper socks are sure to add an extra touch of comfort and charm to your day.- Yarn: Any worsted weight yarn(10ply, category 4) total 160m/174y. (46m/50y contrast and 115m/125y main.)
- Crochet hook: 4.5mm and 4mm.
- Stitch marker: for rounds.
- Tapestry needle (or yarn needle): To weave ends.
- Scissors
Skill Level
This sipper sock pattern is easy as it mainly uses half double crochet stitches with some double crochet and single crochet in the ankle shaping.
Gauge (4" Square)
15 hdc x 11.5 rows with a 4.5m hook.
Abbreviations
This free crochet pattern written in US terms.
- sc =single crochet
- hdc = half double crochet
- dc = double crochet stitch
- fpdc = front post double crochet
- ch = chain stitch
- sl st = slip stitch
- st/sts =stitch/ stitches
Special Stitches - Double Crochet Front Post
The fpdc is crocheted the same way as a regular dc except you will put your hook into the post of the stitch below instead of the 2 loops at the top.
- YO, insert hook through the front post from right to left.
- YO, pull through (3 loops)
- YO, pull through 2 (2 loops)
- YO, pull through 2 (1 loop)
Pattern Notes
- The chain stitches at the beginning of the hdc and sc rounds do not count as a stitch. The first stitch will be in the base of this chain.
- The ch3 at the beginning of the dc rows DO count as a stitch.
Crochet Slipper Socks Pattern, Step By Step Instructions
You will start by crocheting the toe and foot in the round and then switch to flat crocheting for the heel. This will be seamed up and then you will continue in the round of the ankle ribbing.
Crocheting The Toe
- ROUND 1: Start with 4.5 mm crochet hook. In color A, make a magic circle. Ch1 and hdc 10 into the ring (10 stitches). Pull the magic ring closed and slip stitch to join.
- ROUND 2: Ch 1, 2 hdc in each stitch. Slip stitch to join (20 stitches).
- ROUND 3: Ch 1, hdc in each stitch. Slip stitch to join (20 stitches).
- ROUND 4: Ch 1. *2 hdc into next stitch, 1 hdc into next stitch. Repeat from * all around. Slip stitch to join (30 stitches). Fasten off color A.
Foot Section
- Join color B in any stitch. Ch 1, hdc all around (30 stitches).
- Place the stitch marker in the final stitch to mark the end of each row.
- Do not join the round. Instead, hdc into the first stitch to start a new row. This will allow you to crochet hdc in a spiral without noticeable joins.
- Repeat hdc rounds to the number of rows below for your size.
- Slip stitch after final stitch.
- Try on the slipper. It should end at the base of your ankle. Add or subtract rows if necessary.
Heel
- *Ch 1, hdc 20 stitches. Turn.
- Repeat from * to the number of rows below for your size.
- For the final heel row – Ch1, hdc8, sl st 4, hdc 8. (This gives a little more shape to the bottom of the heel once it is sewn up.)
Ankle
- Put the ends together with the slipper the right way out and join the back heel at the top with a slip stitch.
- Ch1, sc around top of slipper (30 stitches). Try to get the 30 stitches evenly placed – 10 in first side, 10 across front, 10 in second side.
- Ch 1, hdc around row (30 stitches).
- Fasten off leaving a long tail.
- Turn the slipper inside out and use the tail to whip stitch the 2 ends together.
- Fasten off and weave all ends.
Ribbing
A smaller hook size here will make the ankle opening nice and tight. If you have a small ankle, you can even go as low as a 3.5mm hook.
- Change to color A at end of sock and 4 mm hook.
- Ch3 (counts as first dc stitch), dc around row.
- Ch3 (counts as dc stitch), fpdc in next stitch.
- *Dc in next stitch, fpdc in next stitch (The fpdc is every second stitch)
- Repeat from * all the way around.
- End with a fpdc and slip stitch to join.
- Repeat for row 31. Fasten off and weave in ends.
Repeat
- Repeat for the second crocheted slipper sock.
Making Crochet Slipper Socks Non-Slip
Crochet slipper socks can be slippery on some hard floors, so it is recommended to add a non-slip surface to the bottom. Adding grip with puff paint is an easy way.
- Turn the slipper upside down.
- Squeeze the puffy fabric paint directly onto the marked areas. Create dots, lines, or any pattern.
- Let the puff paint dry completely according to the instructions on the bottle. This usually takes several hours or overnight.
- Once the paint is dry, test the slipper on various surfaces.
Sewing leather on the bottom of your slippers can also be a great non-slip option.
