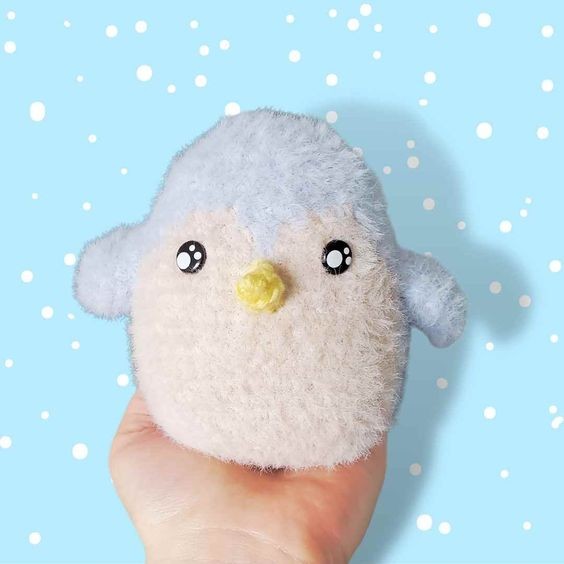
Crochet Adorable Penguin

Crocheting an adorable penguin is a delightful and rewarding experience that brings a touch of charm and cuteness to your crafting projects. With its round body, black and white color pattern, and sweet face, the penguin design is sure to bring a smile to anyone who sees it. Whether you're a beginner or an experienced crocheter, making this penguin can be a fun and relaxing way to channel your creativity.
The intricate details like the little wings and feet can be so satisfying to complete, and the end result is a lovable little penguin that you can proudly display or gift to a friend. So grab your crochet hook and yarn, and let's bring this adorable penguin to life – one stitch at a time!What You’ll Need:
- 1 100g ball of Lion Brand Feels Like Bliss in Sky (size 5)
- 1 100g ball of Lion Brand Feels Like Bliss in Sand Dollar (size 5)
- 1 ball of size 4 worsted yarn in yellow
- 2.75mm crochet hook
- 10mm safety eyes
- Stuffing
- Stitch marker
- Row counter
- Darning needle
- Scissors
Abbreviations:
ch=chain
sc=single crochet
ss=slip stitch
st(s)=stitch(es)
inc=increase
dec=decrease
F/O=fasten off
Gauge:
20 stitches x 20 rows = 4” in single crochet
Penguin Crochet Pattern:
Head/Body:
Starts at the top of the head and ends at the bottom of the body. Start with Sky.
1. Ch 2. 6 sc in the first ch. (6 sts)
2. 2 sc in each st around. (12 sts)
3. 1 sc, inc. Repeat around. (18 sts)
4. 2 sc, inc. Repeat around. (24 sts)
5. 3 sc, inc. Repeat around. (30 sts)
6. 4 sc, inc. Repeat around. (36 sts)
7 – 9. Sc in each st around. (36 sts)
10. Sc in the first 12 sts. Switch to Sand Dollar. Sc in the next 3 sts. Switch to Sky. Sc in the next 3 sts. Switch to Sand Dollar. Sc in the next 3 sts. Switch back to Sky. Sc for the rest of the round. (36 sts)
11. Sc in the first 11 sts. Switch to Sand Dollar. Sc in the next 5 sts. Switch to Sky. Sc 1. Switch to Sand Dollar. Sc in the next 5 sts. Switch to Sky. Sc for the rest of the round. (36 sts)
12. Sc in the first 10 sts. Switch to Sand Dollar. Sc in the next 13 sts. Switch to Sky. Sc for the rest of the round. (36 sts)
13. Sc in the first 5 sts then inc. Sc in the next 5 sts. Switch to Sand Dollar. Inc. 5 sc, inc x 2. 1 sc. Switch to Sky. 4 sc, inc. 5 sc and inc until the end of the round. (42 sts)
14. Sc in the first 10 sts. Switch to Sand Dollar. Sc in the next 19 sts. Switch to Sky. Sc the rest of the round. (42 sts)
15 – 22. Repeat 14.
Attach the 10mm safety eyes to round 12 approximately 7 sts apart. Make sure they are attached to the cream-colored section of the head.
23. 5 sc, dec. 3 sc. Switch to Sand Dollar. 2 sc, dec. 5 sc, dec x 2. Switch to Sky. 5 sc and dec until the end of the round. (36 sts)
24. 4 sc, dec. 3 sc. Switch to Sand Dollar. 1 sc and dec. 4 sc, dec x 2. 1 sc. Switch to Sky. Sc in the next 3 sts and dec. 4 sc and dec for the rest of the round. (30 sts)
25. 3 sc, dec. 3 sc. Switch to Sand Dollar. Dec. 3 sc, dec x 2. Switch to Sky. 3 sc and dec until the end of the round. (24 sts)
26. 2 sc, dec x 2. Switch to Sand Dollar. 2 sc, dec x 2. Switch to Sky. 2 sc and dec until the end of the round. (18 sts)
Stuff.
27. 1 sc, dec. Repeat around. (12 sts)
28. Dec around. (6 sts)
Ss and F/O. Use the tail to sew the hole closed.
Wings:
Use Sky & make two
1. Ch 2. 6 sc in the first ch. (6 sts)
2. 2 sc in each st around. (12 sts)
3. 1 sc, inc. Repeat around. (18 sts)
4. Sc in each st around. (18 sts)
5. 2 sc, inc. Repeat around. (24 sts)
6 – 7. Sc in each st around. (24 sts)
8. 2 sc, dec. (18 sts)
Ss and F/O. Leave a long tail to attach to the side of the body at round 13. Do not stuff. Pinch flat together before attaching.
Beak:
Use Yellow
1. Ch 2. 4 sc in the first ch. (4 sts)
2. Sc in each st around. (4 sts)
Ss and F/O. Leave a long tail to attach to the head in between the eyes at approximately rounds 14 & 15. Do not stuff.
