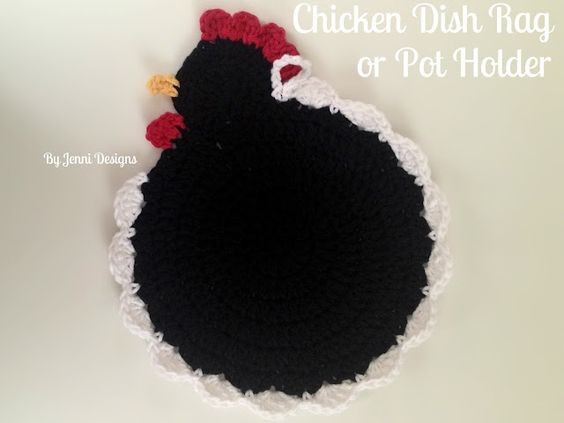
Crochet Chicken Dish Rag or Pot Holder

Creating a crochet chicken dish rag or pot holder is a delightful project that adds a touch of whimsy to your kitchen essentials. These cute and practical items not only bring a pop of fun to your cooking space but also serve a useful purpose. Imagine reaching for a charming chicken-shaped pot holder while whipping up your favorite dish – it's sure to bring a smile to your face every time.
Crocheting these unique pieces allows you to showcase your creativity and add a personal touch to your home decor. So gather your yarn, crochet hook, and get ready to make your kitchen even more welcoming with these adorable and functional chicken dish rags or pot holders that are as charming as they are useful!Skill Level: Easy
Size I (5.5mm) Crochet Hook
100% Cotton Worsted Weight Yarn, approx. 150 yds.
Example Shows: Lily Sugar n Cream Black
Lily Sugar n Cream White
Bernat Handicrafter Country Red
Bernat Handicrafter Pale Yellow
Tapestry Needle
Scissors
Stitch Abbreviations (US Terms):
- Ch – Chain
- Hdc – Half Double Crochet
- Dc – Double Crochet
- Sc – Single Crochet
- Sk – Skip
- Sl st – Slip Stitch
- Tr – Treble Crochet
-It’s important that you use 100% cotton yarn if you are planning to use this to set hot pans on, acrylic will melt if you set a hot pan on it.
-Joins are made with sl st.
-Ch 1’s & 2’s do NOT count as a stitch and are not counted in the end of row stitch count.
-Join to the first stitch in the row, NOT the beginning chain.
-Stitches listed between these brackets: [ ] should all be worked in to the same space.
Row 3: Ch 2, 2 dc in same and in each around. Join. (28 dc)
Row 4: Ch 2, 2 dc in same, dc in next. *2 dc in next, dc in next.* Repeat *to* around. Join. (42 dc)
Row 5: Ch 2, 2 dc in same, dc in next 2. *2 dc in next, dc in next 2.* Repeat *to* around. Join. (56 dc)
Row 6: Ch 2, 2 dc in same, dc in next 3. *2 dc in next, dc in next 3.* Repeat *to* around. Join. (70 dc)
Row 7: Ch 1, 2 hdc in same, hdc in next 4. *2 hdc in next, hdc in next 4.* Repeat *to* around. Join. (84 hdc)
Row 10: Do not work in same, sc in next, hdc in 3, 2 hdc in next 3, hdc in 2, sc in next 2, sl st in last, sl st into next open stitch on the body. Fasten off and sew in ends.
Row 2: Hdc in same, sl st in 2. Fasten off, knot these two ends together then sew them in.
Feathers
Fasten off and sew in ends.
Comb
Beak
Optional Eye
With tapestry needle, stitch on a little eye above the beak. I usually leave this off of the pot holders I make that are only one layer because I don’t like that the end can’t be hidden easily. Maybe a small wooden button would work well, a plastic button may melt if a very hot pan is placed on the pot holder.
