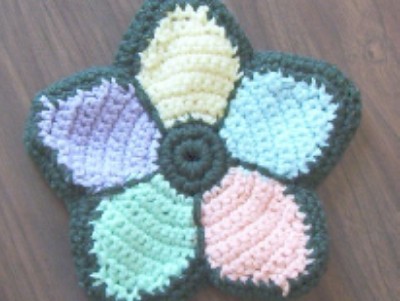
Crochet Stained Glass Flower Potholder

The Crochet Stained Glass Flower Potholder is a charming and functional addition to any kitchen. Its intricate design resembles a beautiful stained glass window, adding a touch of elegance to your cooking space. The vibrant colors used in this potholder create a cheerful and inviting atmosphere while offering protection from hot pots and pans.
Crafting this piece can be a delightful project for any crochet enthusiast, allowing for creativity and relaxation to intertwine. Whether you're making it for your own kitchen or as a heartfelt gift for a friend, this crochet masterpiece is sure to bring joy and style to your culinary adventures.Finished size is approximately 8" across.
Materials: Worsted weight yarn in 6 colours
Crochet hook size G (4.5mm)
NOTE: To change colour in sc: work last st, but do not complete. With two loops left on hook, pick up new colour, pull through both loops. Do not fasten off colours until called for.
Make 2 sides:
With green (trim colour) ch 4, sl st to join.
1. Ch 1, 10 sc in ring, join.
2. Ch 1, 2 sc in each st around. Join, FO. (20)
3. Join first petal colour with sl st. Work in pattern of (2 sc in one st, sc in 2) around, changing petal colour after working into 4 sts of round 2. Join. (27)
4. TURN. Work in pattern of 2 sc in one st, sc in 2) around, matching colours to previous round and changing as needed. Join.
5. TURN. Work in pattern of (sc in 4 sts, 2 sc in next) around. Join.
6. TURN. Increase in each colour section evenly as needed to make 10 sts in each petal. Join.
7. TURN. Increase 1 st in each section.
From here, you will be working in rows.
8. TURN. sl st into 1st st, ch 1, sc in same and in next 10.
9. TURN. ch1, sc across.
10-13. TURN. ch 1, sc dec, sc across to last two, sc dec. At end of row 13, you should have 3 sts.
14. Ch 1, sc across, FO colour.
Repeat rows 8-14 for each petal.
When finished all 5 petals, join trim colour in any st. Ch 1, sc around flower, working in ends of rows and in sts at top, having 2 sc in each corner at top. FO. Weave in ends.
REPEAT for second side, but DO NOT fasten off at end of outlining. Hold both pieces wrong sides together and working through both thicknesses, ch 1, sc around. If desired, at top of one petal, ch 10 for hanging loop, then continue around sc.
With doubled trim colour and working through both thicknesses, embroider solid dividing lines between petals.
