Crochet Mini Bunny Easter Amigurumi Toy

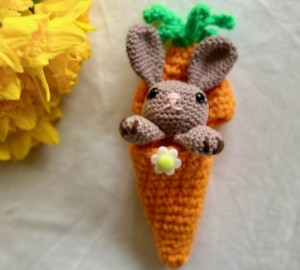
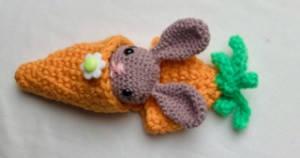
Create your very own adorable Easter bunny toy with this crochet pattern for a mini amigurumi bunny. This project is perfect for beginners and experienced crocheters alike, as it only requires basic crochet stitches and techniques. The finished bunny is small enough to fit in the palm of your hand, making it a cute and portable Easter decoration or gift.
Customize your bunny with different colors of yarn and embellishments to make it truly unique. This project is a fun and creative way to celebrate the Easter season and add a touch of handmade charm to your home. This bunny pattern is a great way to practice your crochet skills and learn new techniques, such as working in the round and shaping amigurumi pieces. The small size of the finished toy makes it a quick and satisfying project to complete, perfect for gifting or displaying in your own home. Whether you're an experienced crocheter looking for a new challenge or a beginner wanting to try something fun and festive, this mini bunny Easter amigurumi toy pattern is sure to bring a smile to your face.MATERIALS AND DIRECTIONS:
This very CUTE MINI BUNNY AMIGURUMI TOYis very easy and super quick crochet project, you just need to know how to crochet single crochet stitch and how to increase and how to decrease.
So let me now get started and tell you what you will need in order to crochet this CUTE MINI BUNNY AMIGURUMI TOY
The pattern was made with yarns:
TEREZKA
50 gr / 150 m / 100% cotton
color A = head, body, ears, paws = grey, brown, white or any color you like
color B = fingers = dark grey, dark brown, black
color C = nose = pink
color D = tail = white
Beautiful cotton yarn. The yarns are great for crocheted toys and amigurumi, also for summer wardrobes, tops, tunics, hats.
For this pattern you will need 3.0 mm crochet hook.
Scissors
Sewing/Embroidery and yarn needle/tapestry needle for sewing pieces together and weaving in ends
Markers
Stuffing
Plastic safety eyes 8 mm
CROCHET CUTE MINI BUNNY AMIGURUMI TOY
Difficulty Level: Level 1 – Easy, for beginners
US crochet terms:
SlSt – slip stitch
CH/s – chain/s
SC - single crochet
sc2tog - 2 single crochet decrease, 2sc together
SK - skip
T - turn
ST/s - stitch(es)
REP – repeat
SC2TOG = 2 single crochets together
Special stitches used:
Single Crochet Decrease (sc2tog)
A crochet decrease makes the current row or round that you are working on shorter than the one previous to it.
1. Insert hook into the first stitch.
2. Yarn over and draw through the loop.
3. Do not complete the stitch as normal.
4. Instead, insert the hook into the next stitch.
5. Yarn over and draw through the loop.
6. There should now be three loops on your hook
7. Yarn over and draw through all three loops on the hook
8. You should now have two single crochet stitches side-by-side, joined together into one stitch at the top.
This pattern requires familiarity with stitches used, attaching yarn and sewing parts together with a sewing needle.

CROCHET CUTE MINI BUNNY AMIGURUMI TOY
PATTERN NOTES
1) A ch1 at beg of the row DOESN'T count as a stitch
2) Magic ring = the starting point for crocheting in a spiral. Use which ever method you prefer.
3) Continuous spiral rounds - which means that you will not be joining the last stitch of the round with the first one. Instead you will need to keep track of where each round started and how many stitches you have made because after each round you will continue right on to the stitches of the next round (with no join). It is useful to use a stitch marker or piece of yarn to mark the start or end of each round.
4) ( ) – The number of stitches that should be in a completed round/row are placed in brackets at the end of that round’s/row’s instructions.
5) The CUTE MINI BUNNY AMIGURUMI TOY is crocheted in these parts using single crochet stitches:
HEAD
EARS
PAWS
6) This CUTE MINI BUNNY AMIGURUMI TOYmeasures
10 cm / 4 inch high (incl. ears)
7 cm / 2.7 inch wide
The finished size will depend on what yarn you use, as well as your tension and hook (as with any amigurumi).
*Measurements are taken from the garment lying flat, before the yarn has stretched out/dropped.
7) You can make the CUTE MINI BUNNY AMIGURUMI TOY bigger with a thicker yarn or smaller with a thinner yarn.
8) There is some sewing: you will sew the head on the body, the ears on the head, the hands and the legs and the tail on the body. This is easy to do, there are no tricks.

HOW TO CROCHET CUTE MINI BUNNY AMIGURUMI TOY
WRITTEN PATTERN
Note: A fabric measuring tape is useful here, since it’s more flexible than a ruler.
Crochet Hook 3 mm
Color A
This part is worked in spiral rounds, without joining rounds. Do not join rounds.
Ch1 at the beginning of round don't count as a stitch.
Make a magic ring
R1: 1sc, 6sc in magic ring (6 sc)
R2: *2sc in each st around* repeat from * to * till end of round (12 sc)
R3: *2sc in next st, 1sc in next st * repeat from * to * till end of round (18 sc)
R4: *2sc in next st, 1sc in next 2st* repeat from * to * till end of round (24 sc)
R5: *2sc in next st, 1sc in next 3st * repeat from * to * till end of round (30 sc)
R6: *2sc in next st, 1sc in next 4st * repeat from * to * till end of round (36 sc)
R7 – R11: *1sc in each st around* repeat from * to * till end of round (36 sc)
R12: *sc2tog, 1sc in next 4st * repeat from * to * till end of round (30 sc)
R13: *sc2tog, 1sc in next 3st * repeat from * to * till end of round (24 sc)
Add safety eyes size 8 mm between row 8 and 9, skip 6 stitches apart.
The eyes are 6 st apart from each other.
Stuff the HEAD well.
R14: *sc2tog, 1sc in next 2st * repeat from * to * till end of round (18 sc)
R15: *sc2tog, 1sc in next st * repeat from * to * till end of round (12 sc)
Stuff more if needed before finishing round R15
R16: *sc2tog * repeat from * to * till end of round (6 sc)
Join all stitches together
Cut yarn color A and fasten off and wave all ends in.

NOSE
Color C
With dark brown yarn and a tapestry needle, embroider the MOUTH and NOSE onto the HEAD on the position in the middle of the eyes.
Make Mouth with a horizontal line between R13 and R14, with the same yarn you will go through the middle of the line you just made and pull it through R11 and R12.
Make a triangle shape or heart shape nose right between eyes.

STUFFING
The exact moment for starting filling and stuffing the toy depends on every single person. I prefer filling the toy with the work almost finished. It’s a bit more difficult to fill, but more comfortable to crochet. You should make proofs until finding the more suitable moment of filling for you.
Stuff head and body firmly and full. Shape as you stuff, make sure to shape the nose too.
Use a stuffing stick or the back end of a pencil to push the stuffing into the right spots.
EAR
Crochet hook 3 mm
Color A
This part is worked in spiral rounds, without joining rounds. Do not join rounds.
Ch1 at the beginning of round don't count as a stitch.
Make a magic ring
R1: 1sc, 6sc in magic ring (6 sc)
R2: *2sc in each st around* repeat from * to * till end of round (12 sc)
R3: *2sc in next st, 1sc in next st * repeat from * to * till end of round (18 sc)
R4-R6: *1sc in each st around* repeat from * to * till end of round (18 sc)
R7: *sc2tog, 1sc in next 4st * repeat from * to * till end of round (15 sc)
R8 – R10: *1sc in each st around* repeat from * to * till end of round (15 sc)
R11: *sc2tog, 1sc in next 3st * repeat from * to * till end of round (10 sc)
R12 – R13: *1sc in each st around* repeat from * to * till end of round (10 sc)
Fold the ear in half, join the end of the bottom fold to make the ear so it stays on the head folded.
Cut the yarn and leave a longer tail to sew the Ear on the Head.
Repeat the pattern for the second EAR.
PAW
Crochet hook 3 mm
Color A
This part is worked in spiral rounds, without joining rounds. Do not join rounds.
Ch1 at the beginning of round don't count as a stitch.
Make a magic ring
R1: 1sc, 6sc in magic ring (6 sc)
R2: *2sc in each st around* repeat from * to * till end of round (12 sc)
R3: *2sc in next st, 1sc in next st * repeat from * to * till end of round (18 sc)
R4 – R5: *1sc in each st around* repeat from * to * till end of round (18 sc)
R6: *sc2tog, 1sc in next 4st * repeat from * to * till end of round (15 sc)
R17: *sc2tog, 1sc in next 3st * repeat from * to * till end of round (12 sc)
Stuff the PAW well.
R8: *sc2tog, 1sc in next 4st * repeat from * to * till end of round (10 sc)
R9 – R10: *1sc in each st around* repeat from * to * till end of round (10 sc)
Stuff more if needed before finishing round R10
Saw the PAW, 5 and 5 stitches together.
Cut the yarn and leave a longer tail to sew the PAW on the BODY bottom.
Repeat the pattern for the second PAW.
To join the Head to the Body go with a sewing needle in front and back loops of each stitch around and pull as tight as you can.
FINISHING INSTRUCTIONS
Face: feel free to play around with different styles and looks. I kept the nose and mouth very simple with pink yarn inserted and wrapped in between the R13 and R14 row. The nose is also with the same brown color inserted and wrapped around the R12th row and finished off with a vertical line.
Eyelashes and eyebrows
You can embroider with color B 2 or 3 short rows around the eyes to make eyelashes and finish with a short eyebrows.
FINGERS/CLAWS
Color B
You can embroider "fingers" or claws on both paws. I sewed 3 vertical lines, one through the middle of the paw over the magic ring and another one a little 1-2 rows to the side, again symmetrically.
Make sure the head and the body is stuffed well before sewing, but not so firm that you can see the stuffing through the stitches.
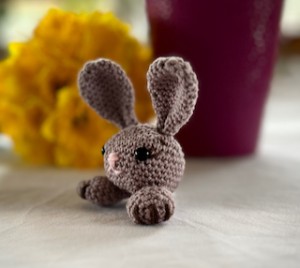
Sew the EARS to the HEAD on the position on top of the HEAD, 4 rows from the magic ring. Shape the ears and stretch them up.
Sew the PAWS on the bottom of the BODY. They should be more towards the front so the body doesn't flop over. Pin the paws before sewing, sit it down on a flat surface to make sure it will sit up on its own. Sew in place and hide yarn tails in the body.
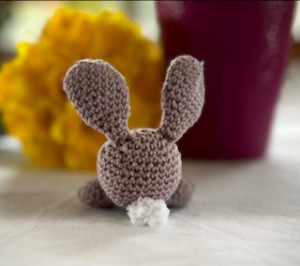
Sew the TAIL on the back of the BODY. Hide the yarn tails inside the body.
And voila! You made a CUTE MINI BUNNY!
This little CUTE MINI BUNNY will a perfect handmade toy for kids and adults! Could be a perfect gift for your love ones. He will surely bring smile to all your recipient’s faces.
