How to Make a Crochet Knot Bag: A Step-by-Step Guide


If you haven't heard of a crochet knot bag before, you're in for a treat! These adorable bags are a fun and stylish way to carry your essentials. The unique knot design adds a touch of charm to any outfit, making it the perfect accessory for a day out or a casual gathering with friends. Not only are they cute, but they are also practical, with just enough space for your phone, wallet, and keys.
Plus, you can customize them with different yarn colors and patterns to suit your personal style. Crochet knot bags are a must-have for anyone looking to add a touch of handmade charm to their wardrobe!Supplies
- Scissors
- Tapestry or yarn needle
- 4 mm – crochet hook
- 3 -2 oz - Peaches & Creme Cotton Yarn Quiet Dahlia or Linen any other medium worsted weight gauge 4 yarn.

Abbreviations – US Terms
- ch/chs – chain/chains
- st/sts – stitch/stitches
- sl – slip crochet stitch
- hdc – half double crochet stitch
Knot Bag Crochet Pattern
Tips
- Use an odd number for the chain if you want to make the bag smaller or larger.
- After the first row, the bag is worked in continuous rounds.
- The handles are 2 different sizes, worked in rows.
- Bag size: without handles 8.5 in x 9.5 in with longest handle 14 in high.
Starting the Bag
Ch 41
Row 1: In the 2nd ch from the hook sc in each st across. 2 sc in the last ch. Turn and sc in each st on the other side of the chain. 2 sc in the last ch.
Round 1: sc in each st around.
Rounds Overview
Rounds 2-4: Repeat Round 1.
Tip: Alternate slip stitch and half double crochet.
Tip: Slip stitch on top of half double crochet, half double crochet on top of slip stitch for entire pattern.
Continuing the Bag
Round 5: sl in the 1st st, hdc in 2nd. Repeat sl, hdc for entire round.
Rounds 6-76: Repeat Round 5.
Rounds 77-80: sc in each st around.
Creating the Handles
Short Handle
Row 1: sc in the next 15 sts. Ch 1 and turn.
Row 2: sc in 2nd st and in each st of the row. Ch 1 and turn.
Row 3-24: Repeat Row 2.
Cut and knot yarn.
Long Handle
Pull up a stitch counting 15 stitches from the end of the bag from the opposite side where you made the short handle.
Row 1: 15 sc. Ch 1 and turn.
Row 2: sc in 2nd st and in each st of the row. Ch 1 and turn.
Repeat Row 2 until you have 48 rows. Cut and knot yarn.
If you need a larger handle just add more rows. I double the short handle to get the length of the long handle.
If you make the handle larger you might need more yarn. I used most of the 3 skeins for my bag.
Finishing
Lay bag flat. Fold each handle over 1 at a time and sew to the opposite side of the bag. Go back and forth 2-3 times for strength. Go through the back half of the stitch on each side to help hide the joining.

Photo Tutorial of Bottom of Bag
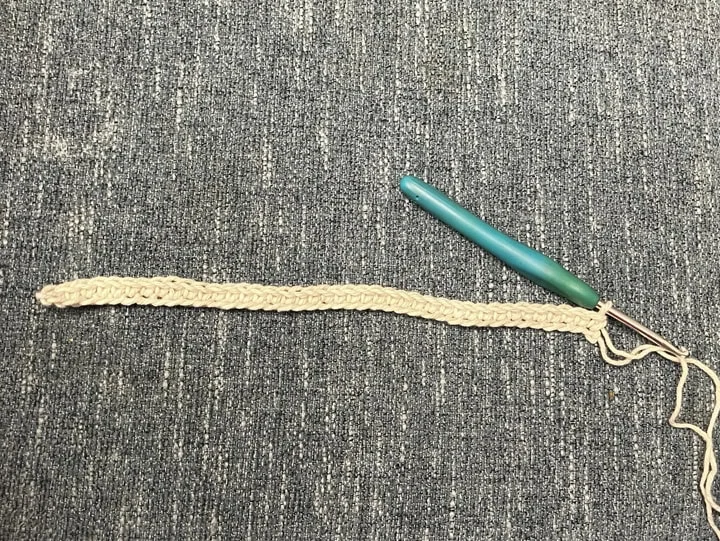
Step 1. Chain 41

Step 2. sc in each chain across. 2 sc in the last stitch.
Step 3. Turn and sc in each st across. 2 sc in the last stitch.
Step 4. sc in each st of the round. Do 2 sts at each end with 2 sc. Repeat 3 times.

Step 5. Slip stitch in the 1st stitch and half double crochet in the next. Repeat sl, hdc for the round.
Repeat Step 5 until you have 76 rows. Then do 4 rounds of single in each stitch. Follow the directions above for the handles.