Crochet a Grumpy Cat Amigurumi: A Step-by-Step Guide
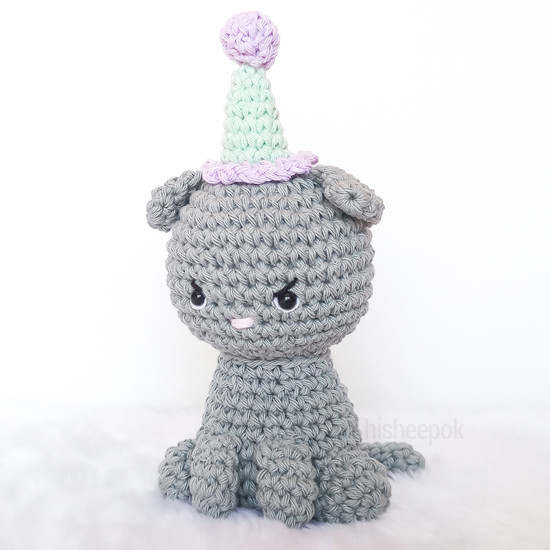
Crocheting a Grumpy Cat amigurumi is a delightful and imaginative project that brings a smile to any cat lover's face. This crafty creation captures the iconic grumpiness of the beloved internet sensation in a cuddly and adorable form. With its small size and intricate details, this amigurumi lets you showcase your crochet skills while bringing a touch of whimsy to your crafting repertoire.
Whether you're making it as a gift or for your own enjoyment, the Crochet Grumpy Cat Amigurumi is sure to become a cherished item that brings joy and laughter wherever it goes. So grab your crochet hook, pick out some yarn, and let's get crafting!Materials Needed
yarn dk, crochet hook 3 mm, safety eyes 6 mm, stuffing, tapestry needle.
Dimensions
The cat including the hat is going to measure 16 cm / 6.3 inches approximately and without the hat 11 cm / 4.3 inches.
Abbreviations (U.S.)
- R: round
- mr: magic ring
- ch: chain
- sl st: slip stitch
- sc: single crochet
- inc: increase
- dec: decrease
- **: repeat to the end of round
- (...) x...: repeat the inside of parentheses according to the indicated number, example: (...) x2
- [...] total stitches at the end of round
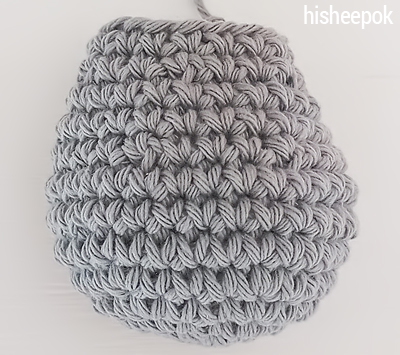
Body Instructions
With gray yarn:
- R1: 6 sc in mr
- R2: *sc inc* [12]
- R3: *1 sc, sc inc* [18]
- R4: *2 sc, sc inc* [24]
- R5: *3 sc, sc inc* [30]
- R6-8: 30 sc [30]
- R9: *3 sc, sc dec* [24]
- R10-11: 24 sc [24]
- R12: *2 sc, sc dec* [18]
- R13: 18 sc [18]
Cut yarn leaving enough for sewing.
Front Legs Instructions
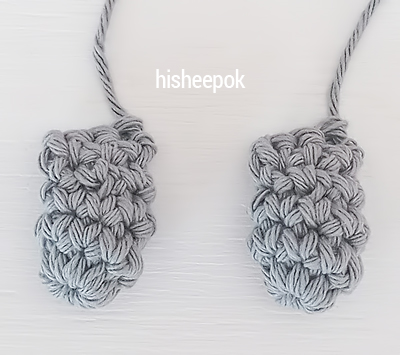
Make two.
Stuff very VERY lightly at the beginning.
With gray:
- R1: 8 sc in mr
- R2-3: 8 sc [8]
- R4: 1 sc, sc dec, 2 sc, sc dec, 1 sc [6]
- R5: 1 ch, turn, flatten and close up with 3 sc
Cut yarn leaving enough for sewing.
Sew legs between R8-9 of the body, leaving one stitch in between them.
BACK LEGS:
Make two.
With gray:
- R1: 6 sc in mr
- R2: *sc inc* [12]
- R3-4: 12 sc [12]
Cut yarn leaving enough for sewing.
Sew back legs between R4-8 of the body, next to each front leg.
Tail Instructions
With gray:
- R1: 6 sc in mr
- R2-10: 6 sc [6]
Cut yarn leaving enough for sewing. Sew to the back of the body between R4-6.
Head Instructions
With gray:
- R1: 6 sc in mr
- R2: *sc inc* [12]
- R3: *1 sc, sc inc* [18]
- R4: *2 sc, sc inc* [24]
- R5: *3 sc, sc inc* [30]
- R6: *4 sc, sc inc* [36]
- R7-12: 36 sc [36]
- R13: *4 sc, sc dec* [30]
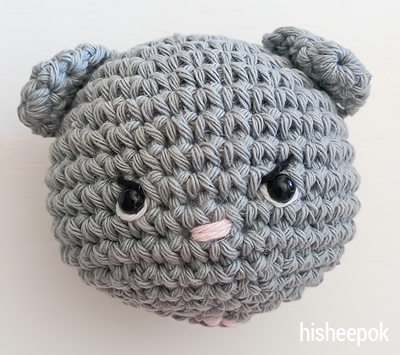
- Place the eyes between R10-11, leaving four stitches in between them.
- R14: *3 sc, sc dec* [24]
- R15: *2 sc, sc dec* [18]
- R16: *1 sc, sc dec* [12]
- R17: *sc dec* [6]
Cut the yarn. Tie off.
With pink yarn, make a horizontal line between R11-12 for the nose. With white yarn, outline the bottom side of each eye.
For the grumpy eyebrows, with black embroidery thread, create a diagonal line above each eye.
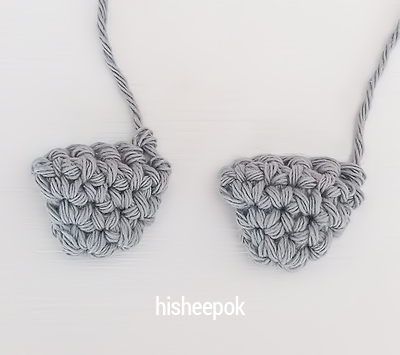
Ears Instructions
Make two.
With gray:
- R1: 6 sc in mr
- R2: *2 sc, sc inc* [8]
- R3: *3 sc, sc inc* [10]
- R4: 1 ch, turn, flatten the piece and close it up with 5 sc
Cut yarn leaving enough for sewing. Sew the ears to the head between R3-8. Now, you can sew the head to the body.
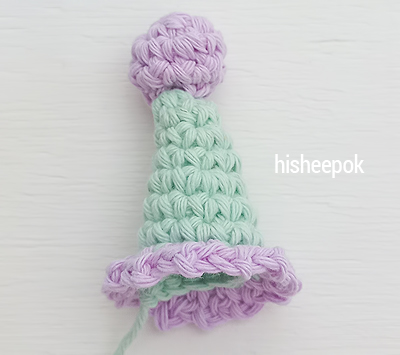
Hat Instructions:
With green:
- R1: 6 sc in mr
- R2: 6 sc [6]
- R3: *1 sc, sc inc* [9]
- R4: 9 sc [9]
- R5: *2 sc, sc inc* [12]
- R6-7: 12 sc [12]
Cut the yarn leaving some for sewing.
Ruffles Instructions
With lilac:
Work the ruffles on the front loop only on R7 of the hat. Join yarn on any loop to start.
- R1: 1 sc, 2 ch, (1 sc on next loop, 2 ch) repeat the parenthesis until you go all around and finish with a sl st to the first stitch.
Cut the yarn, secure and hide the ends from the ruffles.
Hat Ball Instructions
With lilac:
- R1: 5 sc in mr
- R2: *sc inc* [10]
- R3: 10 sc [10]
- R4: *sc dec* [5]
Cut yarn leaving some for sewing. Ensure your ball is stuffed nicely and then close the gap from the end.
Sew it to the top of the hat.
Now sew the hat to the head between the ears.
