How to Crochet a Frog Towel Holder: A Beginner's Guide

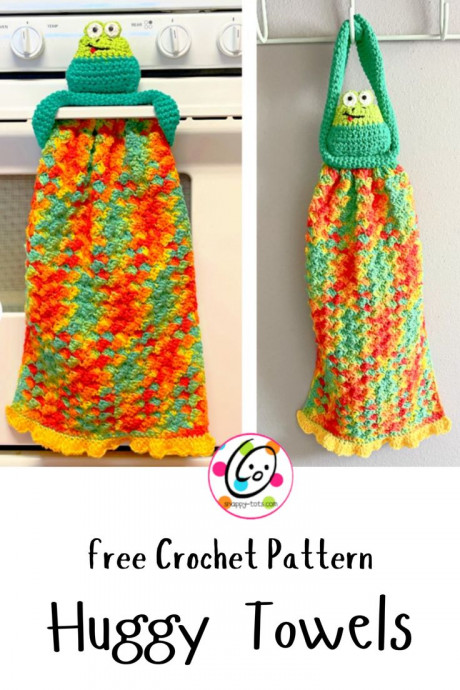
Crochet Huggy Towels are the ultimate cozy solution for post-bath snuggles! These adorable creations combine the practicality of a towel and the comfort of a hug, making drying off a delightful experience. Whether you prefer cute animal designs or vibrant patterns, there's a Crochet Huggy Towel to suit every style.
Not only are they perfect for kids, but they also make fantastic gifts for loved ones. Say goodbye to boring towels and hello to the warm embrace of a Crochet Huggy Towel!Materials Needed
Details and Measurements
Tips and Variations
- The first stitch of each row is worked into the same stitch as the turning chain.
- Note that numbers at the beginning of each line may refer to steps and might not indicate the number of rows.
- Instructions are written with color changes as shown in the main sample. You can substitute colors as desired.
- This could be made into other animals or a monster.
- For a “lovey” version, try using regular worsted weight yarn.
- If intended for children, please use safety eyes. Bernat Blanket yarn makes a cute, squishy soft version. Use an M/N (9mm) hook for a larger one: Towel: 17” across; Frog: 6” across x 8” tall.
Towel Instructions
- With an I hook and ww yarn, ch 41, sc in the 2nd ch from hook and in each ch across. (40 sts)
- Ch 1, turn, 3dc in the same st, *sk 2, (sc, 2dc) in the next st*, repeat until 2 sts remain, sk 1, sc in the last st. (40 sts)
- Repeat the previous row until the cloth is the desired length.
- Ch 1, turn, sc in each st to the end of the row. Finish off, leaving a long tail.

Frog Instructions

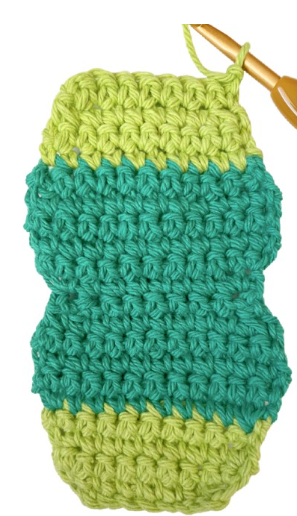
- With an I hook and lighter green yarn, ch 9, sc in the 2nd ch from hook and in each ch across. (8 sts)
- Ch 1, turn, 2sc in the same st, sc 6, 2sc in the last st. (10 sts)
- Ch 1, turn, sc in each st to end of row.
- Repeat step 3.
- Finish off the current yarn and change to a darker green. Ch 1, turn, 2sc in the same st, sc 8, 2sc in the last st. (12 sts)
- Ch 1, turn, sc in each st to end of row.
- Repeat step 6.
- Repeat step 6.
- Ch 1, turn, sc2tog, sc 8, sc2tog. (10 sts)
- Ch 1, turn, sc2tog, sc 6, sc2tog. (8 sts)
- Ch 1, turn, 2sc in the same st, sc 6, 2sc in the last st. (10 sts)
- Ch 1, turn, 2sc in the same st, sc 8, 2sc in the last st. (12 sts)
- Ch 1, turn, sc in each st to end of row.
- Repeat step 13.
- Repeat step 13.
- Ch 1, turn, sc2tog, sc 8, sc2tog. (10 sts)
- Finish off the current yarn and change to the lighter green. Ch 1, turn, sc in each st to end of row.
- Ch 1, turn, sc in each st to end of row.
- Ch 1, turn, sc2tog, sc 6, sc2tog. (8 sts)
- Ch 1, turn, sc in each st to end of row.
- Ch 1, turn, sc2tog, sc 4, sc2tog. (6 sts)
- This step is worked around the outer edge of the piece. Evenly space the stitches in the sections indicated.
- Do not turn. [Ch 1, sc in the same st, sc 3 sts down the side of the lighter green section.
- Finish off this color and change to the darker green. Work the following across the edge of the darker green section towards the center indent/1/2 way point: 2sc in the next spot, sc, 2sc in the next spot, sc 3.
- At this point, you should be at the center indent. Sc 3, 2sc in the next spot, sc, 2sc in the next spot.
- Finish off this color and change to the lighter green. Sc 4.]
- Work the following sts across the bottom edge. This will also create the base of the eyes. Ch 1, sc2tog, *(sl st, ch 2, 2dc) in the next st, (dc, ch 2, sl st) in the next st*, repeat once, sc2tog.
- Repeat the section between [ ] to work down the second long side of the piece.
- This step is worked across the last row. Sc2tog, sc 4, sc2tog. Finish off, leaving a long tail for sewing the edges.
Eyes: With an I hook and white yarn, create a magic circle of 5 sc sts (or preferred method of creating a circle of 5 sc sts), pull closed, and sl st to join. Finish off, leaving a yarn tail for sewing in place.
Arms Instructions
- With an I hook and green yarn, create a magic circle of 6 sc sts (or preferred method of creating a circle of 6 sc sts), pull closed and place a marker for working in the round. (6 sts)
- 2sc in each st to end of round. (12 sts)
- Sc in each st to end of round.
- *sc 2, 2sc in the next st*, repeat to end of round. (16 sts)
- Sc in each st to end of round. Repeat for rounds 6 to 9.
- Repeat
- Repeat
- Repeat
- Repeat
- *sc 6, sc2tog*, repeat once. (14 sts)
- Sc in each st to end of round.
- *sc 5, sc2tog*, repeat once. (12 sts)
- Sc in each st to end of round.
- *sc 4, sc2tog*, repeat once. (10 sts)
- Sc in each st to end of round.
- *sc 3, sc2tog*, repeat once. (8 sts)
- Sc in each st to the end of the round.
- Repeat for an additional 39 rounds.
- *sc 3, 2sc in the next st*, repeat once. (10 sts)
- Sc in each st to end of round.
- *sc 4, 2sc in the next st*, repeat once. (12 sts)
- Sc in each st to end of round.
- *sc 5, 2sc in the next st*, repeat once. (14 sts)
- Sc in each st to end of round.
- *sc 6, 2sc in the next st*, repeat once. (16 sts)
- Sc in each st to end of round.
- Repeat for an additional 4 rounds.
- *sc 2, sc2tog*, repeat once. (12 sts)
- Sc in each st to end of round.
- *sc2tog*, repeat to end of round. (6 sts) Finish off, leaving a long tail for finishing the end.
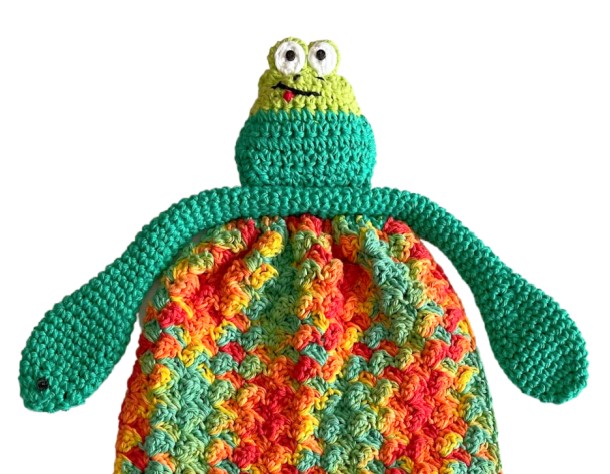
Flatten the arm piece and pin the middle of it to the middle of the top edge of the towel.

With a yarn needle and matching yarn, sew the top edge of the towel to the flat edge of the arm piece.

Arm Closure
To place this on a bar like on an oven, slip the towel behind the bar with the arms together in the front. Pull the towel through the arm piece circle and towards the front.
