Crochet Freak Pin Cushion Amigurumi Tutorial
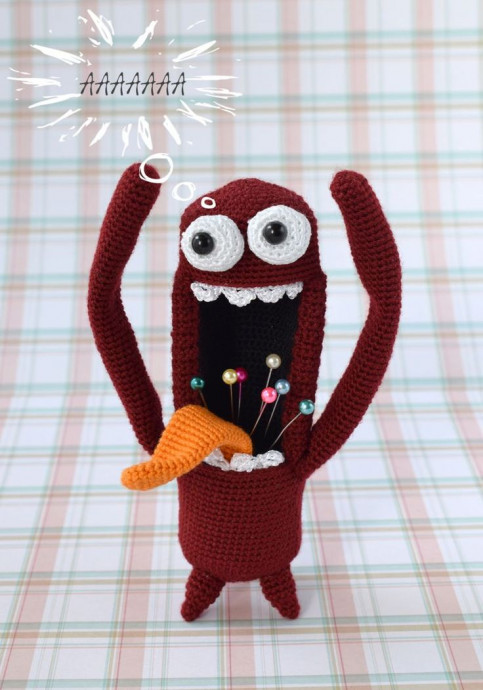
The Crochet Freak Pin Cushion Amigurumi is an absolute delight for any crochet enthusiast! This charming pin cushion not only adds a cute touch to your crafting space but also helps keep your pins organized and handy. With its quirky design and vibrant colors, this amigurumi will surely bring a smile to your face every time you reach for a pin.
Whether you're a seasoned crocheter or just starting out, this fun accessory is a must-have for your crafting collection. Get ready to add a pop of personality to your sewing projects with this adorable Crochet Freak Pin Cushion Amigurumi!Materials
- Alize forever 50 g/300 m cherry, black, white, orange colors.
- 1.25mm crochet hook
- A needle, a pair of scissors, hollow fiber stuffing, 2 half round flat back beads for eyes, transparent all-purpose glue, 0.8mm gauge and 46cm long wire, plastic Kinder Surprise shell, a rectangular piece of plastic sheet 10 x 6.5 cm.
Abbreviations
- ch – Chain
- sc – Single crochet
- dtr – Double Treble crochet
- inc – Increase
- dec – Decrease, two single crochets together
Lower Outer Part of the Body (Cherry Colour)
- Crochet 6 sc in a magic ring
- 6 inc = 12 sc
- (1 sc, 1 inc) х 6 = 18 sc
- (2 sc, 1 inc) х 6 = 24 sc
- (3 sc, 1 inc) х 6 = 30 sc
- (4 sc, 1 inc) х 6 = 36 sc
- (5 sc, 1 inc) х 6 = 42 sc
- (6 sc, 1 inc) х 6 = 48 sc
- (7 sc, 1 inc) х 6 = 54 sc
- 10 – 27: 54 sc
Bind off. Cut off any excess thread.
Lower Inner Part of the Body (Black Colour)
- Crochet 6 sc in a magic ring
- 6 inc = 12 sc
- (1 sc, 1 inc) х 6 = 18 sc
- (2 sc, 1 inc) х 6 = 24 sc
- (3 sc, 1 inc) х 6 = 30 sc
- (4 sc, 1 inc) х 6 = 36 sc
- (5 sc, 1 inc) х 6 = 42 sc
- (6 sc, 1 inc) х 6 = 48 sc
- 9 – 24: 48 sc
Bind off. Cut off any excess thread.
Upper Outer Part of the Body (Cherry Colour)
- Crochet 6 sc in a magic ring
- 6 inc = 12 sc
- (1 sc, 1 inc) х 6 = 18 sc
- (2 sc, 1 inc) х 6 = 24 sc
- (3 sc, 1 inc) х 6 = 30 sc
- (4 sc, 1 inc) х 6 = 36 sc
- (5 sc, 1 inc) х 6 = 42 sc
- (6 sc, 1 inc) х 6 = 48 sc
- (7 sc, 1 inc) х 6 = 54 sc
- 10 – 18: 54 sc
Bind off. Cut off any excess thread.
Upper Inner Part of the Body (Black Colour)
- Crochet 6 sc in a magic ring
- 6 inc = 12 sc
- (1 sc, 1 inc) х 6 = 18 sc
- (2 sc, 1 inc) х 6 = 24 sc
- (3 sc, 1 inc) х 6 = 30 sc
- (4 sc, 1 inc) х 6 = 36 sc
- (5 sc, 1 inc) х 6 = 42 sc
- (6 sc, 1 inc) х 6 = 48 sc
- 9 – 14: 48 sc
Bind off. Cut off any excess thread.
Body Rectangle
Outer Part (Cherry Colour)
- Ch 41. Starting from 2nd ch from the hook, crochet 40 sc, turn
- 2 – 26: 1 ch, 40 sc, turn
Bind off. Leave a small piece of thread for further sewing.
Inner Part (Black Colour)
- Ch 29. Starting from 2nd ch from the hook, crochet 28 sc, turn
- 2 – 26: 1 ch, 28 sc, turn
Bind off. Leave a small piece of thread for further sewing.
Eyes (White Colour) x 2
- Crochet 6 sc in a magic ring
- 6 inc = 12 sc
- (1 sc, 1 inc) х 6 = 18 sc
- (2 sc, 1 inc) х 6 = 24 sc
- 5, 6: 24 sc
- 7. (1 dec, 2 sc) х 6 = 18 sc
- 8. (1 dec, 1 sc) х 6 = 12 sc
Stuff lightly.
- 9. 6 dec = 6
Bind off. Leave a small piece of thread for further sewing.
Tongue (Orange Colour)
- Crochet 6 sc in a magic ring
- 6 inc = 12 sc
- (1 sc, 1 inc) х 6 = 18 sc
- 4 – 31: 18 sc
Bind off. Leave a small piece of thread for further sewing.
Arms (Cherry Colour) x 2
- Crochet 6 sc in a magic ring
- 6 inc = 12 sc
- (1 sc, 1 inc) х 6 = 18 sc
- 4 – 51: 18 sc
Bind off. Leave a small piece of thread for further sewing.
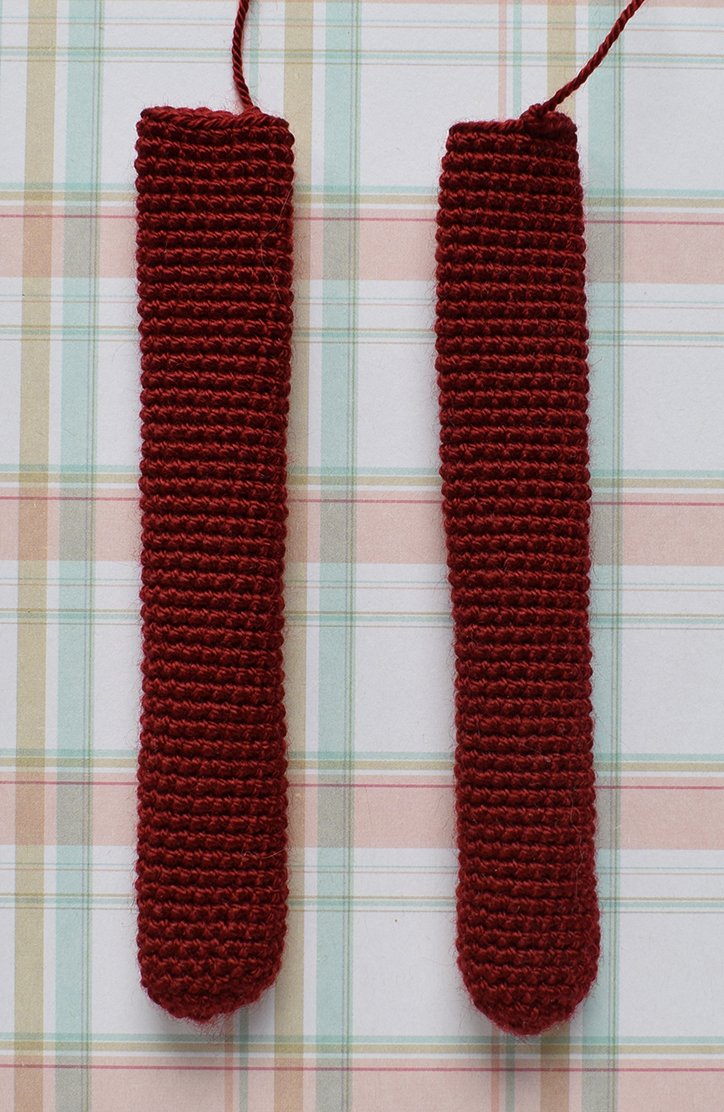
Legs (Cherry Colour) x 3
- Crochet 6 sc in a magic ring
- 2, 3: 6 sc
- 4: 6 inc = 12 sc
- 5 – 7: 12 sc
Stuff lightly. Bind off. Leave a small piece of thread for further sewing.
Teeth x 2 (White Colour)
4 ch, 3 dtr from 4th ch from the hook (5 ch, 3 dtr from 4th ch from the hook) х 3
Bind off. Leave a small piece of thread for further sewing.
Ball (Black Colour)
- Crochet 6 sc in a magic ring
- 6 inc = 12 sc
- (1 sc, 1 inc) х 6 = 18 sc
- (2 sc, 1 inc) х 6 = 24 sc
- (3 sc, 1 inc) х 6 = 30 sc
- (4 sc, 1 inc) х 6 = 36 sc
- (5 sc, 1 inc) х 6 = 42 sc
- 8 – 19: 42 sc
- 20. (1 dec, 5 sc) х 6 = 36
- 21. (1 dec, 4 sc) х 6 = 30
- 22. (1 dec, 3 sc) х 6 = 24
- 23. (1 dec, 2 sc) х 6 = 18
Stuff lightly.
- 24. (1 dec, 1 sc) х 6 = 12
- 25. 6 dec = 6
Stuff lightly. Bind off. Leave a small piece of thread for further sewing.
Assembly
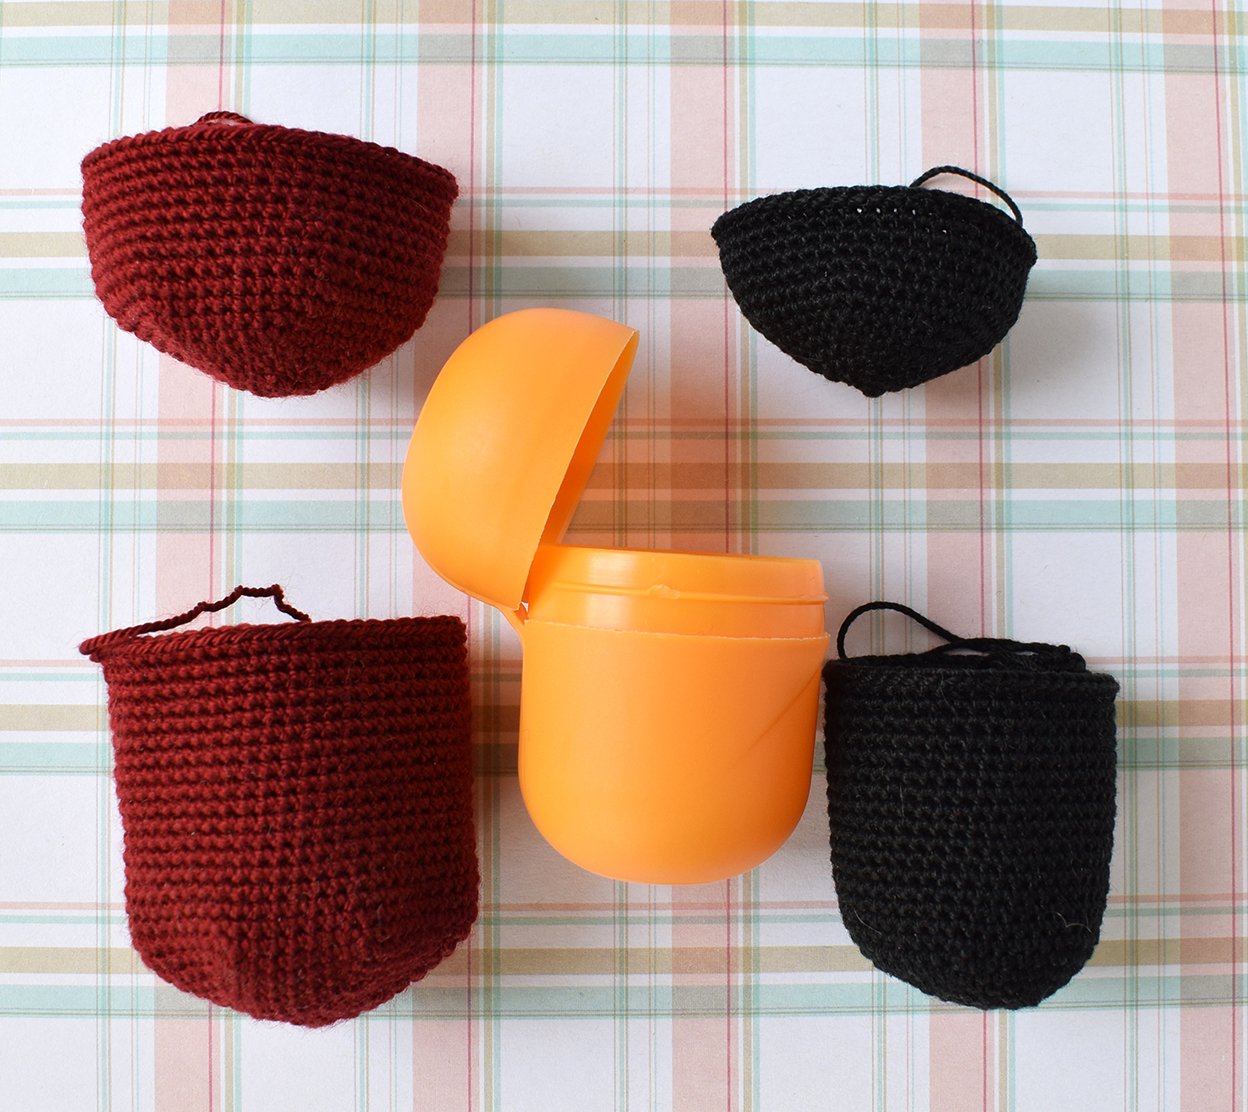
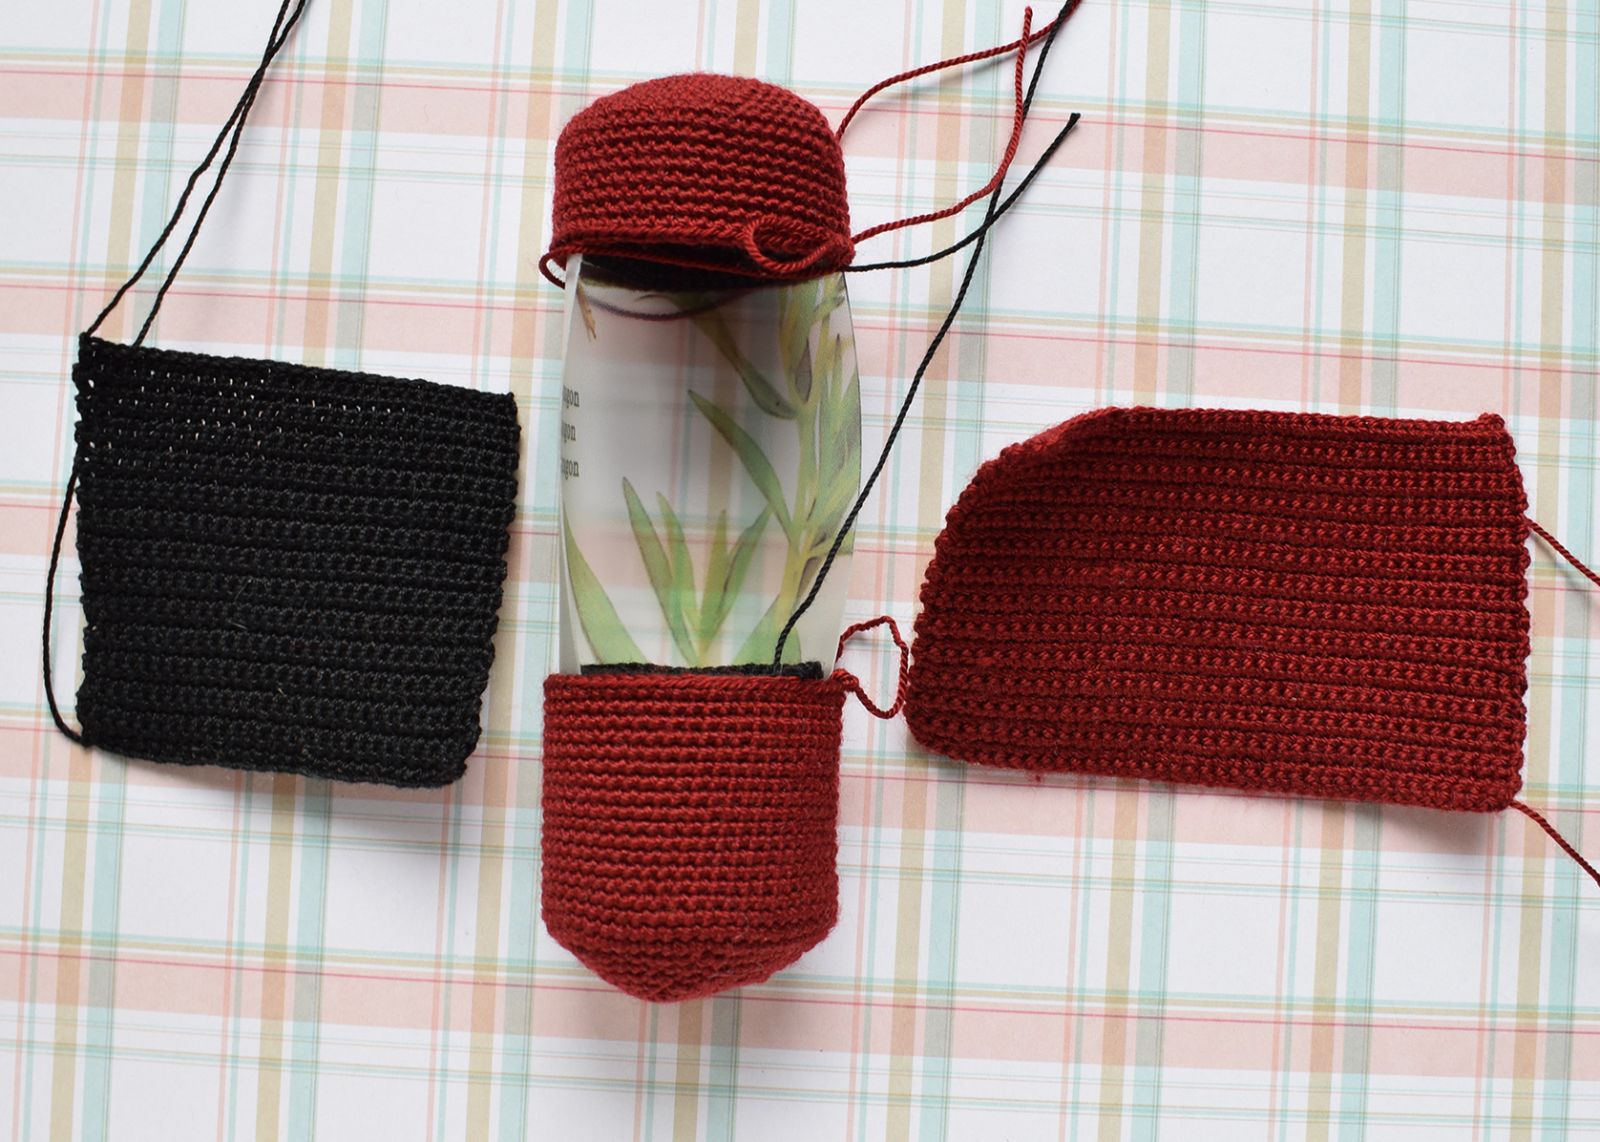
Take two Kinder Surprise plastic shell parts and insert them into the cherry colour parts (outer parts). Then insert black inner parts into the plastic parts as shown on the pictures.
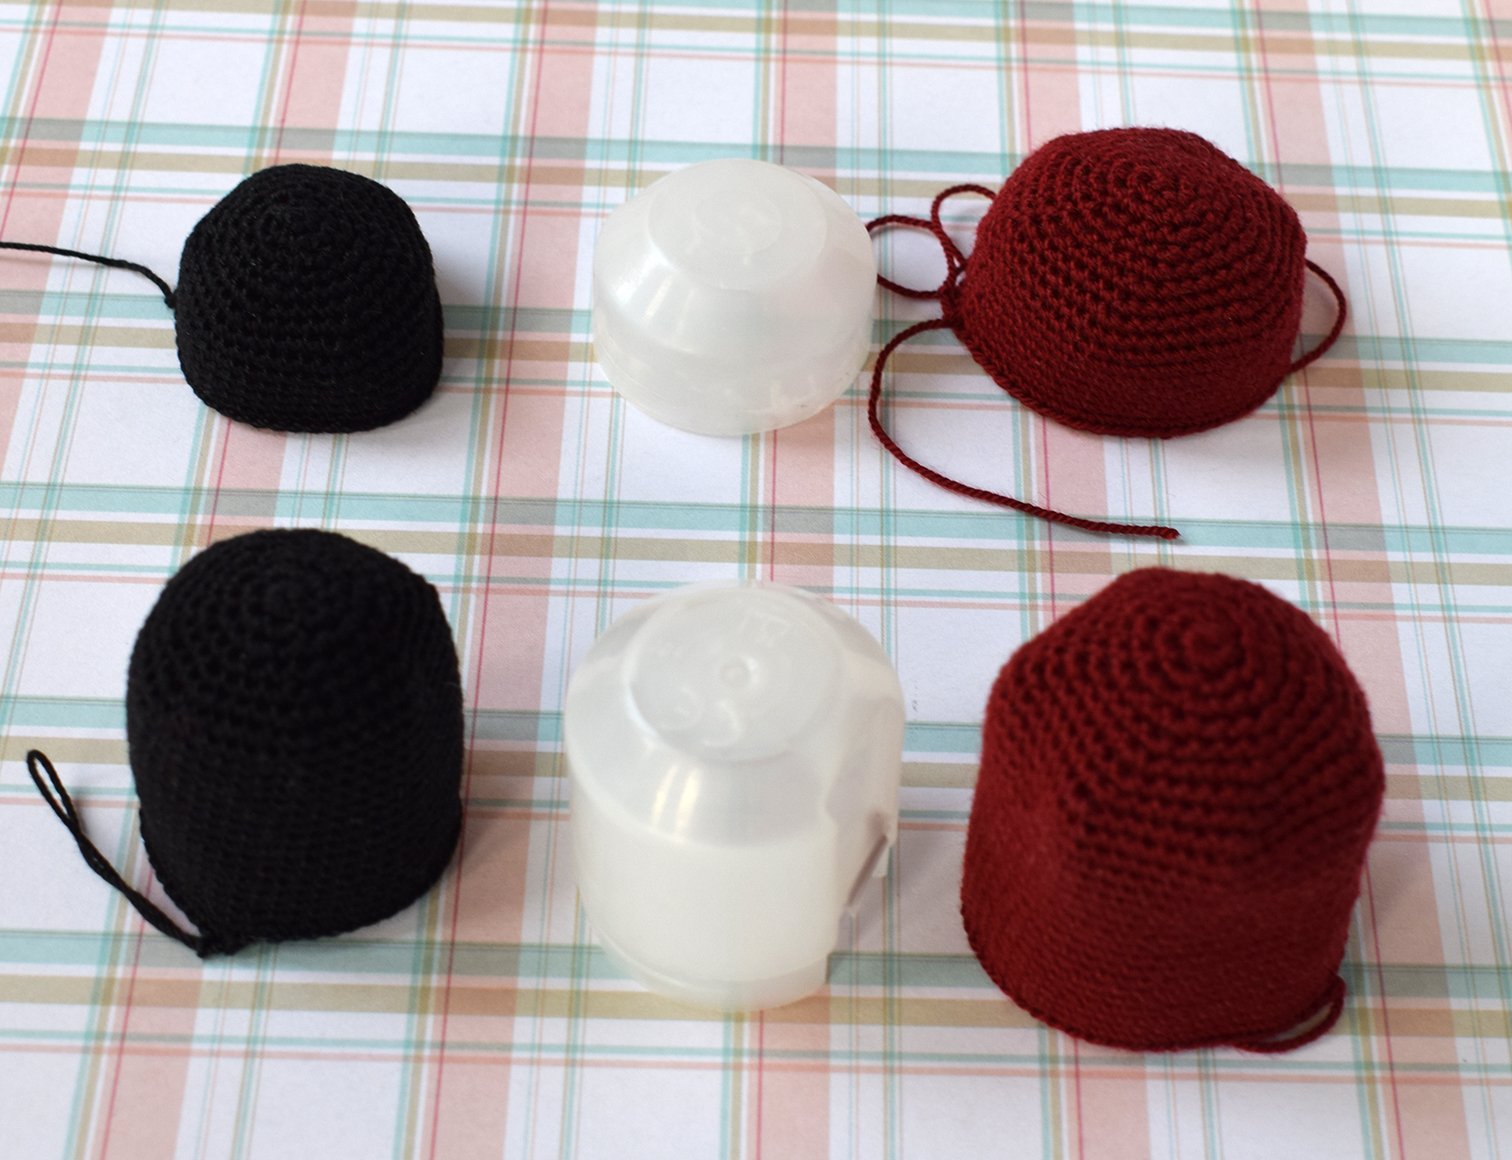
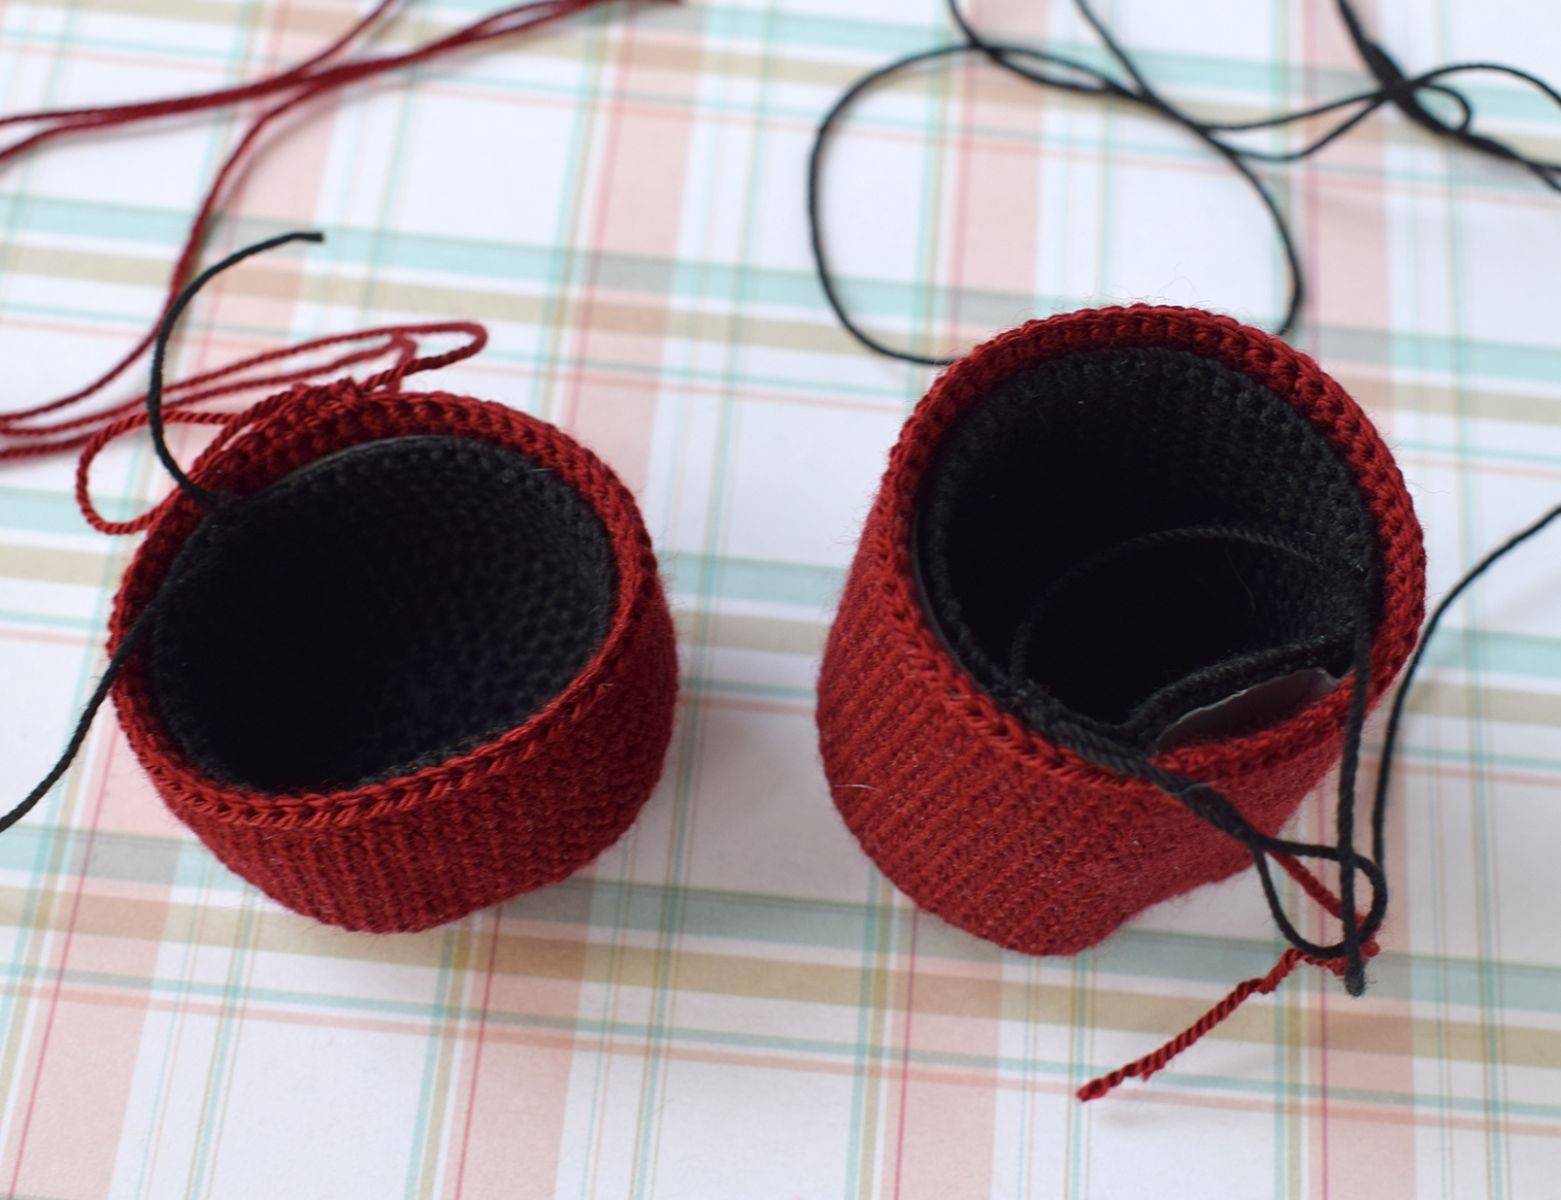
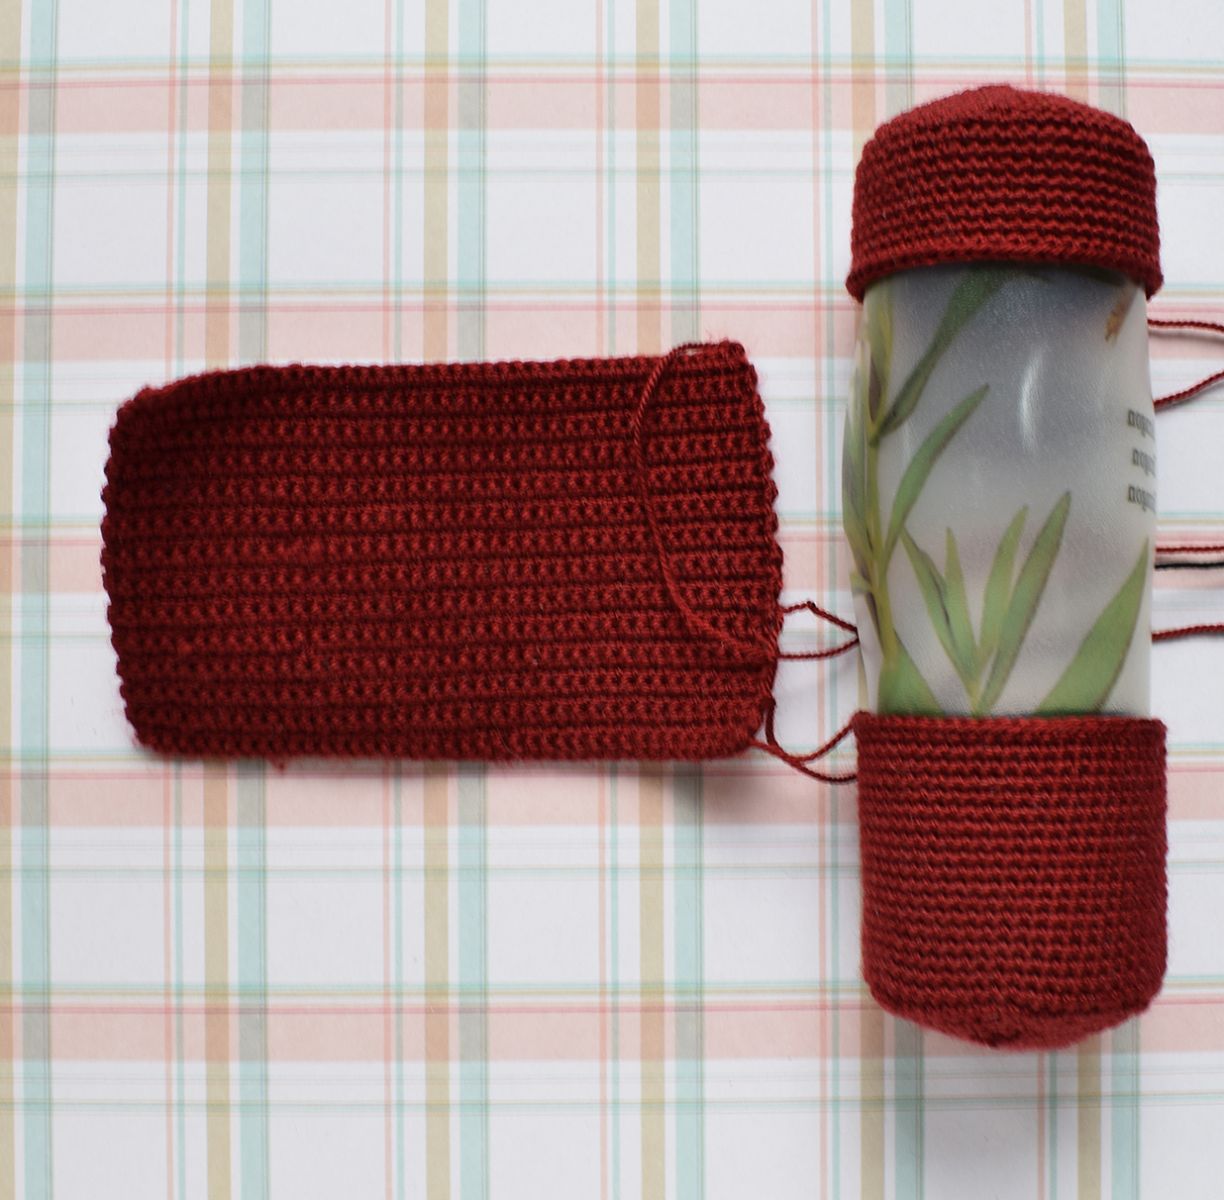
Insert the rectangular plastic sheet inside as shown.
Sew the black colour rectangular part onto the lower body part as shown in the picture.
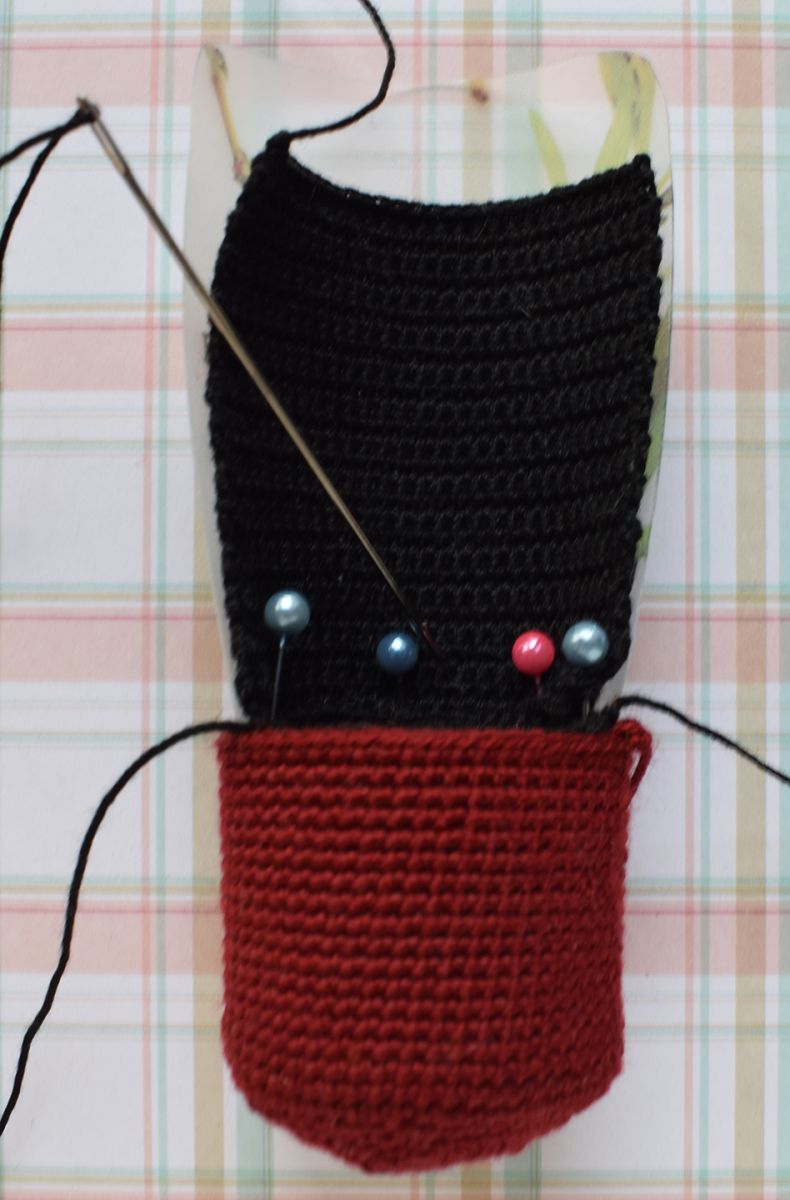
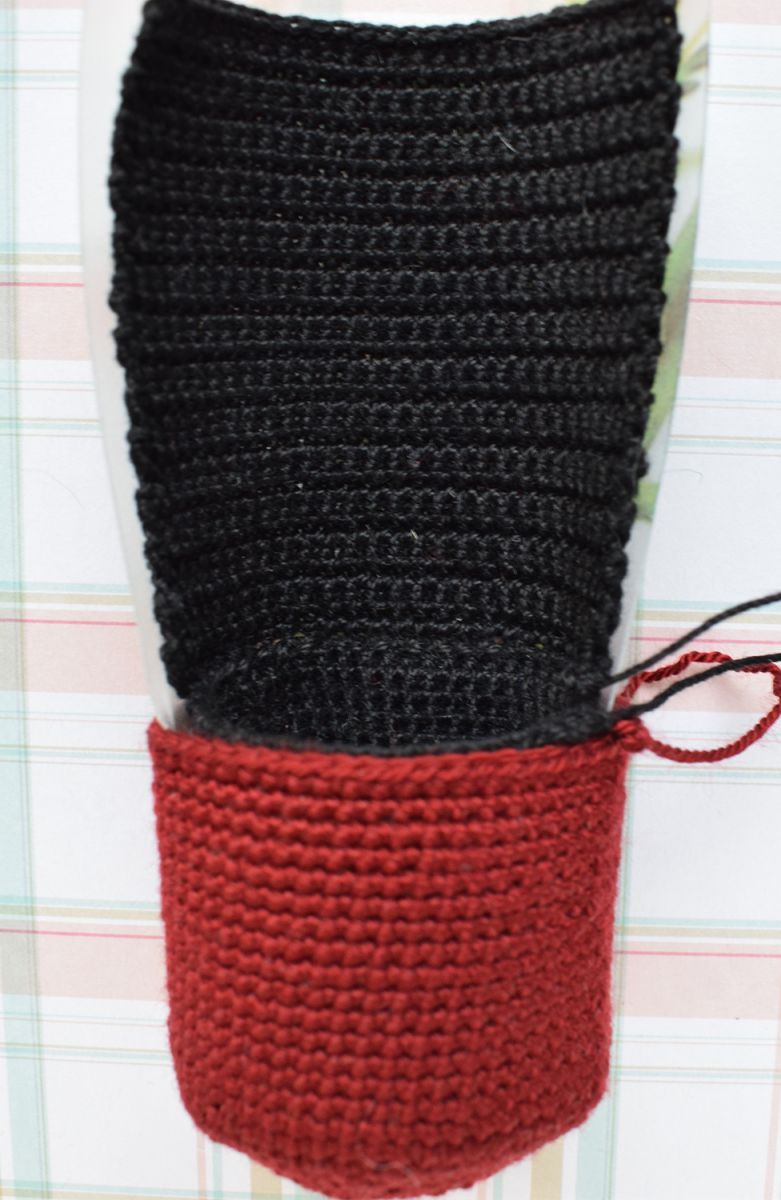
Sew the black color rectangular part onto the upper body part as shown in the picture.
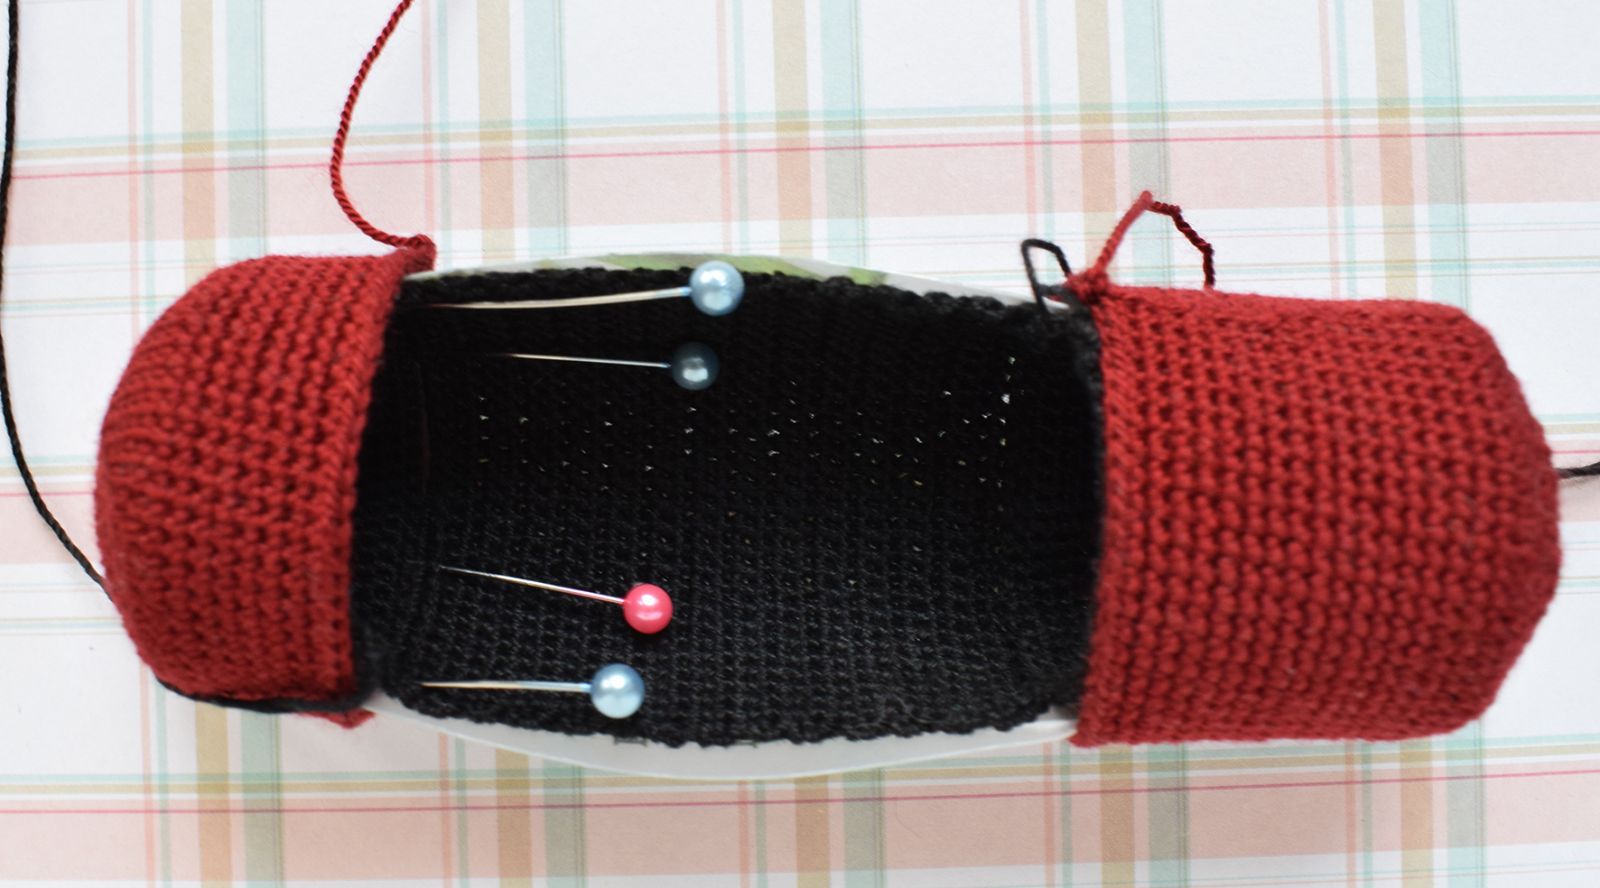
Take a cherry color rectangular part and place it on the outside. The plastic sheet is now hidden between the black and the cherry color rectangles. Sew the two rectangles together.
Attach and sew the cherry color rectangle to the upper part of the body.
Take a piece of wire and make a frame for the arms. Insert the frame as shown. The wire bit should fit into a hollow between the lower and upper parts of the body from outside. Try the cherry color arm parts on to ensure the wire frame sits comfortably and no excess bare wire bit is sticking out.
Attach and sew the bottom bit to the rectangular part as shown in the picture. The wire is now hidden inside.
Sew the arms onto the body.
Attach the legs to the bottom part and sew them on.
Sew the teeth on.
Sew the tongue on.
Sew the eyes on.
Glue the beads onto the whites of the eyes.
Place a black colour ball inside the mouth of your creature. You will use it to insert the pins in.
