CrochetMenScarvesHatsGlovesSweatersCardigansSocksOther clothingWomenScarvesHatsGlovesShawls and cover upSweatersCardigansSocksSlippersBagsOther clothingChildrenScarvesHatsGlovesSweatersCardigansSocksSlippersOther clothingHomeBlankets and plaidsRugsHome decorationsPetsSchemesKnittingOther hand-madeChat
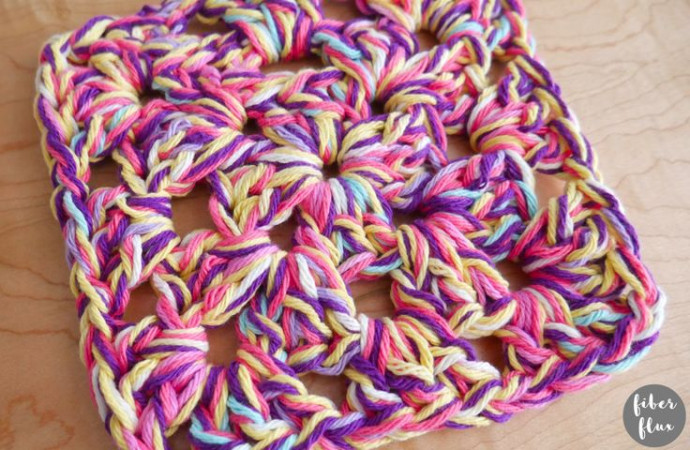
Crochet Granny Trivet

Looking to add some charm and functionality to your kitchen? Look no further than the Crochet Granny Trivet! This adorable and handmade trivet is not only practical for protecting your countertops from heat but also adds a touch of nostalgia and warmth to your living space. With its intricate crochet patterns and variety of colors to choose from, it's a delightful addition to any kitchen decor. Plus, the handmade touch makes it a unique and thoughtful gift for friends and family. So why not treat yourself to a little piece of handmade goodness with the Crochet Granny Trivet?
Materials:
- 10.0 mm crochet hook
- Several yards each of four colors of medium/#4 weight cotton dishcloth yarn (I held 4 strands of yarn throughout the whole trivet, 2 ounces total of yarn, a half ounce per color)
- Yarn/tapestry needle
- Scissors
- Measuring Tape
Sizing:
- 7 inches wide
- 7 inches tall
Pattern Notes:
- To make your trivet larger, repeat round three as many times as you like!
- Try holding strands of yarn in different color combinations for a variety of looks, the possibilities are endless!
30 Minute Granny Trivet Pattern:
- Note: if you want to change colors at each round, simply fasten off and tie a new color on into any corner space. To keep the same color, slip stitch over to the first corner space you come to.
- Chain 4, join into the furthest chain from the hook with a slip stitch.
- Round 1: Chain 3, work (2 dc into center of ring, chain 1) then work (3 dc, ch 1) three times. Join to close with a slip stitch in the topmost chain.
- Round 2: Chain 3 (counts as a dc), then in the same space, work (2 dc, ch 2, 3 dc, ch 1). *Work (3 dc, ch 1, 3 dc, ch 1) into the next ch 1 space. Repeat from * two more times. Join to close with a slip stitch in the topmost chain.
- Round 3: Chain 3 (counts as a dc), then in the same space, work (2 dc, ch 2, 3 dc, ch 1). *Work (3 dc, ch 1) into the next ch 1 side space. Then work (3 dc, ch 2, 3 dc, ch 1) into the ch 1 corner space. Repeat from * two more times. Work the last side of the square by working (3 dc, ch 1) into the ch 1 side space. Join to close with a slip stitch into the topmost chain.
Finishing:
- Weave in all of the ends and you’re done!
No comments
Write a comment
