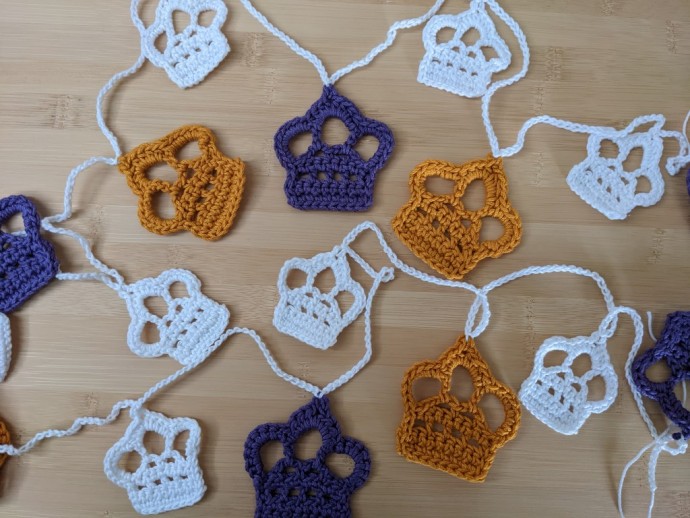
Crochet Crown Bunting

Crochet Crown Bunting is a charming and delightful addition to any celebration or nursery decor. This adorable craft combines the intricate art of crochet with the whimsical theme of crowns, creating a unique and eye-catching display. Whether you're planning a baby shower, birthday party, or simply sprucing up a room, this bunting adds a touch of royal elegance.
Crafting this piece is not only fun but also allows you to personalize the colors and sizes to suit your style. Imagine the joy it brings as it hangs proudly, adding a sprinkle of magic to any space. So, gather your yarn and hook, and let your creativity reign as you create your own Crochet Crown Bunting fit for a king or queen!To make the Jubilee Crochet Crown Bunting you will need:
- 3.00mm and 4.00mm crochet hook
- Lion Brand Cotton 24/7 in Purple and Goldenrod
- Scheepjes catona in Snow white
- Pair of scissors
- Darning needle
- Tape measure
Stitches used in the Crochet Crown Bunting pattern:
This is a beginner-friendly pattern so only four basic stitches are used: the single crochet, the half double crochet, the double crochet and the slip stitches.
The Crochet Crown Bunting pattern:
Step 1: Use the 3.00mm crochet hook with the Scheepjes catona yarn and the 4.00mm hook with the Lion Brad cotton yarn.
Step 2: Chain (CH 10). Make 1 single crochet (SC) in the second loop from hook. Make a total of 9 SCs. CH 1 and turn.
Step 3: Make 9 SCs and turn.
Step 4: Make 1 half double crochet (HDC), CH 1 and skip 1 stitch. Repeat a total of 4 times. Make 1 HDC. CH 1 and turn.
Step 5: Make 9 SCs and turn.
Step 6: Slip stitch into the first and second stitches. Make 1 SC and CH 3. Skip one stitch. Make 1 SC and CH 3. Skip one stitch. Then, make 1 SC and slip stitch into the last two.
Step 7: CH 7 and make 1 double crochet (DC) in the first CH 3 space. CH 6 and make 1 DC in the second CH 3 space. CH 7 and slip stitch into the last slip stitch.
Step 8: In the first CH 7 space make 8 SCs. In the CH 6 space make 4 HDCS, CH 3 and slip stitch into the second CH and then make another 4 HDCs. In the second CH 7 space make 8 SCs.
Step 9: Without turning your piece, slip stitch into the side of your piece, adding one slip stitch per row. Slip stitch across your original CH 9 and then up the other side of your piece. Slip stitch into the first SC of the CH 7 space. Snip off your yarn.
Step 10: Weave in your ends. Repeat to make as many crown appliques as you want. For my bunting I made 7 crochet crown appliques in Lion Brand Cotton 24/7 and 6 in goldenrod. Using my 3.00 crochet hook and the Scheepjes catona Snow White yarn, I made 12 crown appliques.
Step 11: On an ironing board, place your appliques so that you are happy with their shape. Using the steam setting on your iron, press each of the appliques for a few seconds. Only use this method if you are working with cotton yarns, as the direct heat will burn an acrylic or other synthetic yarn.
Step 12: Decide how closely you want your crowns placed. I decided to start and end the bunting with a purple crown. Start by making CH 10 (2inches/5cm). Pick up your first crown and slip stitch into the top of your piece. I then decided to leave approx. 5.5 inches between each crown. Continue by making CH 30 between each crown. When slip stitching the rest of the crowns, make sure they are facing the same way by keeping the CH straight, without any twists. Finish the bunting by making CH 10. Snip off your yarn and weave in your ends.
