Crochet Two Strand I-Cord Shoelaces

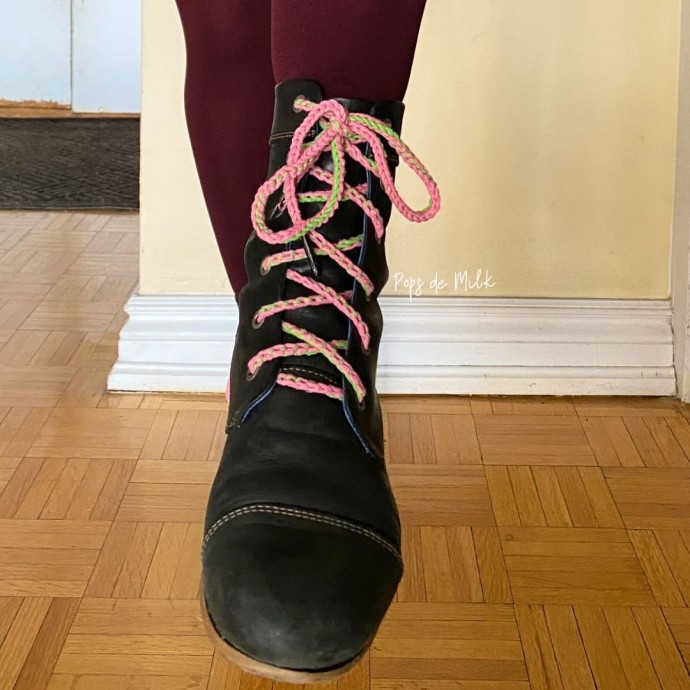
Looking to add a fun and creative touch to your footwear? Crocheting your own two-strand I-cord shoelaces is a fantastic way to customize your shoes! Not only does this project allow you to choose your favorite colors and patterns, but it also gives you the satisfaction of wearing something handmade. By using the crochet technique, you can easily create durable and unique shoelaces that will surely make your shoes stand out. Whether you're a crochet enthusiast looking for a new project or a beginner eager to try something new, making two-strand I-cord shoelaces is a delightful and rewarding craft that will add a charming flair to your everyday style. Try it out and step into a world of handmade creativity!
Materials
To make these shoelaces, you'll need the following materials:
- Worsted weight cotton yarn (in your desired color combination)
- 3.25mm crochet hook
- Shoelace aglets (I purchased mine from Amazon)
- Pliers (to attach the lace tips to the crochet cords)
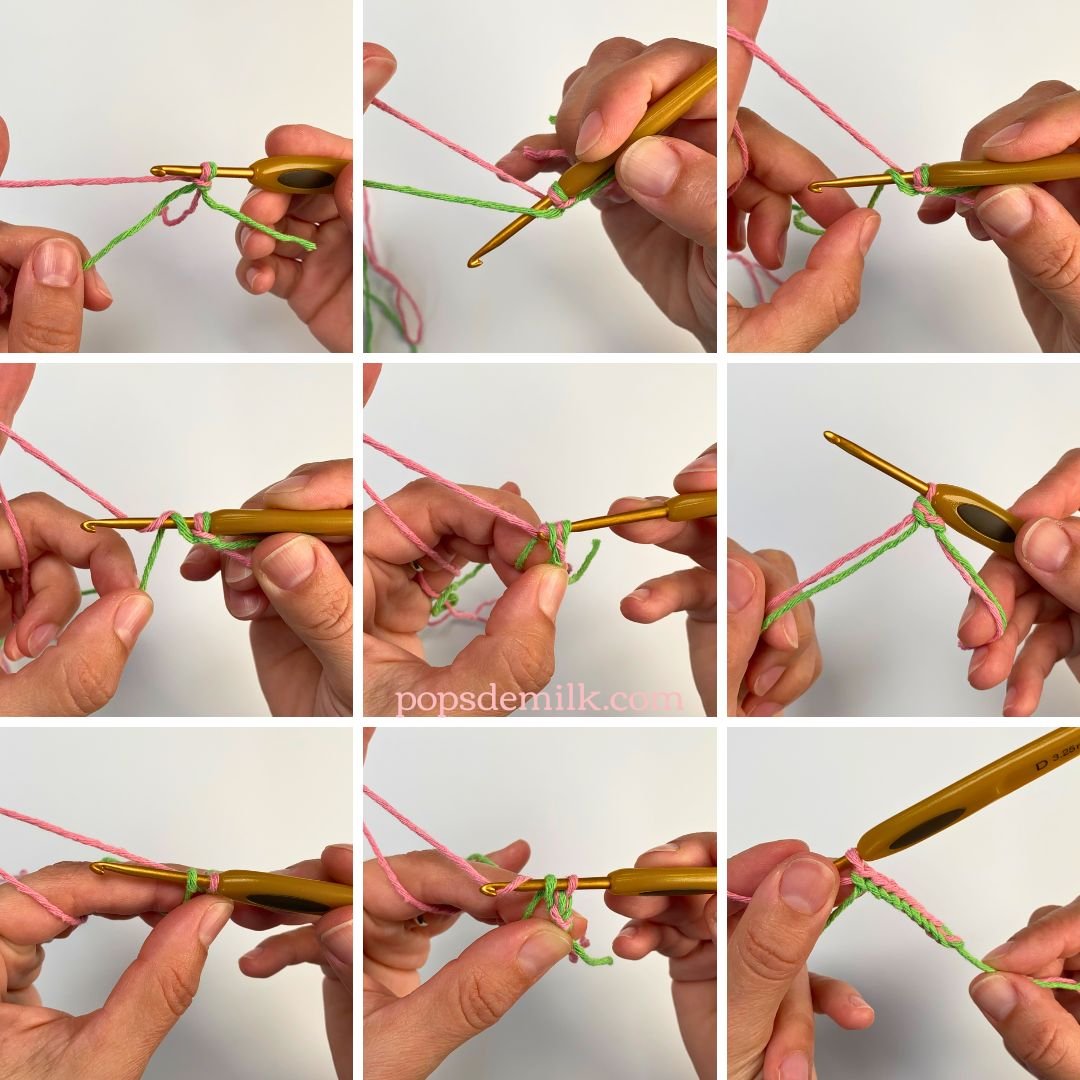
Start by choosing two colors of yarn or use two strands of the same color. In my case, I chose pink and green. The two-strand crochet technique involves holding two strands of yarn together. Here’s how to crochet the two-strand i-cord:
- Decide which strand will be color A (top strand) and which will be color B (bottom strand).
- Make a slip knot with both strands together.
- Hold the two strands together and insert your hook into the slip knot.
- Wrap color B (bottom) over the hook. There will be two loops on the hook; color B and the slip knot loop.
- Wrap color A (top) over the hook and pull through the two loops. That's your first stitch!
- Repeat steps 4 and 5 until you reach your desired length. Cut the yarn and tie a knot to secure the cord.
Note: Make sure to keep the tension consistent between the two strands to ensure that your cord is even and consistent throughout.

Finishing Touches
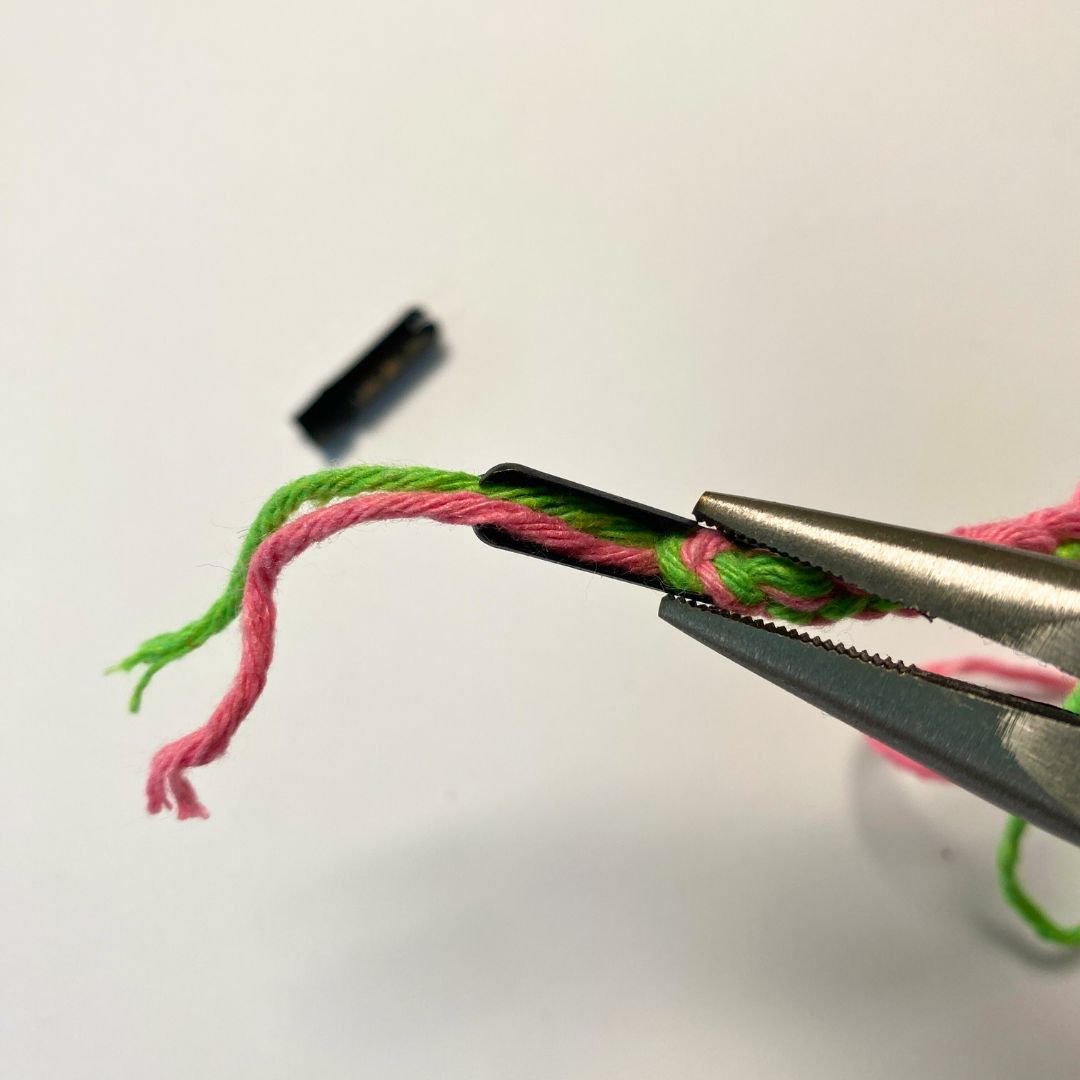
Once you've completed your cords, it's time to add the shoelace aglets. Using pliers, attach the aglets to each end of the cord. Snip off any excess yarn. And there you have it - a pair of handmade shoelaces that are unique and stylish!
If you find that the aglets don’t quite fit throug the holes in your shoes or boots you can use the pliers to make them smaller and easier to thread through the holes.

