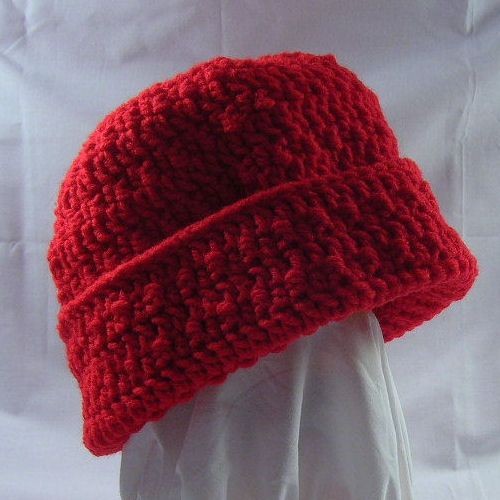
Crochet Thermal Stitch Adult Hat

Crocheting a Thermal Stitch Adult Hat can be a fun and rewarding project to take on! This versatile stitch not only creates a cozy and warm fabric perfect for winter accessories but also adds a lovely textured look to your hat. Whether you are a beginner or a seasoned crocheter, this hat pattern provides a great opportunity to practice your skills and create something stylish and practical for yourself or as a thoughtful gift for a loved one.
Embrace the soothing rhythm of crocheting this hat and enjoy the creative process as you see your project come to life stitch by stitch. Get your favorite yarn colors ready and let's craft a trendy and comfy accessory that will keep you warm in style!Materials Needed
3oz Worsted weight acrylic yarn in color of choice
Size 8/H or 5mm aluminum crochet hook
Yarn needle for weaving in ends
Yarn Thickness: 4mm
Gauge: 4dc = 1"
Finished Size: Fits an average adult size head
Skill Level: Beginner to Intermediate
Special Stitch:
Single Crochet front back bobble: (scfbb) Insert hook in back lp only of next st. yo, draw up a loop. You will now have 2 lps on hook. Yo, draw through one lp on hook. Now, insert hook in front lp of same stitch from the inside toward you, yo draw up a lp. You should now have 3 lps on hook. Yo and pull through all 3 lps on hook.
Instructions
RND 1: Ch4. Join w/slst to first ch to form ring. Ch3, 15dc in ring. Join w/slst to top of ch3.
RND 2: Ch2. Hdc in same st as slst. Scfbb in next st. *2hdc in next st. Scfbb in next st. Rep from * around. Join w/slst to top of ch2.
RND 3: Ch3. Dc in same st as slst. Dc in next st. *2dc in next st. Dc in next st. Rep from * around. Join w/slst to top of ch3.
RND 4: Ch2. Hdc in same st as slst. Scfbb in next st. *2hdc in next st. Scfbb in next st. Rep from * around. Join w/slst to top of ch2.
RND 5: Ch3. Dc in next st. 2dc in next st. *Dc in each of the next 2 sts. 2dc in next st. Rep from * around. Join w/slst to top of ch3.
RND 6: Ch2. Scfbb in next st. *Hdc in next st. Scfbb in next st. Rep from * around. Join w/slst to top of ch2.
RND 7: Ch3. Dc in each st around. Join w/slst to top of ch3.
RND 8-15: Rep RNDs 6 & 7 consecutively 3 times more. At the end of RND 15, ch2, turn. So you will work the opposite way to form the cuff.
Cuff:
RND 16-21: Repeat RND 6 & 7 consecutively 3 times.
RND 22: Slst in each st around. Join w/slst to first slst. Fasten off and weave all ends into back of work.
