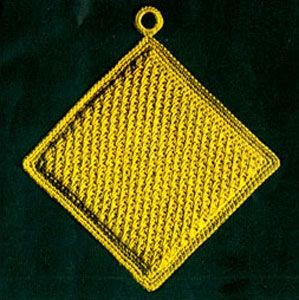
Crochet Square Pot Holder

Crochet square pot holders are not just practical kitchen accessories; they are an excellent way to add a touch of charm and warmth to your cooking space! With their unique designs and vibrant colors, these pot holders can brighten up any kitchen while serving a functional purpose of protecting your hands from hot pots and pans.
Whether you prefer a classic granny square pattern or a more intricate design, crocheting your own pot holder allows you to showcase your creativity and personalize your kitchen decor. So why not grab your crochet hook and yarn, and create a cozy and stylish addition to your culinary arsenal!COATS & CLARK'S O.N.T. "SPEED-CRO-SHEEN" MERCERIZED COTTON, Art. C.44: 2 balls of No. 10-A Canary Yellow.
Milwards Steel Crochet Hook No. 2/0 (double zero).
A bone ring.
GAUGE: 5 sts make 1 inch; 5 rows make 1 inch.
Starting at bottom, make a chain 7 inches long. 1st row: Sc in 2nd ch from hook, sc in each ch across until row measures 6 inches, having an uneven number of sc. Cut off remaining chain. Ch 1, turn. 2nd and 3rd rows: Sc in each sc across. Ch 1, turn. 4th row: Sc in first sc, * insert hook in base of next sc 2 rows below and draw loop through to height of row in work, thread over and draw through both loops on hook (long sc made), sc in next sc. Repeat from * across. Ch 1, turn. 5th row: Sc in each st across. Ch 1, turn. 6th row: Make a long sc in first sc 2 rows below, * sc in next sc, make a long sc in next sc. Repeat from * across. Ch 1, turn. 7th row: Repeat 5th row. Repeat 4th to 7th rows incl until piece is square, ending with 4th row. Break off. Make another piece the same way.
BORDER … 1st rnd: With wrong sides facing and working through both thicknesses, attach thread to any corner, 3 sc in same place, sc closely around, making 3 sc in each corner. Join. 2nd and 3rd rnds: Sc in each sc around, making 3 sc in center sc of each corner. Join. Break off at end of 3rd rnd. Sc closely around bone ring. Sew in place.
