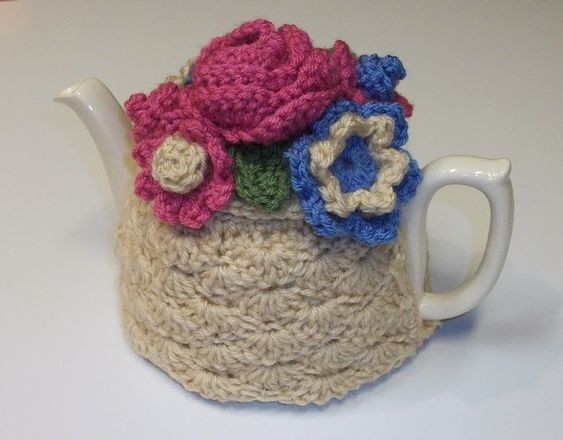
Looking to add a touch of coziness to your teatime ritual? The Crochet Shell Stitch Teapot Cozy is here to keep your teapot warm and stylish at the same time. With its intricate shell stitch pattern, this cozy exudes a charming and homey vibe that will make every tea-drinking experience more delightful.
Not only does it keep your tea piping hot, but it also adds a lovely decorative element to your kitchen decor. Whether you're a seasoned crocheter or just starting out, creating your own teapot cozy can be a fun and rewarding project. So why not grab your yarn and hook, and crochet yourself a cozy little companion for your teapot today!
Materials:Worsted Weight Yarn
Scraps of Yarn for Flowers & Leaves
Size G Crochet Hook
Tapestry Needle
Measure the base of your teapot on one side of the spout and handle. That will be the length of your starting chain. Chain however many you need to reach that length. You want your cozy to be tight and have to stretch slightly to fit. Err on the side of making the chain too short rather than too long. It will bunch up and look messy if you make the cozy too large. The below instructions are for a teapot that measures 8 inches on each side.
For Base (Make 2)
Ch 26
Row 1: Sc in 2nd ch from hook and in each stitch across to end, Ch 1; turn.
Row 2: Sc in same st, *sk 2 st, 5 dc in next st (shell made), sk 2 st, sc in next* repeat from * to * to end of row. Ch 3; turn.
Row 3: 2 dc in same space as ch 3, skip 2 dc and sc in top of next dc, *skip 2 st, 5 dc in sc of previous row, sk 2 st, sc in top of next dc * Repeat between *’s to end, 3 dc in last stitch, ch 1; turn.
Row 4: Sc in same stitch, skip 2 st, *5 dc in sc of previous row, sk 2 st, sc in top of next dc, sk 2 st* Repeat between *’s to end, sc in last stitch (top of ch 3 from previous row); ch 3; turn.
Repeat Rows 3 & 4 until piece is desired height, ending with Row 3. Fasten off and weave-in ends.
With wrong sides together, whip-stitch both pieces together on the sides to form a tube, leaving a small gap on one side for the spout and a larger gap on the other side for the handle.
Sc around the top opening of the cozy and also around the opening for the spout and the handle. This gives it a more finished and neat appearance.
Teapot Lid Cover
I crocheted a circle slightly larger than the teapot lid and attached it to the top edge of the cozy on one side with ten firm stitches to create a flap. Make flowers and leaves and sew onto the lid and/or body as desired.
Note: It’s much easier to crochet the flowers & leaves onto the circle first and then attach it to the top edge of the cozy.

