Crochet Little Frog Amigurumi

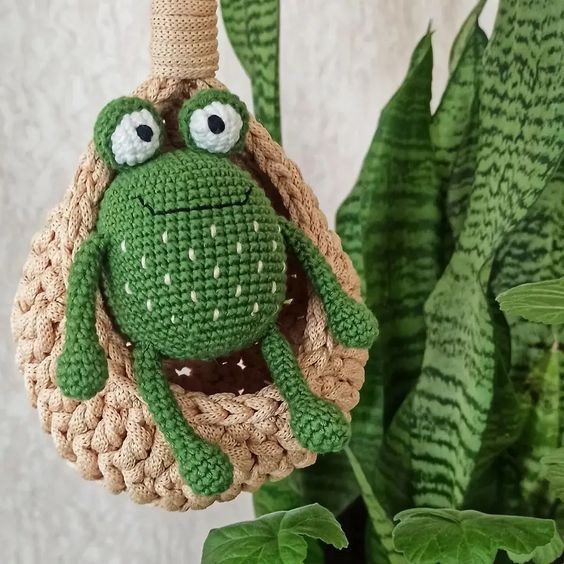
Crocheting a little frog amigurumi can be such a delightful and charming experience! With its cute, squishy body and adorable eyes, this little handmade creation is perfect for bringing a touch of whimsy to your space. Whether you are a beginner or an experienced crocheter, creating a tiny frog friend can be a fun and rewarding project.
You can personalize it with different colors or even add a tiny crown to turn it into a frog prince. The process of crocheting each little detail, from the frog's limbs to its smile, is not only relaxing but also allows you to unleash your creativity. Once your amigurumi frog is complete, it will surely bring a smile to your face and add a sprinkle of joy to your day. So grab your crochet hook and yarn, and let the magic of creating your own little froggy companion begin!Materials:
- YarnArt Jeans yarn (55% cotton, 45% acrylic, 50 g/160 m): green, white, milk/light yellow
- 2.0 mm crochet hook
- Black thread embroidery
- Sewing needle
- Scissors
- Sewing pins
- Fiberfill
Abbreviations:
R = row
mc = magic circle
ch = chain
sl st = slip stitch
sc = single crochet
inc = 2 sc in the next stitch
dec = single crochet 2 stitches together
F.o. = finish off
( ) = number of stitches you should have at the end of the round/row
( ) * 6 = repeat whatever is between the brackets the number of times stated
Free crochet frog pattern
Head-body (one piece)
R 1: 6 sc in mc (6)
R 2: (inc) * 6 (12)
R 3: (1 sc, inc) * 6 (18)
R 4: (2 sc, inc) * 6 (24)
R 5: (3 sc, inc) * 6 (30)
R 6: (4 sc, inc) * 6 (36)
R 7: (5 sc, inc) * 6 (42)
R 8: (6 sc, inc) * 6 (48)
R 9-22: 48 sc (14 rows)
R 23: (6 sc, dec) * 6 (42)
R 24: (5 sc, dec) * 6 (36)
R 25: (4 sc, dec) * 6 (30)
R 26: (3 sc, dec) * 6 (24)
Stuff with fiberfill.
R 27: (2 sc, dec) * 6 (18)
R 28: (1 sc, dec) * 6 (12)
R 29: (dec) * 6 (6)
Cut the yarn, leaving a long tail. Pull off the hole with needle.
Hide the end of yarn inside the body.
Paws (make 4)
R 1: 6 sc in mc (6)
R 2: (inc) * 6 (12)
R 3-5: 12 sc (3 rows)
R 6: (dec) * 6 (6)
R 7-16: 6 sc (10 rows)
Do not stuff the paw.
Fold top of paw flat and 3 sc through both sides across.
F.o. and leave a long tail for sewing.
Eyes
With white yarn (make 2):
R 1: 6 sc in mc (6)
R 2: (inc) * 6 (12)
R 3-5: 12 sc (3 rows)
Stuff with fiberfill.
R 6: (dec) * 6 (6)
Cut the yarn, leaving a long tail. Pull off the hole with needle.
Hide the end of yarn inside the body.
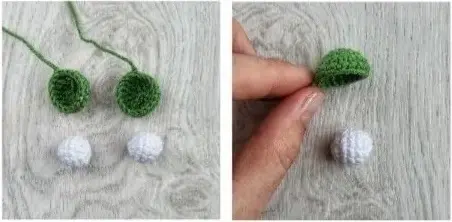
With green yarn (make 2):
R 1: 6 sc in mc (6)
R 2: (inc) * 6 (12)
R 3: (1 sc, inc) * 6 (18)
R 4-5: 18 sc (2 rows)
Sl st, leave a long tail for sewing.
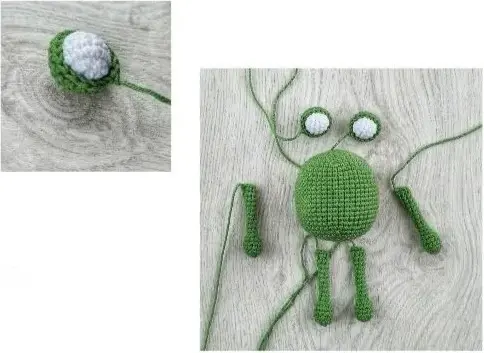
Insert the white detail in the green one and sew them together on the edge of the green circle.
Embroider pupils with a black thread.


Assembly
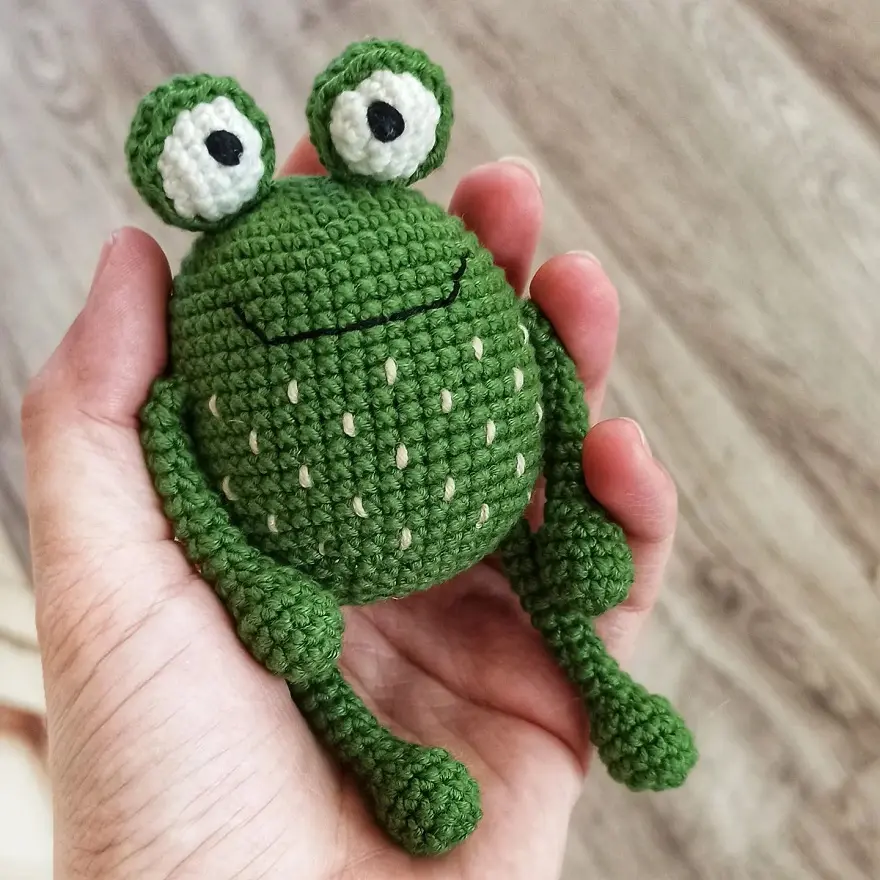
Sew the paws arms to the body between R 12 and R 13, the paws legs between R 23 and R 24.
Sew the eyes between R 3 and R 4. Use sewing pins to fix the eyes before sewing.
Embroider a smile on R 10 using a black thread.
Use a milk/light yellow yarn to embroider stitches on the body as in the photos.

