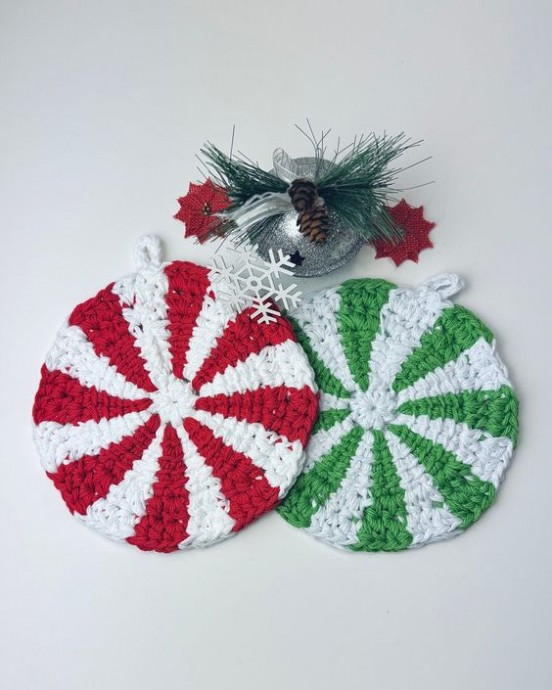
Crochet the Cutest Peppermint Hot Pad!

Crocheting the cutest peppermint hot pad can be a fun and rewarding project to add a touch of festive charm to your kitchen. With its vibrant red and white colors, it can brighten up your cooking space and protect your countertops from hot dishes. Whether you're a beginner or an experienced crocheter, this project offers a great opportunity to hone your skills and create something practical and adorable at the same time.
Imagine setting a steaming pot on your peppermint hot pad and adding a whimsical flair to your daily kitchen routine. So grab your yarn, crochet hook, and your favorite peppermint-inspired colors, and let's get creative together!What you will need for the Peppermint Hot Pad crochet pattern
- Worsted weight (#4) cotton yarn
- Main Color – White: 39 yds; Contrasting Color – Red or Green: 37 yds
- 8.00 mm (L) hook
- Yarn Needle
- Scissors
Pattern Notes
* Intermediate pattern
** Written in US crochet terms
* Finished size: 7.5″ across
** Gauge: Gauge: From center of hot pad to edge of Rnd 2 = 2.5″
* Chain stitch at the beginning of each round does not count as a stitch.
* Stitch count is only listed on each round when there is a change.
** I do not cut the yarn between color changes. For: Rnd 2, I work the stitches then drop the color that I’m not working with. I pick up the next color and continue. For Rnd 3, I work over the dropped yarn from the previous Rnd and carry the yarn between color changes. For Rnd 4, I carry the yarn.
* For Rnd 2, to change from contrasting color to main color complete the last st and then pull new color through loop. This is the ch 1 for this Rnd.
Stitch Key
ch = chain
hdc = half double crochet
LS = Link Stitch
MC = Magic Circle
rep = repeat
Rnd(s) = Round(s)
sc = single crochet
sk = skip
slst = slip stitch
st = stitch
YO = Yarn Over
Hot Pad Instructions
With Main Color (White).
Rnd 1:
leaving a 12” tail, hdc 9 times in MC, slst to join to 1st hdc. (9 hdc)
Rnd 2:
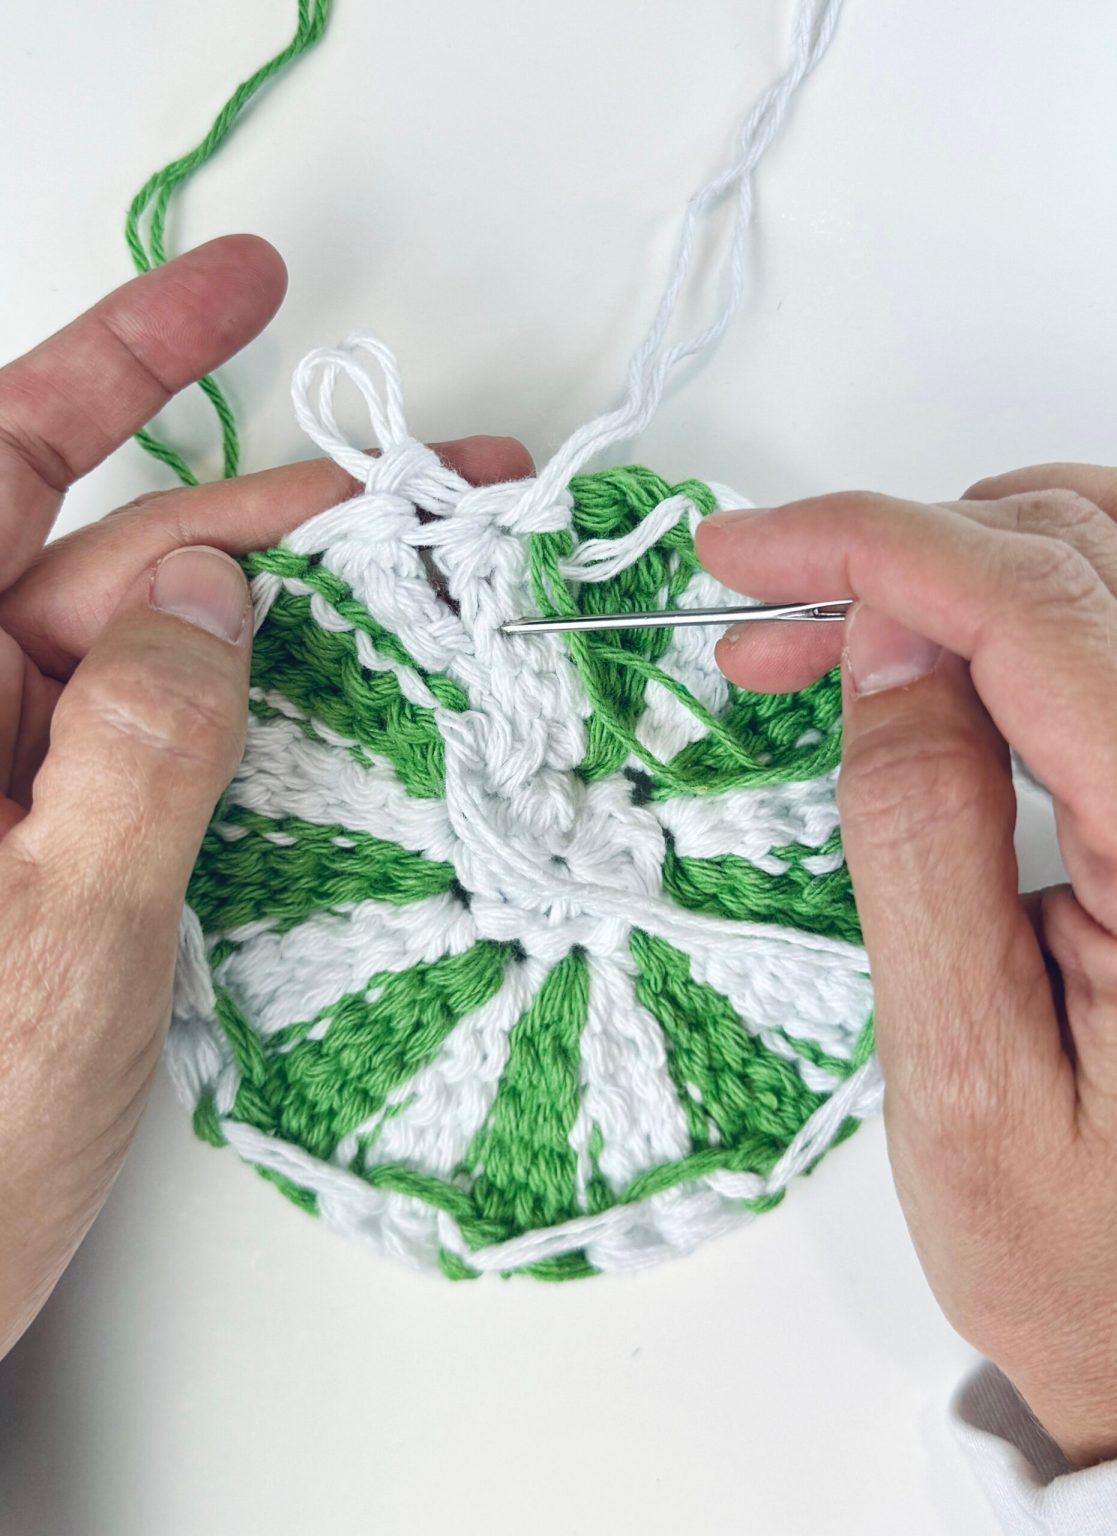
with Main Color, LS in 1st hdc. With Contrasting Color, 2 LS in the same hdc, ch 1, *with Main Color, 2 LS in next hdc, with Contrasting Color, 2 LS in same hdc, ch 1; rep from * around until one stitch remains, with Main Color, 1 LS in the last hdc, connect 1st LS to last LS. See photos and instructions below to connect. (32 Link Stitches)

Next, connect the last Link Stitch to the first Link Stitch
Slst to join to 1st LS, ch 1, put hook aside. To connect the LS gap, turn hot pad so that the back is facing you and, with beginning tail, whip stitch the gap closed using yarn needle, finish off.
Using crochet hook, insert in ch 1 and continue to Rnd 3.
Notes for Rnd 3:
- sk each ch-1 between LS from Rnd 2. After completing round 2 and connecting the 1st and last LS, make sure right side is facing you before beginning round 3.
- hdc over dropped yarn from Rnd 2 and carry yarn as you work around.
Rnd 3:
with Main Color, 2 hdc in 1st st, with Contrasting Color, hdc, 2 hdc in next st, sk ch st, *with Main Color, hdc, 2 hdc in next st, with Contrasting Color, hdc, 2 hdc in next st, sk ch st; rep from * around until last stitch, with Main Color, hdc, slst to join to 1st hdc, ch 1. (48 hdc)
Note for Rnd 4: carry yarn as you work around.
Rnd 4:
with Main Color, hdc in 1st st, 2 hdc in next st, with Contrasting Color, hdc in next 2, 2 hdc in next st, *with Main Color, hdc in next 2, 2 hdc in next st, with Contrasting Color, hdc in next 2, 2 hdc in next st; rep from * around until last st, with Main Color, hdc, slst to join to 1st hdc. Ch 6, slst in beg st. (64 hdc)
Finish off, weave in ends.

Just curious, what is your description of a «linked stitch» and how do you do it?? I know about linked double crochet but there is no hint of what you mean by linked stitch.
Hello 👋
LS tutorial :
up a loop (2 loops on hook), insert hook under 2nd horizontal bar and pull up a loop. Finally insert hook into st of previous rnd and pull up a loop (4 loops on hook).