Crochet Beautiful Pig


Crocheting a beautiful pig can be such a delightful and rewarding project! The soft yarn and gentle repetitive motions create a calming and cozy crafting experience. You'll enjoy watching your cute pig slowly come to life stitch by stitch, making it not only a fun activity but also a lovely piece of handmade decor or a thoughtful gift.
Get your crochet hook ready and prepare to embark on a creative journey filled with charm and sweetness!
Materials
- 1 skein of dark pink yarn
- black acrylic yarn
- 2 safety eyes (small)
- Stuffing (fibrefill or cotton)
Tools
- A crochet hook G/4mm
- Scissors
- Needle
- Stitch marker
Instructions
Head
- Round 1: 6 SC in the magic ring
- Round 2: 2 SC in each stitch (12)
- Round 3: * 1 SC, 1 INC, * repeat 6 times (18)
- Round 4: * 2 SC, 1 INC, * repeat 6 times (24)
- Round 5: * 3 SC, 1 INC, * repeat 6 times (30)
- Round 6: * 4 SC, 1 INC, * repeat 6 times (36)
- Round 7-12: 1 SC in each stitch (36)
Insert the eyes between rows 9-10 leaving 4 single crochet stitches in between the safety eyes
- Round 13: * 4 SC, 1 DEC, * repeat 6 times (30)
Round 14: * 3 SC, 1 DEC, * repeat 6 times (24)
Round 15: * 2 SC, 1 DEC, * repeat 6 times (18)
Round 16: * 1 SC, 1 DEC, * repeat 6 times (12)
Fill the head with toy stuffing but do not overstuff. It should not be poking through the stitches. You should still be able to squeeze the head
- Round 17: 6 DEC and fasten off the opening. Leave a long thread of yarn
Thread your yarn through the needle and sew the head closed. Leave a long string of yarn for attaching the head to the body later.
Body
- Round 1: 6 SC in magic ring (6)
- Round 2: 2 SC in each stitch (12)
- Round 3: * 1 SC, 1 INC * repeat 6 times (18)
- Round 4: * 2 SC, 1 INC * repeat 6 times (24)
- Round 5: * 1 INC, 11 SC, * repeat once (26)
- Round 6-7: 1 SC in each stitch (26)
- Round 8: * 11 SC, 1 DEC, * repeat once (24)
- Round 9: * 2 SC, 1 DEC, * 6 times (18)
- Round 10-12: 1 SC in each stitch (18)
- Round 13: * 1 SC, 1 DEC, * repeat 6 times (12)
- Round 14-15: 1 SC in each ST (12)
Stuff the body with fiberfill and fasten off.
Arms (Make 2)
- Round 1: 6 SC in magic ring (6)
- Round 2: * 1 SC, 1 INC * repeat 3 times (9)
- Round 3-4: 1 SC in each stitch (9)
- Round 5: 3 DEC, 3 SC (6) Stuff the arm with fiberfill till row 5
- Round 6-11: 1 SC in each stitch (6) for 5 rows
Fold the top opening flat and make 3 SC through both sides.
Fasten off, leaving a long tail for sewing.
Legs (Make 2)
- Round 1: 6 SC in magic ring (6)
- Round 2: 1 INC, repeat 6 times (12)
- Round 3-4: 1 SC in each stitch (12) for 2 rows
- Round 5: * 1 SC, 1 DEC * repeat 4 times (8)
- Round 6-10: 1 SC in each stitch (8) for 3 rows
Fold the top of the leg flat and make 4 SC through both sides across.
Ear (make 2)
- Round 1: 6 SC in magic ring (6)
- Round 2: 1 SC in each stitch (6)
- Round 3: * 1 SC, 1 INC, * repeat 3 times (9)
- Round 4: * 2 SC, 1 INC, * repeat 3 times (12)
- Round 5: * 1 SC, 1 INC, * rep 6 times (18)
- Round 6-8: 1 SC in each stitch (18)
- Round 9: * 1 DEC, * repeat 9 times (9)
Fasten off and leave a long thread of yarn so you can attach the ears to the head.
Tail
- Foundation: Chain 16 stitches
- Row 1: 16 SL ST
Fasten off and leave a long thread of yarn so you can attach it to the body
Snout
Work around the first round, meaning you work on both sides of the chain stitches.
- Round 1: Chain 4
- Round 2: * 1 INC, 2 SC, * repeat 2 times (8)
- Round 3: 1 SC, 1 INC, 3 SC, 1 INC, 3 SC, 1 SL ST (10)
Fasten off but leave a long thread of yarn to attach the snout to the head.
Assemble The Pig
- Attach the legs on the side of the body on row 5 of the bottom
- Attach the arm at the top of the body
- Then attach the head on top of the body
- Attach the ears at row 5 of the head
- Attach the tail at the back between the legs on row 5
- Use black yarn to create eyebrows
Notes
- Use the hook as mentioned on the yarn so you can work tight. This prevents holes between the stitches and will not show the stuffing
- It is recommended to use a stitch marker so you know where you are in the pattern
- You can use a crochet stitch marker, safety pin, bobby pin, or a piece of yarn as a stitch marker
- Test if the security eyes are attached securely and can't be pulled through the yarn
- Do not give this toy to really young children
- Recipes
-
 Cilantro Lime Rice
-
 Sweet Potato Soup with Roasted Cauliflower Crumbles
-
 Americano Cocktail
- Funny Pictures
-
 Funny Pics of the Day
-
 Funny Pics for Your Scrolling
-
 Some Pics to See When You’re Bored
- Crochet Ideas
-
 Crochet Crop Top
-
 Crochet Easter Sheep and Duck Egg Bags
-
 Crochet Summer Top
- Lifehacks
-
 How to Crochet the Plaid Stitch Photo Tutorial
-
 How To Crochet The 3-Colored Crosshatch Stitch Tutorial
-
 Flower With Stem Stitch Photo Tutorial
- DIY
-
 DIY Seashell Hair Pins
-
 Crochet Smiling Flowers
-
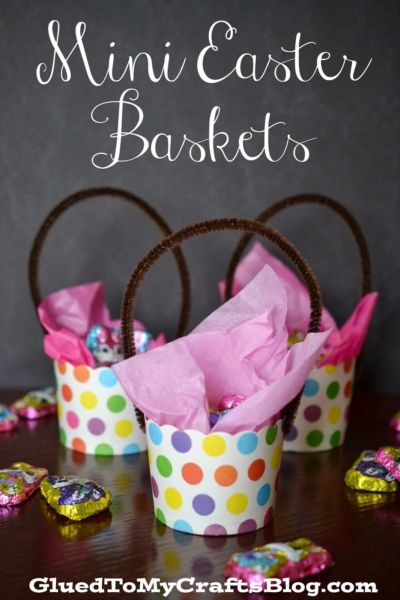 Paper Cup Mini Easter Basket Gifts
- Knitting Ideas
-
 Knitted Twist and Shout Hat
-
 Knitted Pom-Pom Booties
-
 Knitted Rabbit Dolls