Crochet Teeny Tiny Dachshund Amigurumi
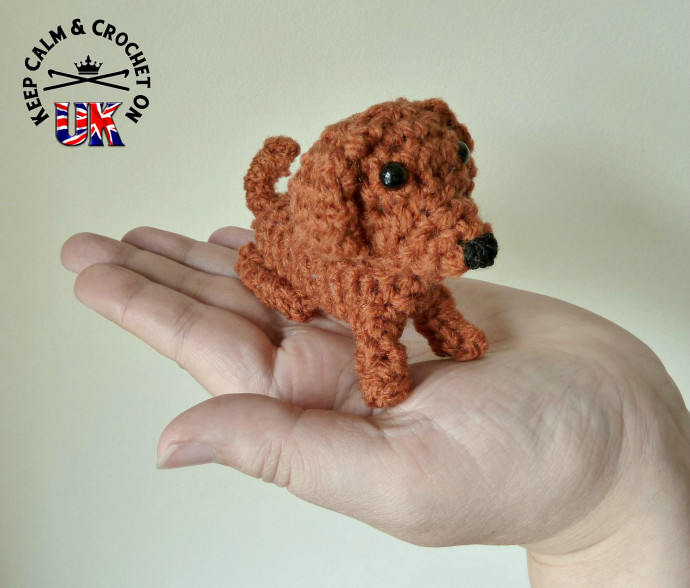
If you're looking to add a touch of cuteness to your collection, the Crochet Teeny Tiny Dachshund Amigurumi is an absolute must-have! This adorable little crochet creation is full of charm and personality, perfect for those who love both dachshunds and crafts. With its small size and intricate details, this amigurumi is sure to bring a smile to your face and warmth to your heart.
Materials Needed
Yarn:
- 8ply / yarn weight #3 or #4
- 5g of double knit yarn
- Black thread
Hook:
3.5 mm or 4 mm hook (US size E or G)
You Will Also Need:
- Yarn needle
- Stitch marker
- 2 x 6 mm black safety eyes (optional)
- Small amount of toy filling
- Small piece of felt (optional)
Gauge
4 dc/sc = 1 inch / 2.5 cm
These measurements are approximated, and actual subjects may vary. Pattern will work in other yarns though gauge/size will be different.
Abbreviations
- st(s) = stitch(es)
- sl st = slip stitch
- ch(s) = chain
- dc/sc = UK double / US single crochet
- inv.dc2tog/sc2tog = Invisible UK double crochet 2 sts together / Invisible US single crochet 2 sts together
Pattern Instructions
Working Without Joining
Place the stitch marker in the top of the first st to mark start of round.
Body:
Rnd 1: Ch 2 (does not count as first st), 6 dc/sc in beginning ch (6 sts).
Rnd 2: 1 dc/sc in next st, 1 dc/sc in same st then 2 dc/sc in each st around until you reach the st mrkr (12 sts).
Rnd 3: 1 dc/sc in next st, *2 dc/sc in next st, 1 dc/sc in next* repeat from * to * until the end of the rnd (18 sts).
Rnds 4 – 6: 1 dc/sc in each st around (18 sts).
Rnd 7: *1 dc/sc in the next st, 1 inv.dc2tog/sc2tog over next 2 sts* repeat from * to * until end of rnd (12 sts).
Rnds 8 – 12: 1 dc/sc in each st around (12 sts).
- Lightly stuff the body
Rnd 13: *1 dc/sc in the next st, 1 inv.dc2tog/sc2tog over next 2 sts* repeat from * to * until end of rnd (6 sts).
Rnd 14: *1 dc/sc in the next st, 1 inv.dc2tog/sc2tog over next 2 sts* repeat from * to * until end of rnd, sl st to top of the next dc/sc to join cut thread leaving a long tail (3 sts).
Rnd 15: With the tail end and using your yarn needle, sew the last 3 stitches together, finish off and weave in ends.
Head:
Rnd 1: Ch 2 (does not count as first st), 6 dc/sc in beginning ch (6 sts).
Rnd 2: 1 dc/sc in next st, 1 dc/sc in same st then 2 dc/sc in each st around until you reach the st mrkr (12 sts).
Rnd 3: 1 dc/sc in next st, *2 dc/sc in next st, 1 dc/sc in next 2 sts* repeat from * to * until the end of the rnd (18 sts).
Rnds 4 – 6: 1 dc/sc in each st around (18 sts).
- Add safety eyes between rows 3-4 or work two French knots with black yarn/thread.
Rnd 7: *1 inv.dc2tog/sc2tog over next 2 sts* repeat from * to * until end of rnd (12 sts).
- Lightly stuff the head.
Rnd 8: *1 inv.dc2tog/sc2tog over next 2 sts* repeat from * to * until end of rnd, sl st to top of the next dc/sc to join cut thread leaving a long tail (6 sts).
Muzzle:
Rnd 1: Ch 2 (does not count as first st), 6 dc/sc in beginning ch (6 sts).
Rnds 2 – 3: 1 dc/sc in each st around, sl st to top of the next dc/sc to join cut thread leaving a long tail (6 sts).
- With black thread, sew a nose onto the end of the muzzle, adding a small black line under the nose to represent a mouth.
- Stuff muzzle lightly and then sew muzzle onto the head.
Ears (Make 2):
Rnd 1: Ch 2 (does not count as first st), 5 dc/sc in beginning ch (5 sts).
Rnds 2 – 6: 1 dc/sc in each st around, sl st to top of the next dc/sc to join cut thread leaving a long tail (5 sts).
- Sew ears to each side of the head; you can tack the bottom of the ears to the neck if you wish them to lie flat.
- With the tail end of your head, sew the head to the larger end of your body.
Back Legs (Make 2):
- The legs are worked in rows rather than in the round.
Row 1: Ch 6, dc/sc in 2nd ch from hook and in the next 4 st, turn (5)
Row 2: Ch 1, dc/sc in same st as beginning 1 ch and in each st along until end, finish off but leave a long tail for sewing (5)
- Fold the leg in half and sew evenly together, taking care not to sew too tightly or the legs will curl.
- Sew your legs evenly onto the back end of the body of your dog for balance and so it appears he is sitting down.
Front Legs (Make 2):
- The legs are worked in rows rather than in the round.
Row 1: Ch 6, dc/sc in 2nd ch from hook and in the next 5 st, turn (5)
Row 2-3: Ch 1, dc/sc in same st as beginning 1 ch and in each st along until end, finish off but leave a long tail for sewing (5)
- Roll the leg up so it’s all together, then sew together to form a tube.
- Sew your legs onto the front end of the body of your dog for balance and so it appears he is sitting down.
Tail:
- The tail is worked in rows rather than in the round.
Row 1: Ch 6, dc/sc in 2nd ch from hook and in the next 4 st, turn (5)
Row 2: Ch 1, dc/sc in same st as beginning 1 ch and in each st along until end, finish off but leave a long tail for sewing (5)
- Fold the tail in half and sew evenly together, making it more tightly than the legs to create that curved tail.
- Sew the tail onto the back end of your dog's body.
Optional Accessories:
Using a small piece of felt, cut a small strip for a collar and sew onto the neck of your dachshund.

