Crochet Summer Nights Cardigan
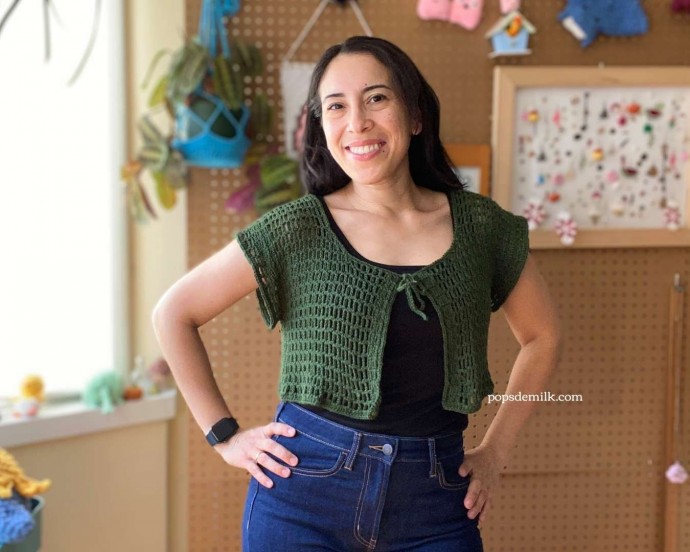
The Crochet Summer Nights Cardigan is the perfect addition to your wardrobe for those breezy summer evenings spent under the stars. This lightweight and stylish piece is sure to keep you cozy while adding a touch of bohemian charm to your outfit. The intricate crochet design is both trendy and timeless, making it a versatile choice for layering over a sundress or pairing with your favorite jeans.
Skill Level: Intermediate
Materials
- Black version: We Crochet Shine Sport Weight (2) in Black, approx. 200 grams/440 yards
- Green version: We Crochet Brava Sport Weight (2) in Dublin, approx. 140 grams/382 yards
- 3.50mm crochet hook
- Measuring tape
- Scissors
- Yarn needle
Abbreviations (US Terminology)
- ch: chain
- sc: single crochet
- sk: skip
- sp: space(s)
- hdc: half double crochet
- sl st: slip stitch
Gauge
15 hdc rows x 6 ch-3 sps = 4”
Pattern Notes
This cardigan is made up of 1 back panel and 2 front panels. The pattern is worked in rows from side to side, allowing for more flexibility in adjusting the width and length.
Front panels:
These panels are worked from side to side. You will start at the side edge and work towards the center opening.
Back panel:
The back panel is worked from side to side. You will start at one side edge and work across to the other.
Sleeves are added after joining seams.
A border is added along the front panels, neckline, and bottom hem.
Button loops or tie closures are created when adding the front panel border (see Finishing the cardigan).
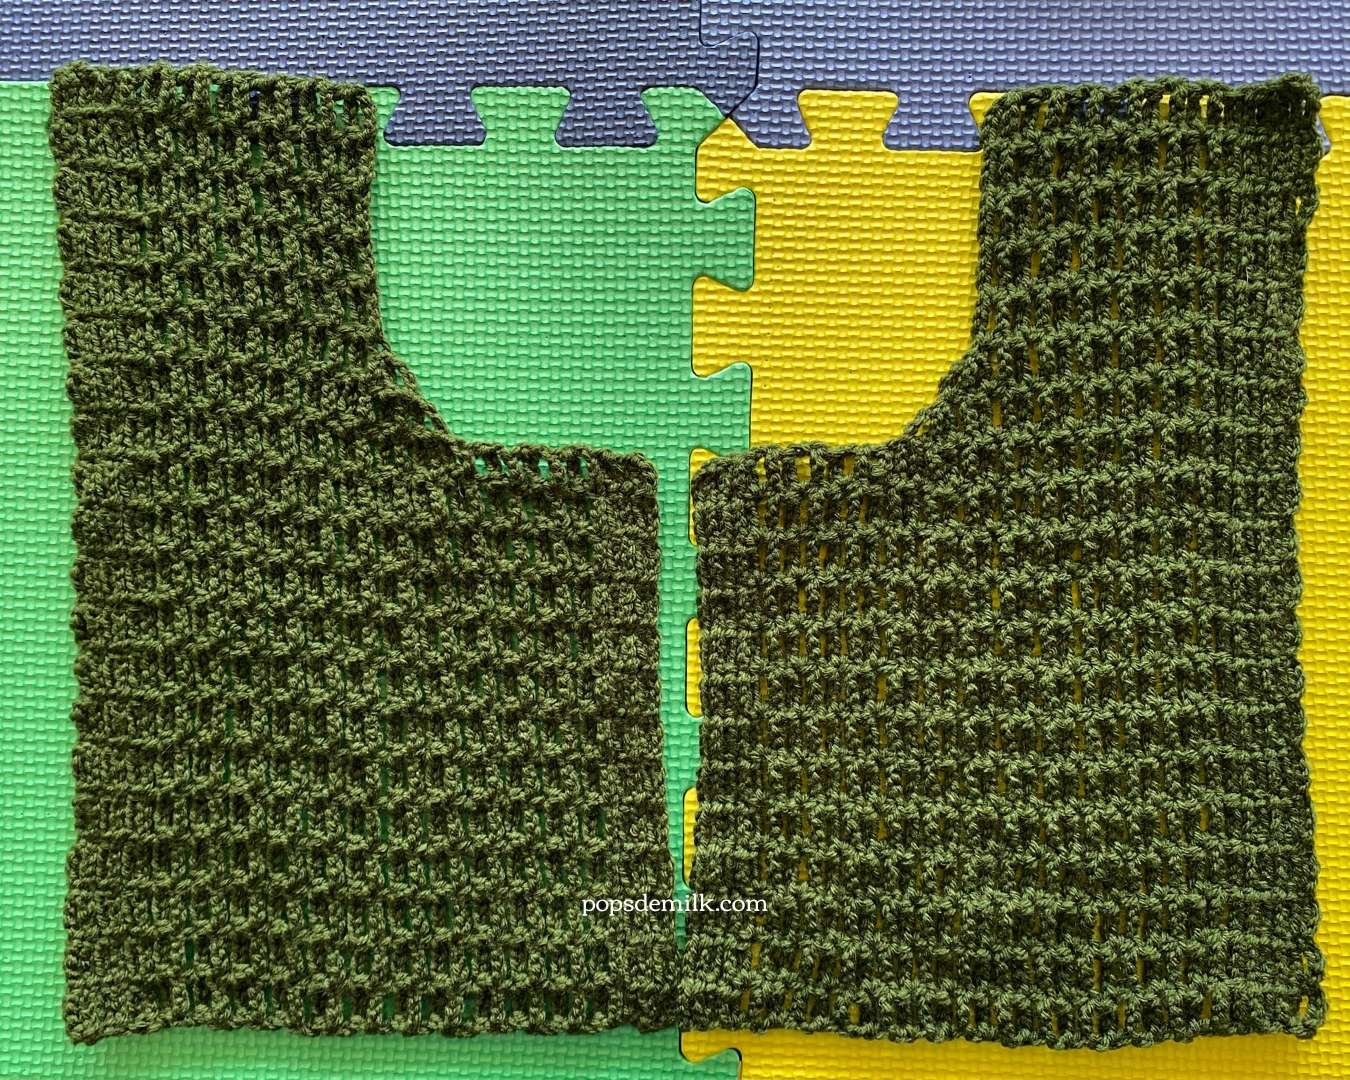
Two front panels after blocking
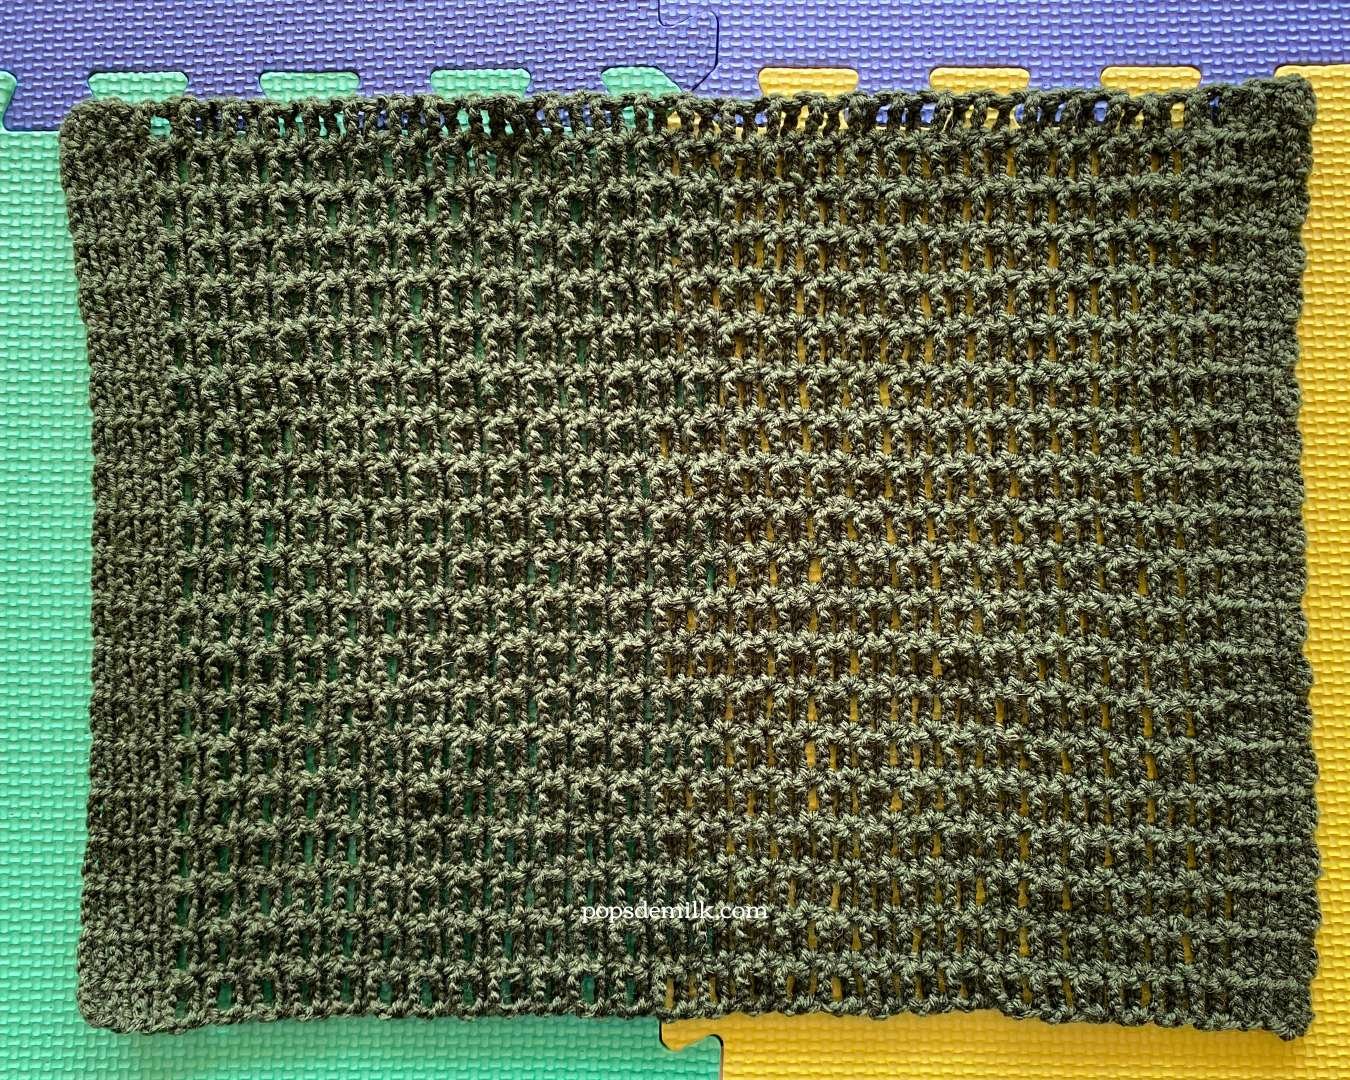
Back panel after blocking
Notes on sizing and measurements
This pattern is made to measure.
- Use a measuring tape to check your progress and ensure your cardigan is the right size.
- Measure yourself and compare to the panel dimensions regularly.
- Adjust the pattern for your specific measurements by adding or reducing rows and chains as needed. For example, if you have a longer torso, add more foundation chains to the front and back panels.
- Continuously measure your work against your body as you crochet to ensure a perfect fit.
- Make notes of any adjustments you make to the pattern for future reference.
Measurements for my cardigan:
Height: 15 inches from shoulder to bottom hem
Front panels width: 9 inches each
Back panel width: 18 inches
My bust is approximately 37 inches around and I wanted a loose fit so I aimed for around 40 inches or so.
Stitch Notes
Multiples of 4 + 1 (add 1 for foundation chain)
The starting chain counts as a stitch and 3 chains.
When ending rows, work the last stitch into the top of the turning chain.
Front Panels - make 2
Row 1: ch 82
Row 2: sc in 2nd ch from hook,* ch 3, sk 3, sc in next ch, repeat from * to end, turn (20 ch-3 sps)
Row 3: ch 4 (counts as 1 sc and 3 chs), * sk 3, sc in next st, ch 3, repeat from * to end, sc in last st, turn
Rows 4-6: Repeat Row 3
Row 7: ch 5 (counts as 1 hdc and 3 chs), * sk 3, hdc in next st, ch 3, repeat from * to end, turn
Rows 9-18: Repeat Row 7
Shape for Neckline
Row 19: ch 5 (counts as 1 hdc and 3 chs), sk 3, hdc in next st, * ch 3, sk 3, hdc in next st, repeat from * 13 times, ch 3, sk 3, sl st in next st, turn (15 ch-3 sps)
Row 20: ch 3, sk 3, hdc in next st, * ch 3, sk 3, hdc in next st, repeat from * to end, hdc in last st, turn
Row 21: ch 5 (counts as 1 hdc and 3 chs), sk 3, hdc in next st, * ch 3, sk 3, hdc in next st, repeat from * 12 times, ch 3, sk 3, sl st in next st, turn (14 ch-3 sps)
Row 22: ch 3, sk 3, hdc in next st, * ch 3, sk 3, hdc in next st, repeat from * to end, hdc in last st, turn
Row 23: ch 5 (counts as 1 hdc and 3 chs), sk 3, hdc in next st, * ch 3, sk 3, hdc in next st, repeat from * 11 times, ch 3, sk 3, sl st in ch-3 sp, turn (13 ch-3 sps)
Rows 24-30: ch 5 (counts as 1 hdc and 3 chs), * sk 3, hdc in next st, ch 3, repeat from * to end, hdc in last st, turn
Rows 31-34: ch 4 (counts as 1 sc and 3 chs), * sk 3, sc in next st, ch 3, repeat from * to end, sc in last st, turn
Cut the yarn and weave in the ends.
Back Panel
Row 1: ch 82
Row 2: sc in 2nd ch from hook,* ch 3, sk 3, sc in next ch, repeat from * to end, turn (20 ch-3 sps)
Row 3: ch 4 (counts as 1 sc and 3 chs), * sk 3, sc in next st, ch 3, repeat from * to end, sc in last st, turn
Rows 4-6: Repeat Row 3
Row 7: ch 5 (counts as 1 hdc and 3 chs), * sk 3, hdc in next st, ch 3, repeat from * to end, hdc in last st, turn
Rows 8-54: Repeat Row 7
Rows 55-60: Repeat Row 3
Cut the yarn and weave in the ends.
Assembling the cardigan
Block the pieces if needed.
Join the cardigan at the shoulder and sides, using a yarn needle to sew the seams.
Tip: Use locking stitch markers to hold the panels in place while sewing.
Sleeves
Join yarn in the underarm seam, then:
Round 1: ch 1 (does not count as a st) sc in the same sp as the join, ch 3, * sk 3, sc in next st, ch 3, repeat from * to end, sl st to first st, turn
Round 2: ch 2 (does not count as a st), hdc in first st, ch 3 * sk 3, hdc in next st, ch 3, repeat from * to end, sl st to first st, turn
Repeat Round 2 two more times or you can work more rounds for a longer sleeve.
Last round: ch 2 (does not count as a st), hdc in first st, * work 3 hdc in the ch sp, make 1 hdc in each hdc, repeat from * around, sl st to first st.
Cut the yarn and repeat on the other armhole.
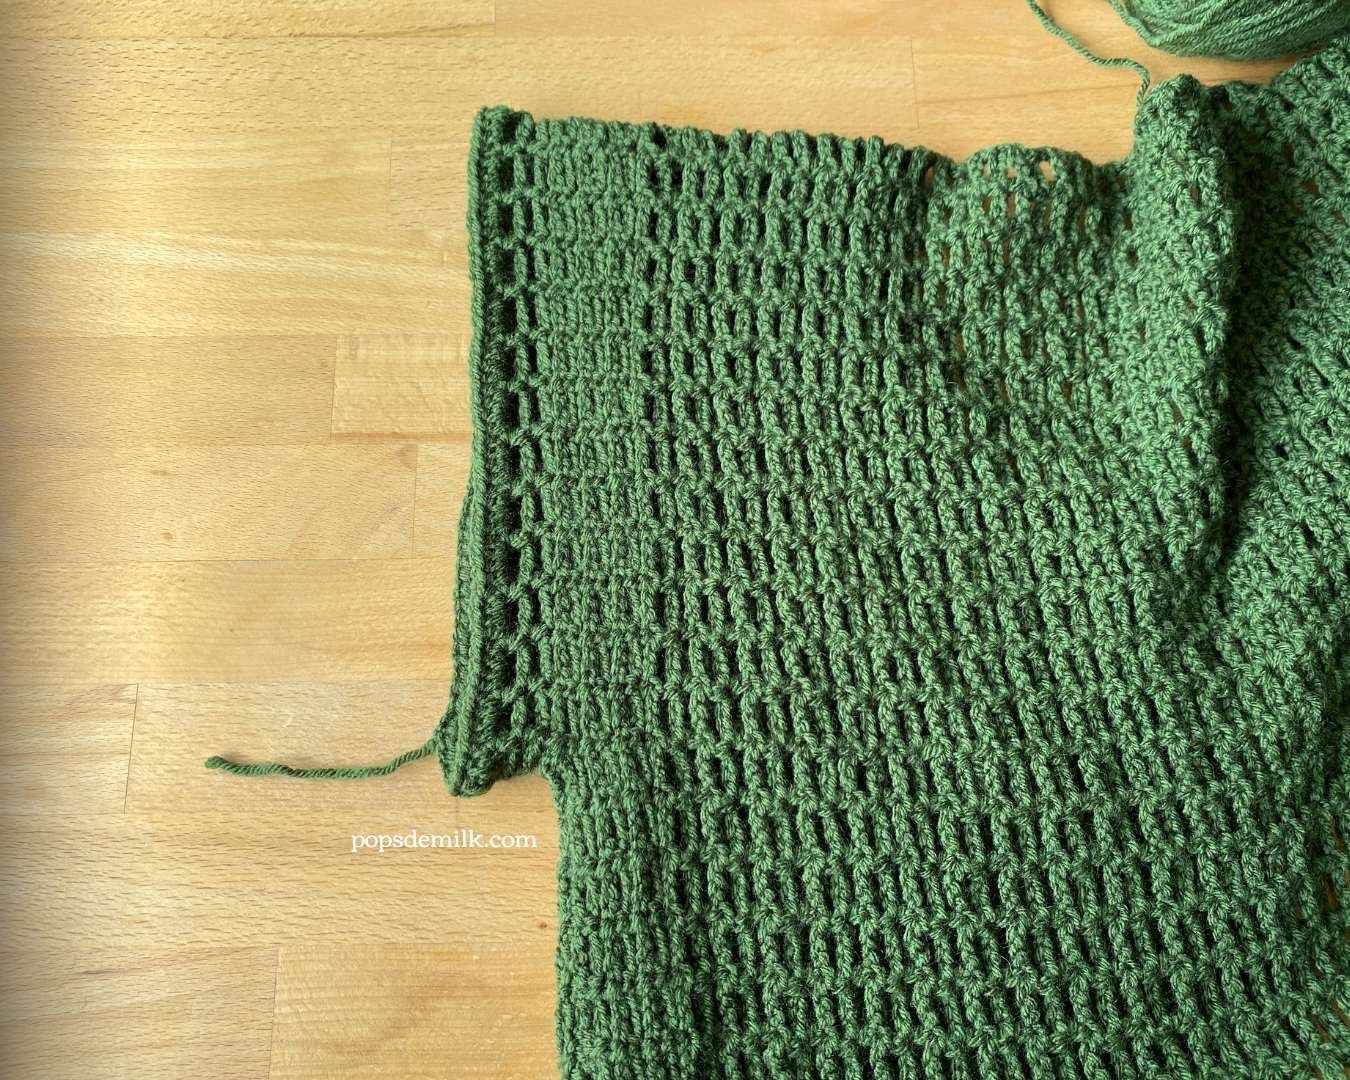
Finished sleeve
Finishing the cardigan
This step adds a border along the neck, front, and bottom hem. With the right side facing, join yarn in either shoulder seam.
Evenly single crochet in the chain spaces and row edges until you reach the front panel opening. If using buttons, create button loops or add a tie closure.
Continue to single crochet along the front panel opening toward the bottom hem.
Evenly half double crochet in the bottom hem edges. Alternately you can work double crochet stitches to add more height to the bottom hem.
Continue to single crochet along the neckline, and back, then slip stitch to join.
Cut the yarn and weave in the ends.
If you are using buttons, create button loops as follows:
- Refer to the size of the buttons you are using to determine the number of chains needed for each loop. For my ¾” button I made 6 chains for the button loop.
- Make the necessary number of chains for the first button loop.
- Single crochet evenly in the top chain space to close the button loop.
- Repeat for any additional button loops you want to add.
If you are adding a tie closure:
- Make a chain to desired length, mine is 10”, and cut the yarn.
- Rejoin yarn and continue the pattern (see steps below) until you reach the opposite front panel top.
- Make the second tie same as the first and cut the yarn.
- Rejoin yarn and continue the pattern (see steps below).
Your lacy and breezy cardigan is ready to wear!

