How to Create a Stylish Crochet Bucket Hat: Step-by-Step Instructions, Materials, and Tips
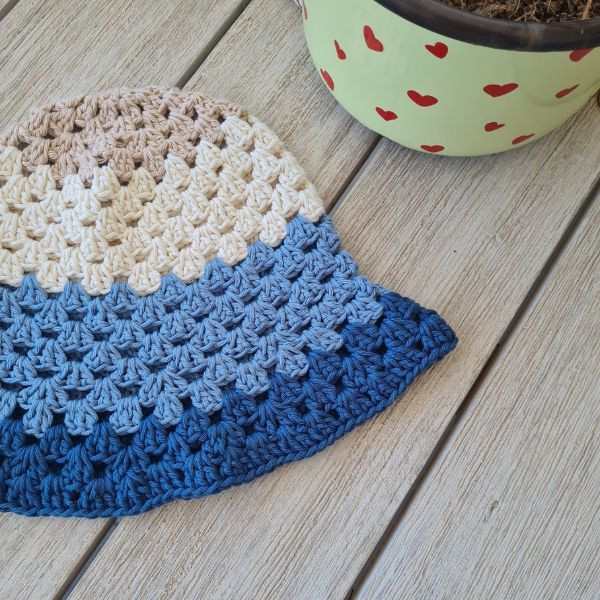
Crochet bucket hats are the perfect combination of style and comfort! They come in a wide range of colors and patterns, making it easy to find one that suits your unique personality. Whether you're heading to the beach or running errands around town, a crochet bucket hat adds a fun and trendy touch to any outfit.
Plus, the soft material and wide brim provide excellent sun protection while keeping you looking cool. So go ahead and add a crochet bucket hat to your wardrobe - you'll be both stylish and sun-safe in no time!Materials
Drops Paris Uni Color 100% cotton, 50g, 75 m (82 yds) color dark blue, light blue, and cream – or any Weight #4 - Total of approx 160 yards
Or use any cotton or blended cotton yarn weight #4 yarn
Weight: 4 - Medium
Hook: US Size (5mm)
Yarn Needle, Scissors, Measuring Tape
Gauge
15 st X 7 rounds ( 4” X 4”)
Sizes
This sample can be modified as you wish. The sample is: 8” in height and 21” in circumference before the brim.
Stitch Key
- Ch = Chain
- Sc = Single Crochet
- St = Stitch
- Dc = Double Crochet
- Slst = Slip stitch
- Inc = Increase round
Specialty Stitch
3Dc Cluster = 3 Double crochet st in the same space
Notes
- The pattern is worked in rounds.
- Ch 3 counts as st at the beginning of the round.
- All rounds from round 2 will be worked between the posts of Dc’s, not on top of the Dc’s.
- This pattern uses pattern repeats.
- You can work this pattern with one color or multiple as you wish - I used four colors.
Instructions
I used four colors and changed every few rows (I used scrap yarn so as the yarn ran out) You decide when to change.
Ch 4 and Slst to 1st ch to form a round, or use the magic circle method.
Round 1
Ch 3 (counts as 1st st), dc 11 in circle, slst to ch 3 to close the round (12)
Round 2
Inc, Slst to 1st space between the posts of dc from the previous round, Ch 3, dc 1 in the same space, dc 2 in the next space (between posts), continue around to end of the round, slst to ch 3 to close the round (24)
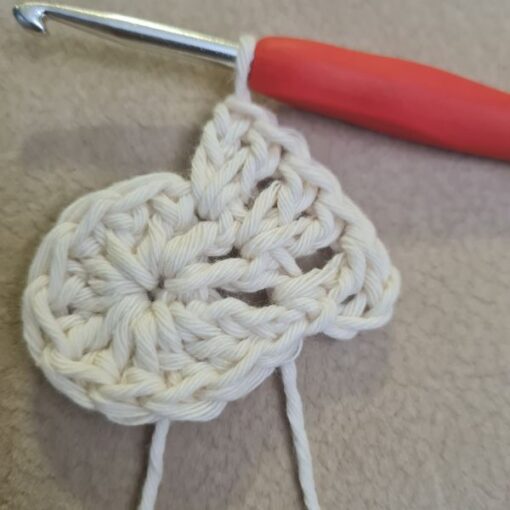
Round 3
Inc, Slst to 1st space between the posts of dc from previous round, Ch 3, dc 2 in the same space, dc 3 in the next space (between the 2 dc clusters from previous round), continue around to end of the round, slst to ch 3 to close the round (36)
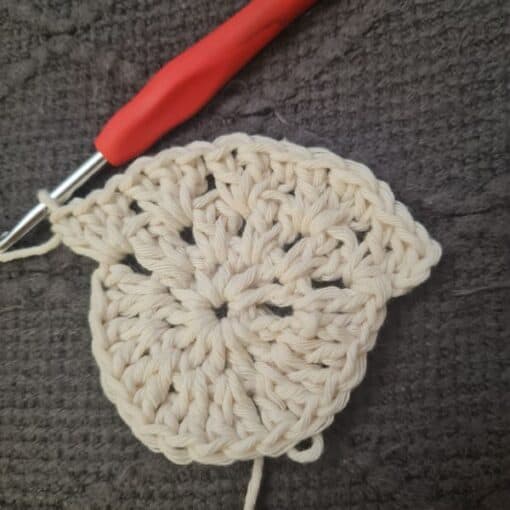
Round 4
Inc, Slst to 1st space between the 3 dc clusters from previous round, Ch 3, dc 3 in the same space, *dc 3 in the next space (between the 3 dc clusters from previous round), dc 4 in the next space, repeat from *around to last space of the round, dc 3, slst to ch 3 to close the round (42)
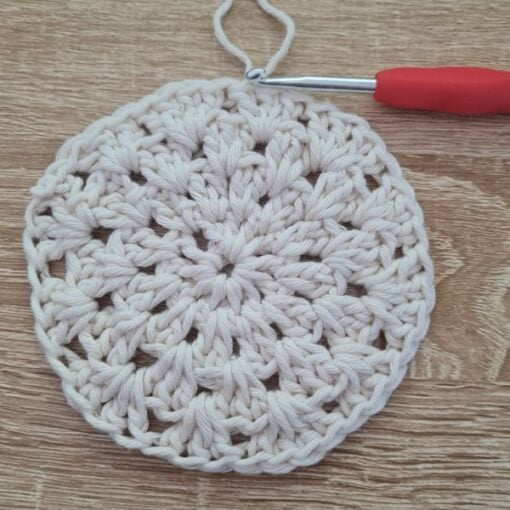
Last Increase Round
Round 5: Inc, Slst to space between the 2 first posts of the 4dc cluster from the previous round, Ch 3, dc 2 in the same space, dc 3 in the next space (between the 4dc cluster and the next 3 dc cluster from previous round), dc 3 in the next space (between 3dc cluster and the next 3 dc cluster), dc 3 in space between the first 2 dc from the 4dc cluster, alternate as in the photo to end of round, slst to ch 3 to close the round (54)
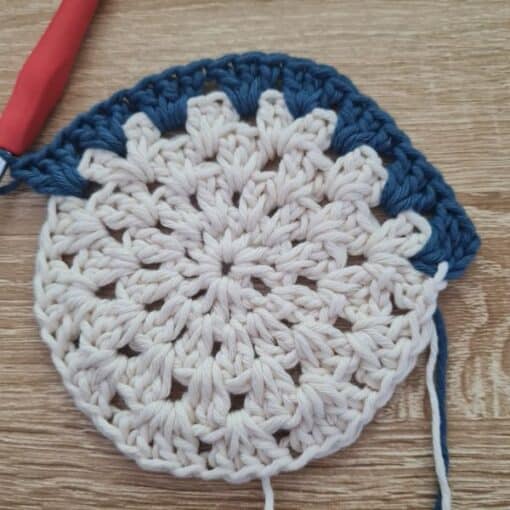
Here we stop increasing – you should have around a 5.5” – 6.5” diameter circle.
Rounds 6-15
Slst to 1st space between the 3 dc clusters from the previous round, Ch 3, dc 2 in the same space, *dc 3 in the next space, repeat from *around to last space of the round, dc 3, slst to ch 3 to close the round (54)
Try your hat on and make sure it fits your head. If you need more, continue repeats of the last round.
Brim
Round 16: Inc, Slst to 1st space between the 3 dc clusters from the previous round, Ch 3, dc 3 in the same space, *dc 3 in the next space (between the 3 dc clusters from previous round), dc 4 in the next space, repeat from *around to last space of the round, dc 3, slst to ch 3 to close the round (63)
Round 17: Inc, Slst to space between the 2 first posts of the 4dc cluster from the previous round, Ch 3, dc 2 in the same space, dc 3 in the next space (between the 4dc clusters and next 3 dc cluster from the previous round), dc 3 in the next space (between 3dc cluster and next 3 dc cluster), dc 3 in space between the first 2 dc from the 4dc cluster, alternate as in the photo to end of round, slst to ch 3 to close the round (81)
Round 18: Inc, Slst to 1st space between the 3 dc clusters from the previous round, Ch 3, dc 2 in the same space, *dc 3 in the next space (between the 3 dc clusters from previous round), dc 3 in the next space, repeat from *around to last space of the round, dc 4, slst to ch 3 to close the round (93)
You can continue repeating rounds 17+18 for a longer brim.
Finishing
Cut your yarn and weave in the ends.
