Crochet the Elegant Guinevere Bralette with These Easy Steps

Crocheting The Guinevere Bralette is an exciting and rewarding project that allows you to create a stylish and comfortable piece of clothing. The intricate details and delicate lace pattern make it a lovely addition to any outfit, perfect for both casual outings or special occasions. With just a few simple crochet stitches and some yarn in your favorite color, you can bring this beautiful bralette to life.
So grab your crochet hook and get ready to enjoy a fun and fulfilling crafting experience!Materials Needed
- 2-3 Balls of Gazzal XL Baby Cotton in Pinkish Orange
- G-6/4.00 Crochet Hook
- 2-4 Buttons (Based on band length and preference)
Measurements and Getting Started
Around Under The Bust (minus 1″ for the extension for buttons)
We are going to begin the pattern by working on the “Cups” of the bralette. The cups as well as other parts of the bralette are going to partially be worked in the “Suzette Stitch”.
Bralette Cups
Foundation
Begin the cup by Chaining 10
Row 1
- Work 1 SC into the first stitch
- Work 1 DC into the same stitch
- Skip 1 stitch
- Work 1 SC into the next stitch
- Work 1 DC into the same stitch
- Repeat steps 3-5 two more times until you reach the end of the row
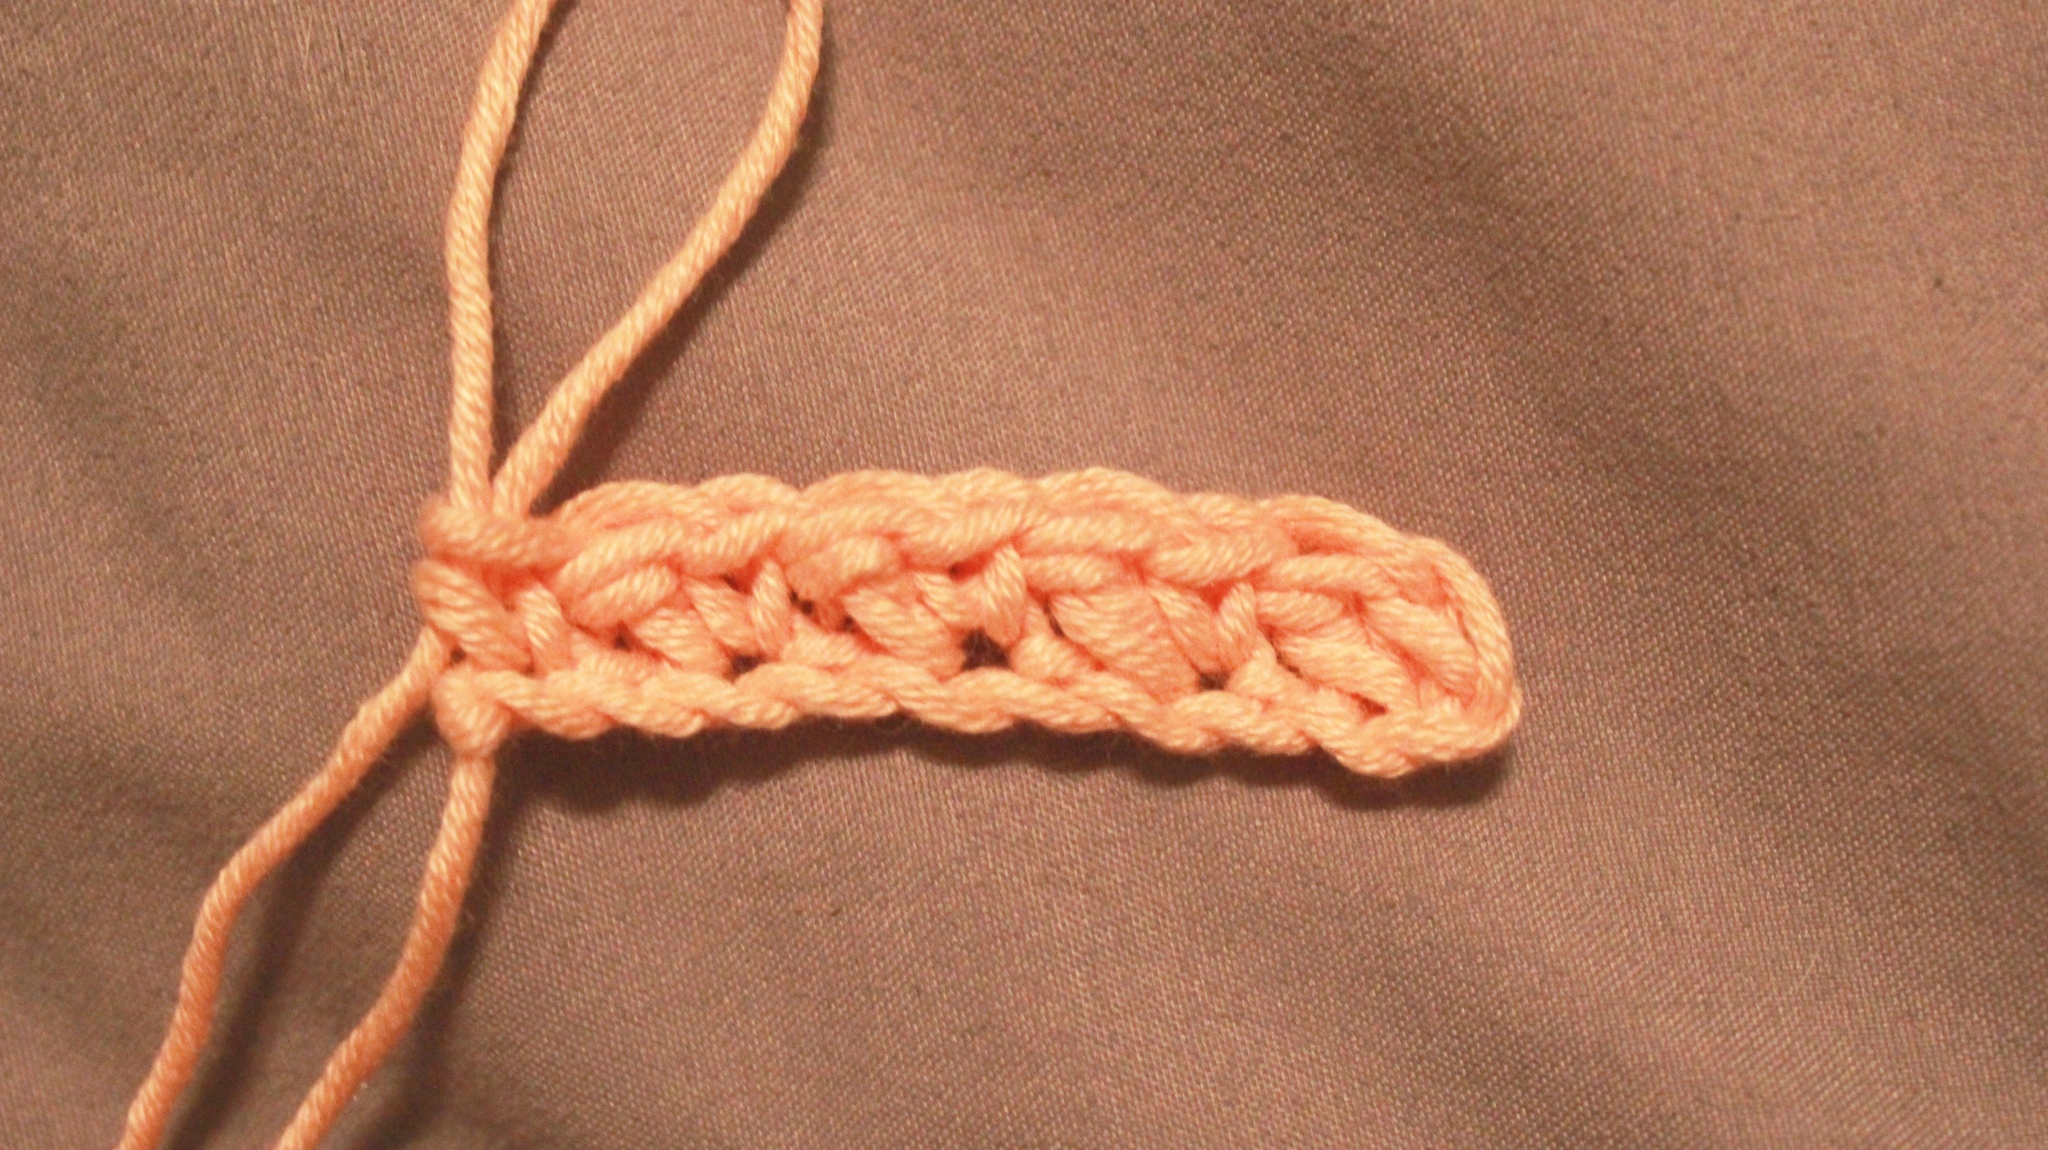
Additional Rows with Suzette Stitch
7. Work 2 SC into the last stitch
8. Chain 2
9. Work 2 SC into the same stitch
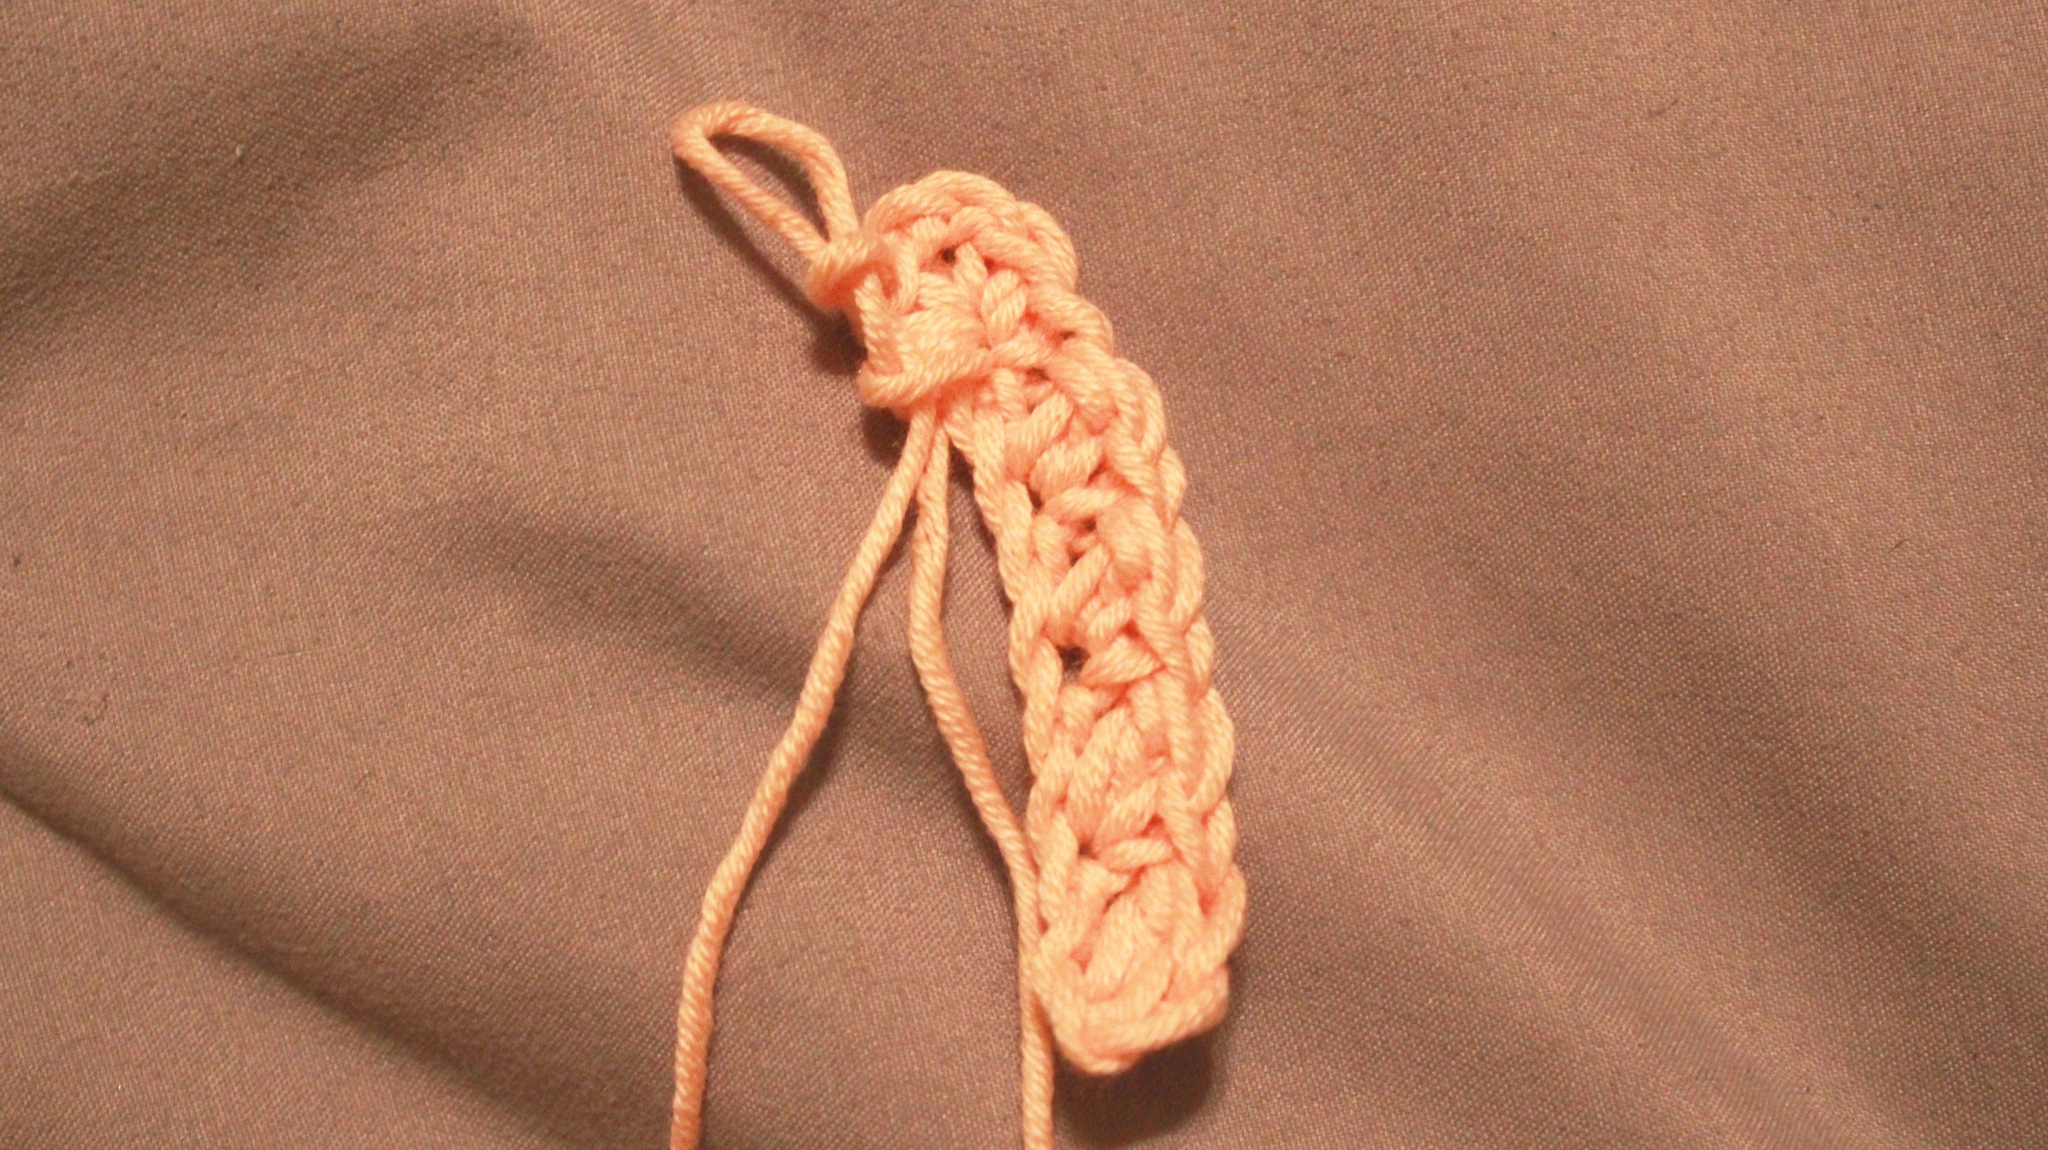
10. Work 1 SC into the space below the “Suzette Stitch” on the other side.
11. Work 1 DC into the same stitch
12. Repeat 10-11 until the end of the row
13. Work 1 SC into the last stitch
14. Chain 1 and turn your work
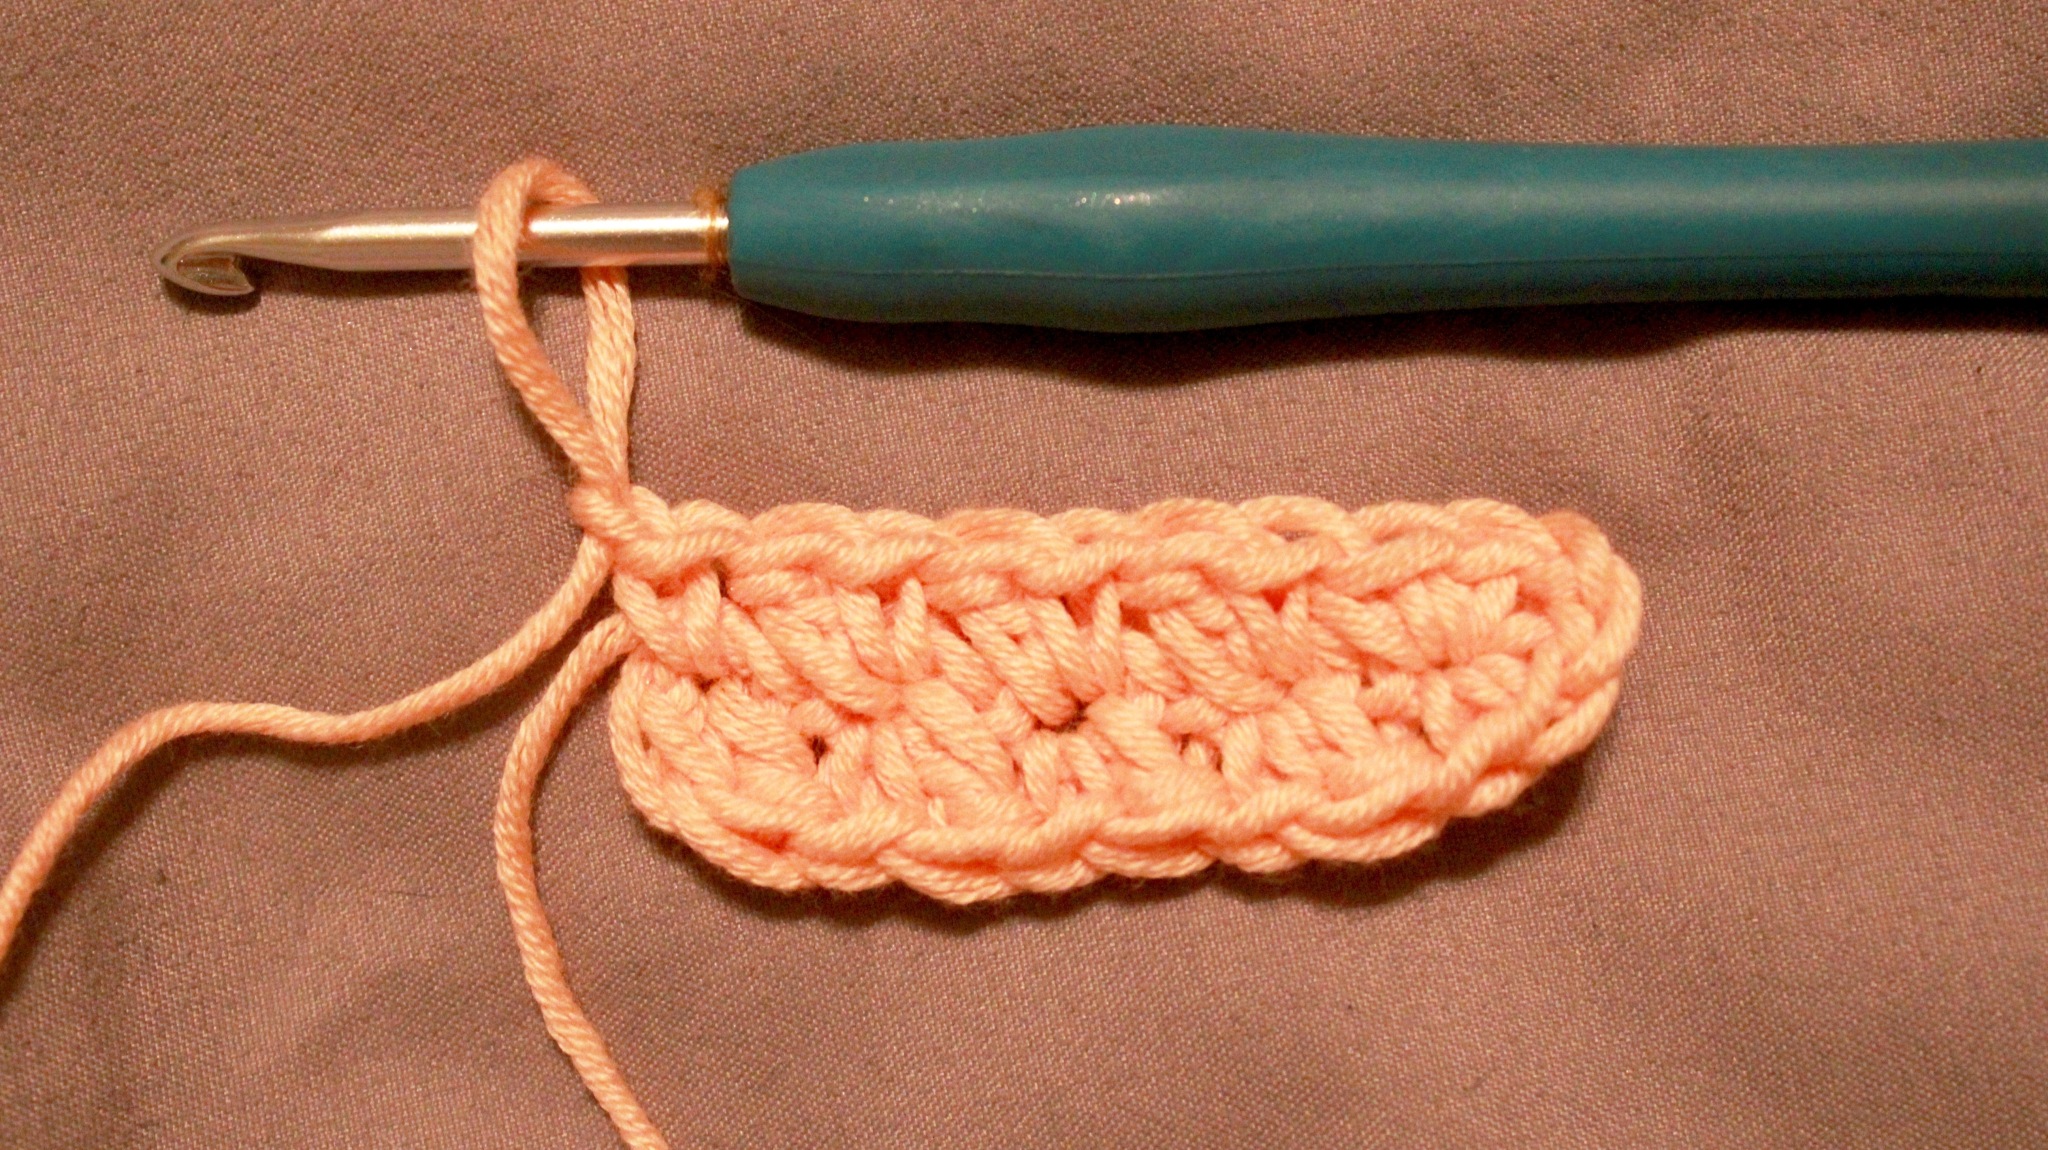
Continuing the Cup
*Working steps 1-3 is considered a “Suzette Stitch” and will be referred to that way for the rest of the pattern. Just remember that at the beginning of the row, the first “Suzette Stitch” must be worked into the first stitch*
Row 2
- Work 4 Suzette Stitches (pretty much until you reach the first SC in the previous row)
- Work 1 SC into the next 2 stitches
- Work 3 SC into the chain 2 space
- Work 1 SC into the next 2 stitches
- Work 3 Suzette stitches until the end of the row
- Work 1 SC into the last stitch
- Chain 1 and turn your work
Row 3
- Work 4 Suzette Stitches (pretty much until you reach the first SC in the previous row)
- Work 1 SC into the next 3 stitches
- Work 3 SC into the next stitch
- Work 1 SC into the next 3 stitches
- Work 3 Suzette stitches until the end of the row
- Work 1 SC into the last stitch
- Chain 1 and turn your work
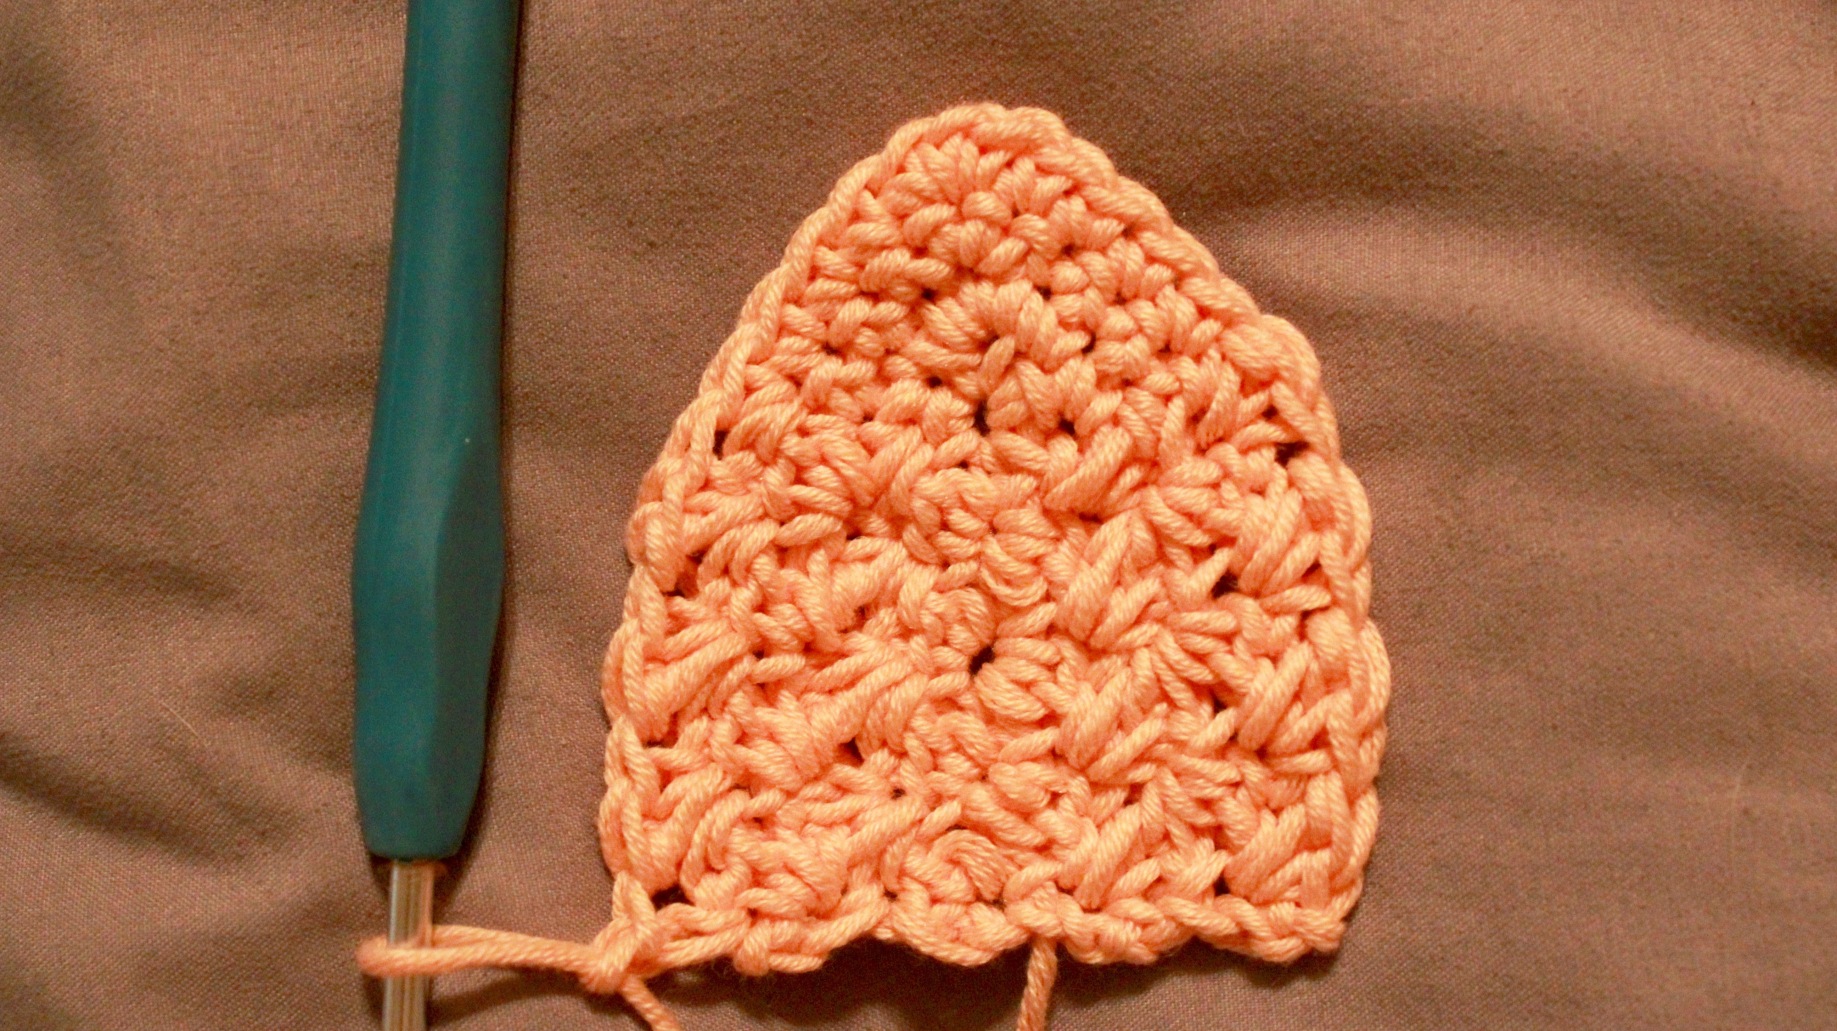
Row 4
- Work 4 Suzette Stitches (pretty much until you reach the first SC in the previous row)
- Work 1 SC into the next 4 stitches
- Work 3 SC into the next stitch
- Work 1 SC into the next 4 stitches
- Work 3 Suzette stitches until the end of the row
- Work 1 SC into the last stitch
- Chain 1 and turn your work
Size Adjustment
Row 5 and onward... Each row is similar, except for the SC stitches on either side of the 3 SC at the tip of the row, which increases by 1 each row.
Continue working rows this way until the cup size is appropriate for your bust. For a 32A bra size, 9 rows total may fit comfortably.
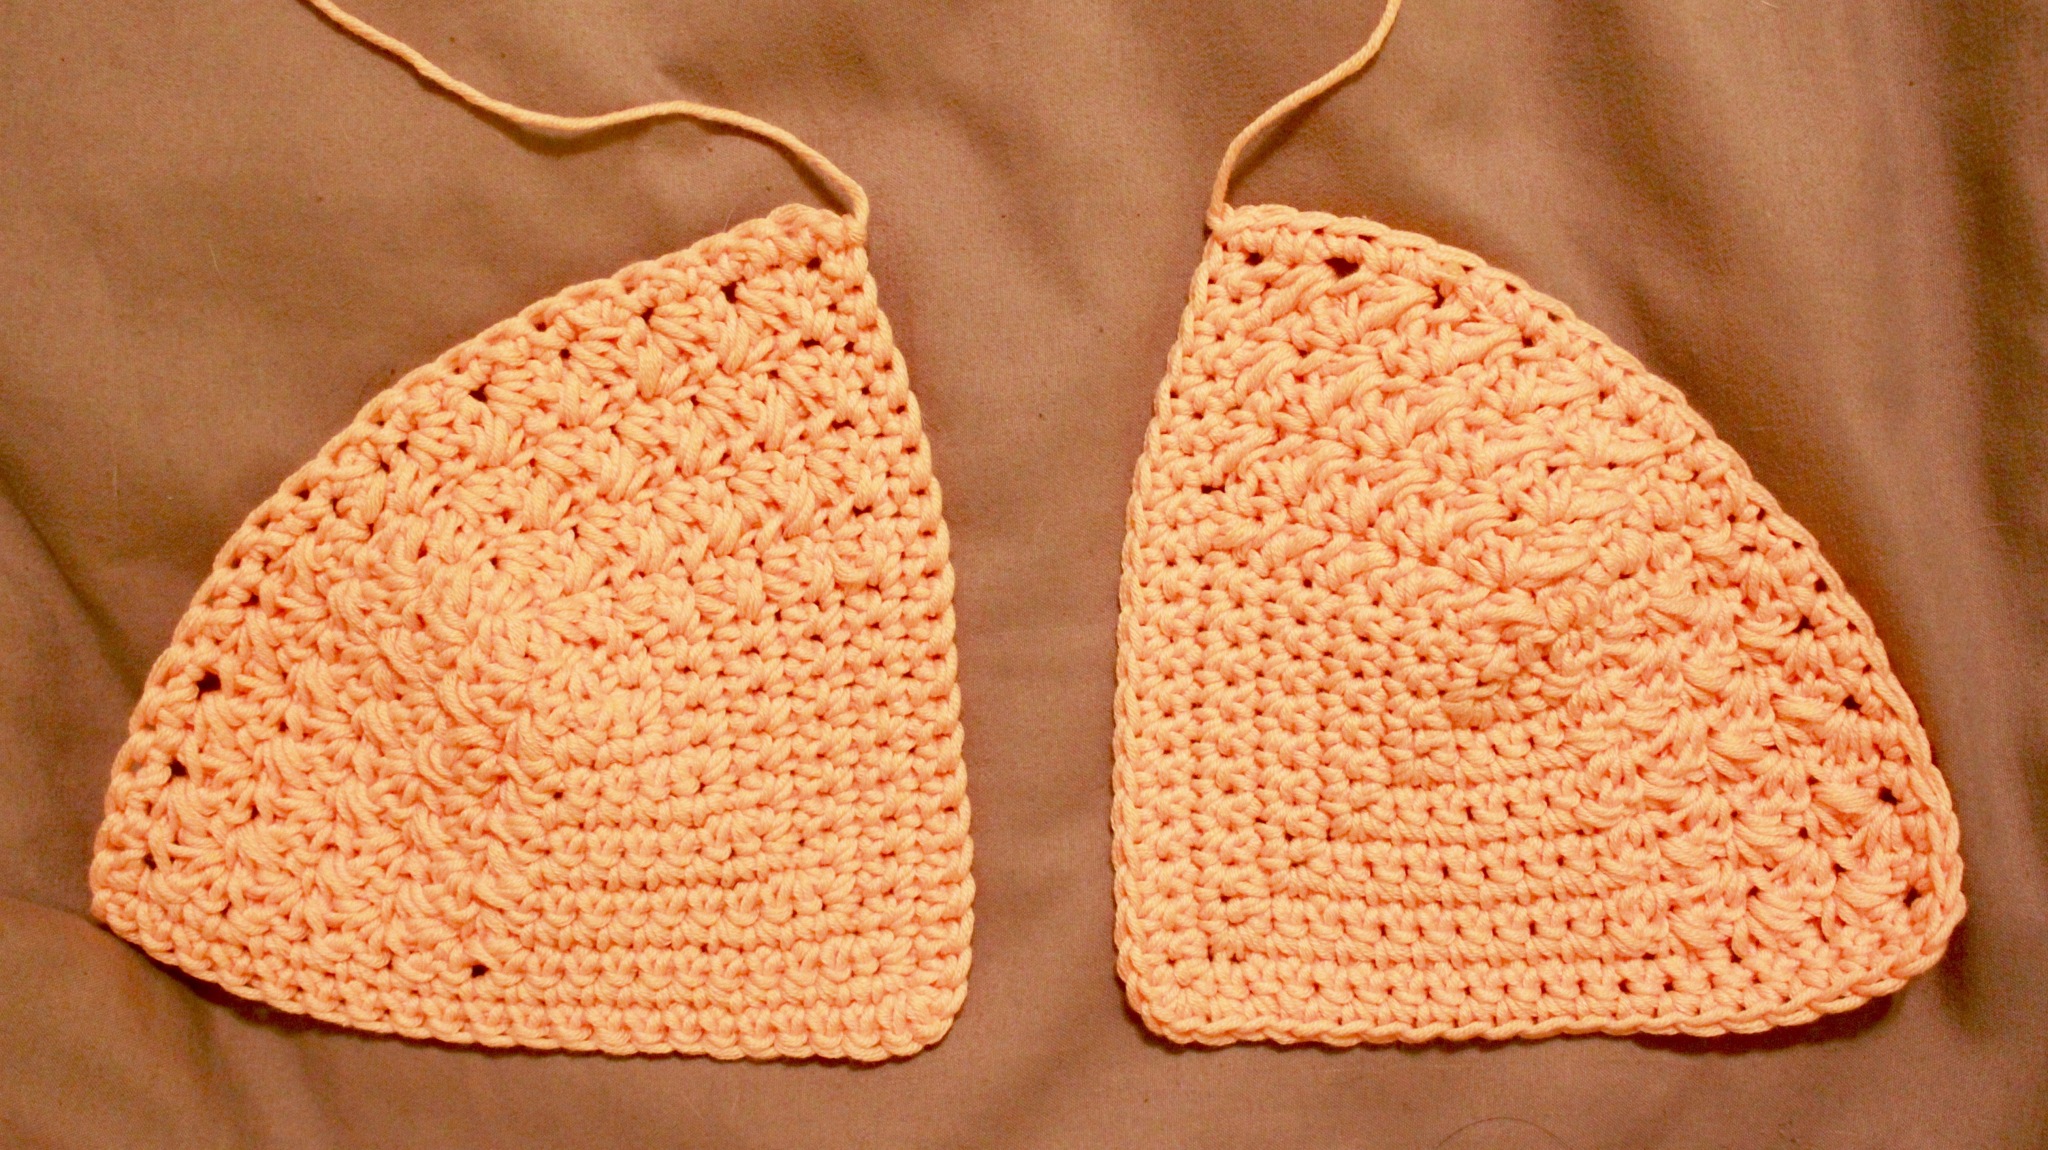
Cup Border
Once the cup is the desired size, work a simple border around its edge:
Row 1-2: Work 1 SC into each stitch in the row.
Row 3: Work 1 SC into each stitch at the “bottom” of the cup.
The “corner” of the cup that is composed of SC’s is the “inner” part of the cup, where the tie in the middle of the bralette is attached.
*Repeat all the steps of the Cups and the Border to create the second cup*
Creating the Band
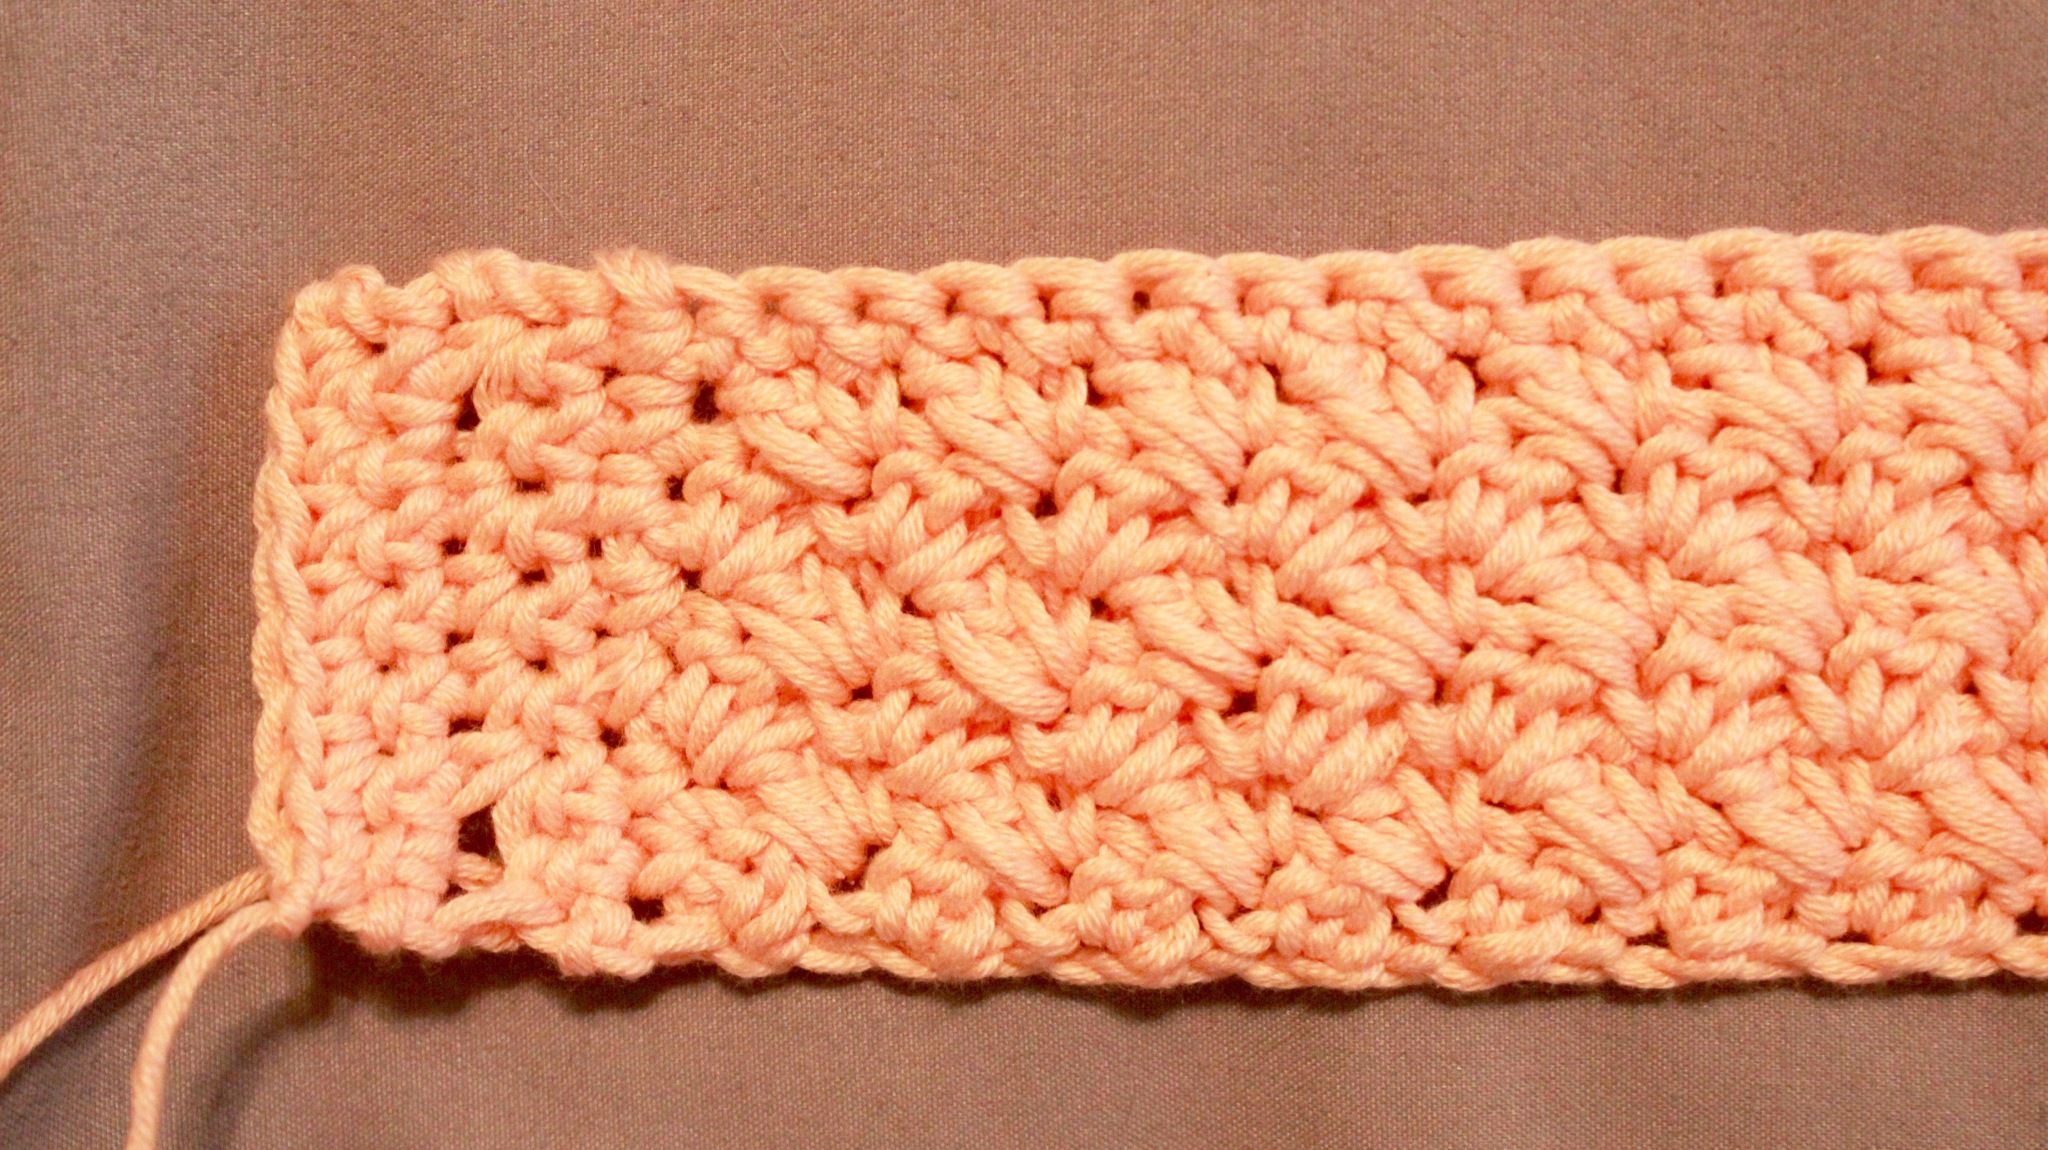
Foundation
Using the “Under The Bust Measurement” (minus 1″), make a foundation chain in multiples of 2 that is equal to that measurement. *Take note of your band's chain number for later attachment of cups.*
Row 1
- Work “Suzette Stitches” until the end of the row
- Work 1 SC into the last stitch
- Chain 1 and turn your work
Row 2 and Continuing
Repeat Row 1 until your band is a length that you like.
Polish and Button Extension
- To polish the band, work one row of SC’s along the top edge of the band. Chain 1 and begin working on the side edge.
- Work a row of SC’s along this edge. Chain 1 and turn.
- Work 4 more rows of SC onto the extension.
- Tie off.
- Flip your work. Work 2 rows of SC along the opposite side edge.
- In the 3rd row, work button holes by skipping one stitch, evenly placed for the number of buttons.
- Work 2 more rows of SC into the extension.
- Tie off.
Sewing the Cups onto the Band
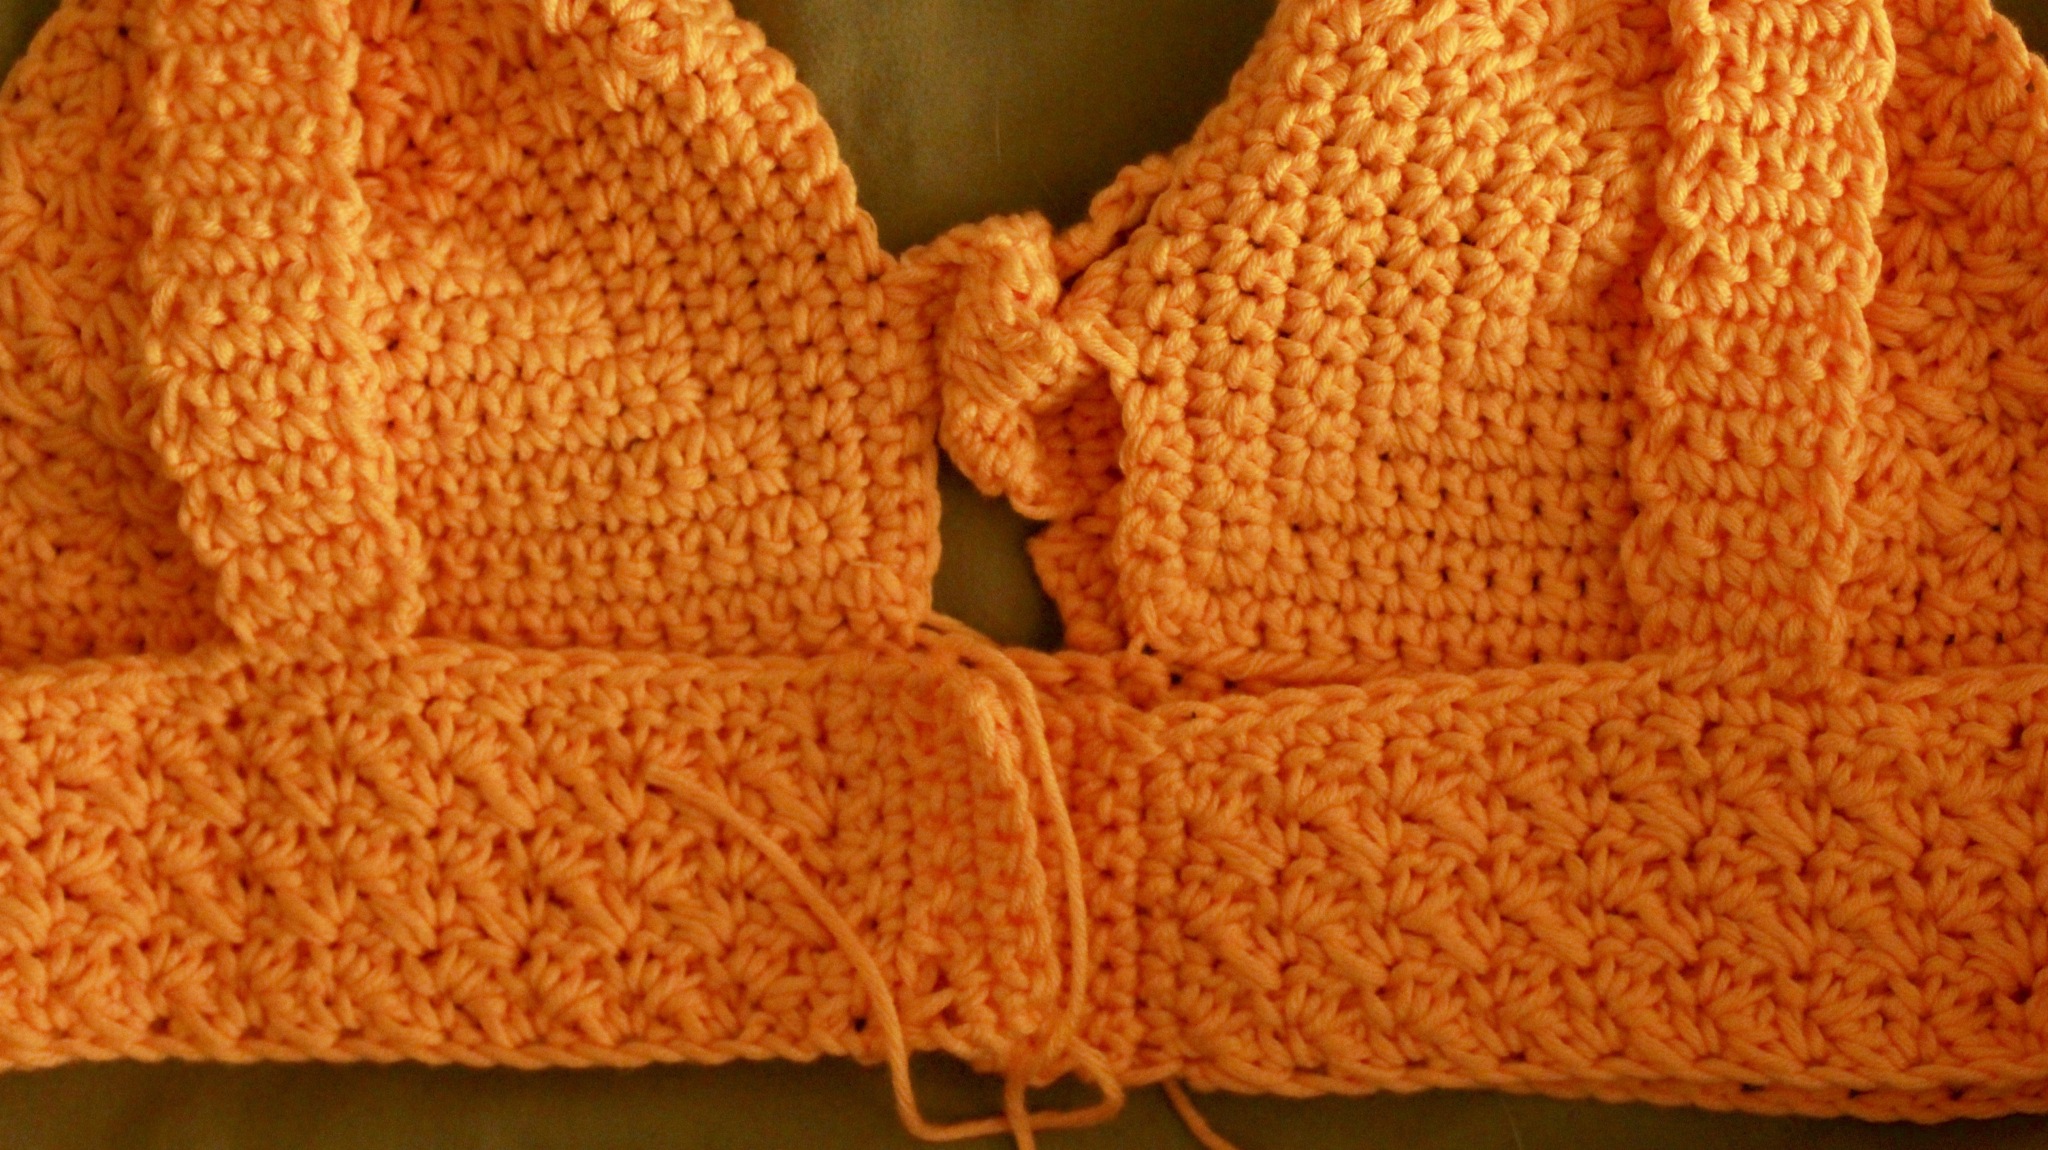
Identify the middle stitch of the band. Divide your recorded chains/stitches (before adding extensions) by 2 to find the middle. For 80 stitches, the 40th stitch is your middle. Mark this middle stitch with a Stitch Marker.
Skip one stitch in both directions and place stitch markers in the second stitch away from the middle on both sides. These points will be the starting points for sewing in the cups.
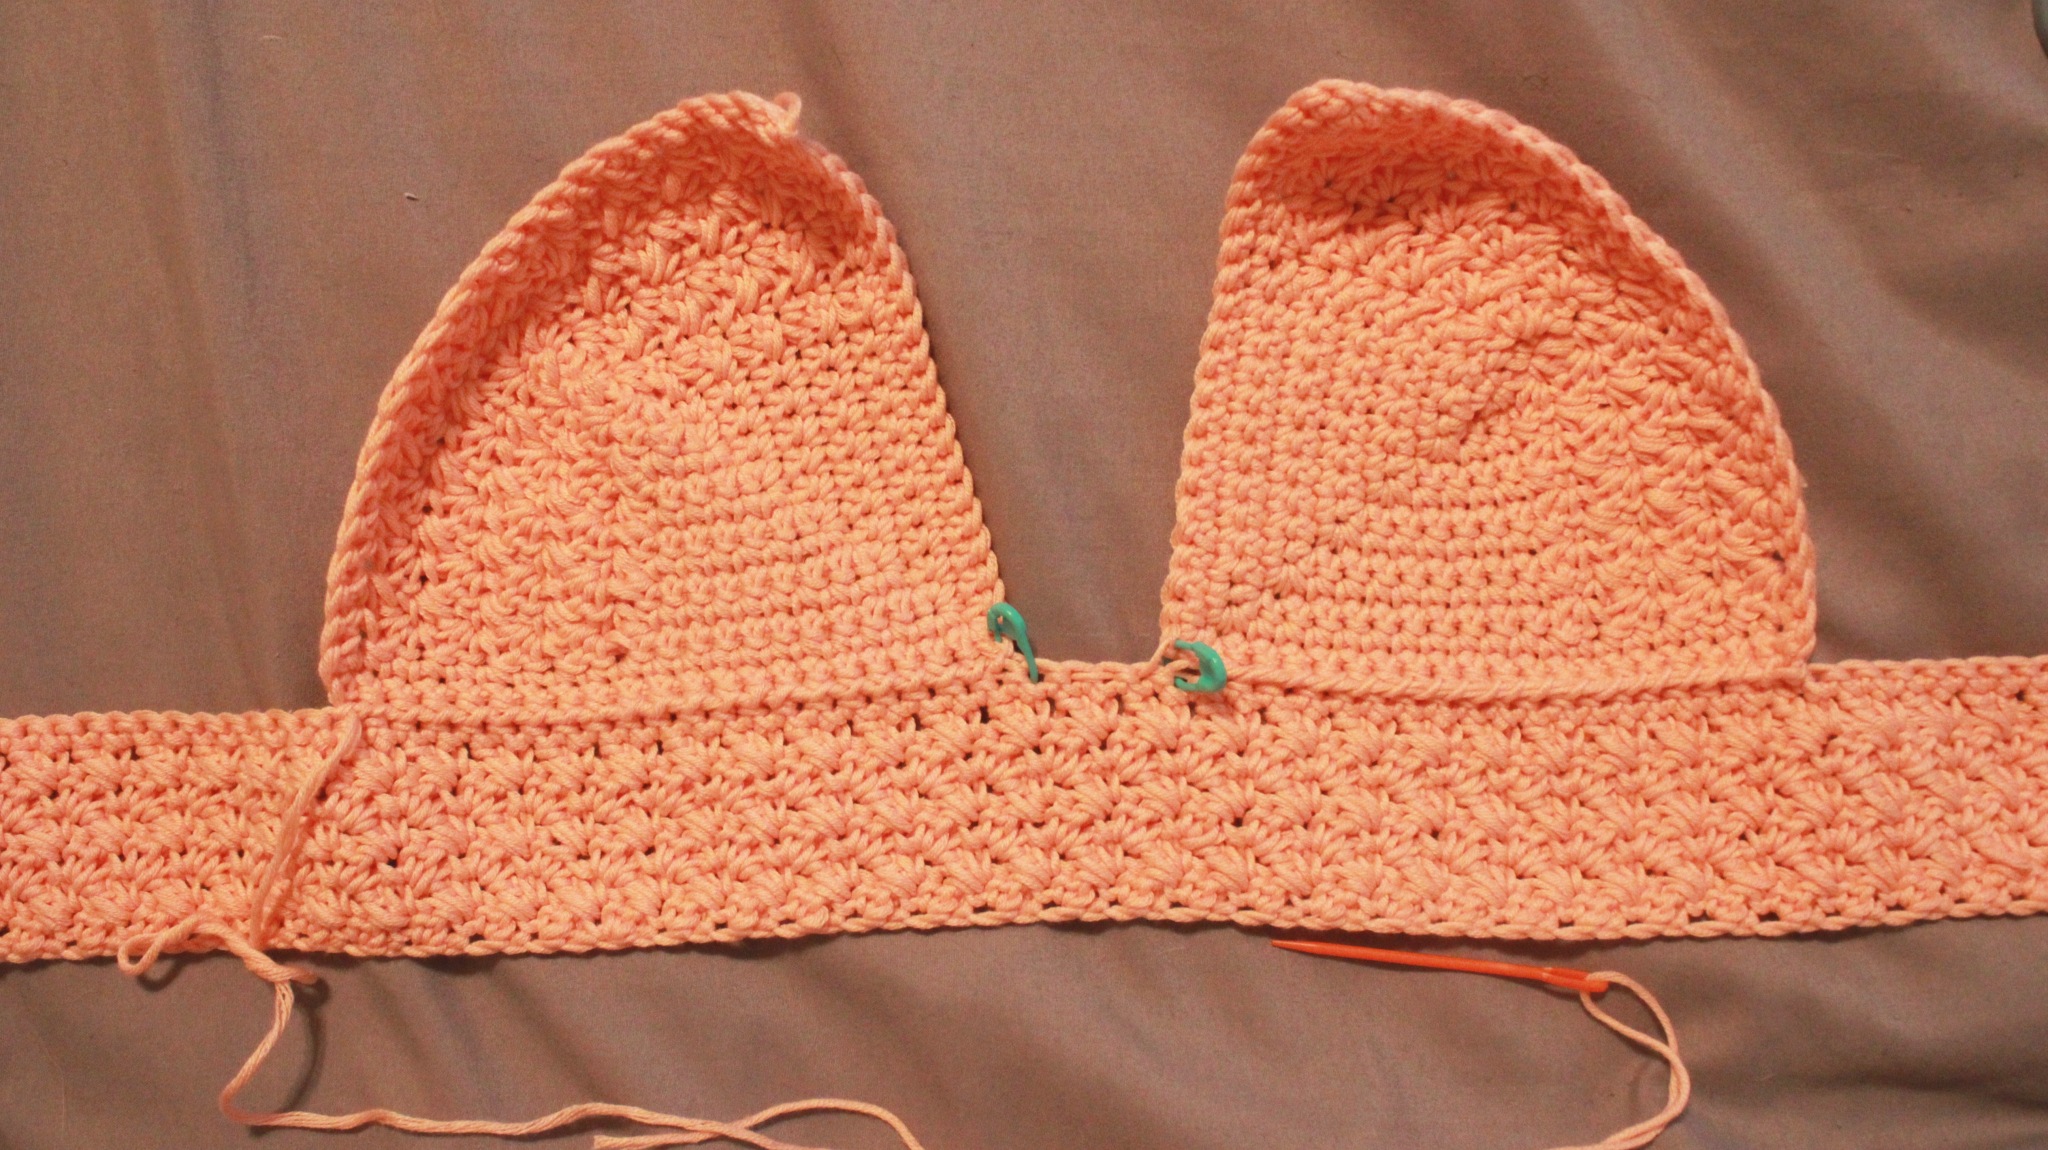
Sew the cups so that the SC section faces inward on the band, securing the cup with the corner stitch clipped to the marker. Sew the cups to the band and weave in the ends.
Creating the Middle Tie
- From the corner stitch, count 5 stitches up and place another stitch marker.
- In the marked stitch, work 1 SC.
- Work 1 SC into the next two stitches.
- Chain 1 and turn your work.
- Work 1 SC into the three stitches.
- Chain 1 and turn your work.
- Repeat steps 5-6 for 14 more rows and tie off.
*Repeat on the other cup, then tie the strips together.*
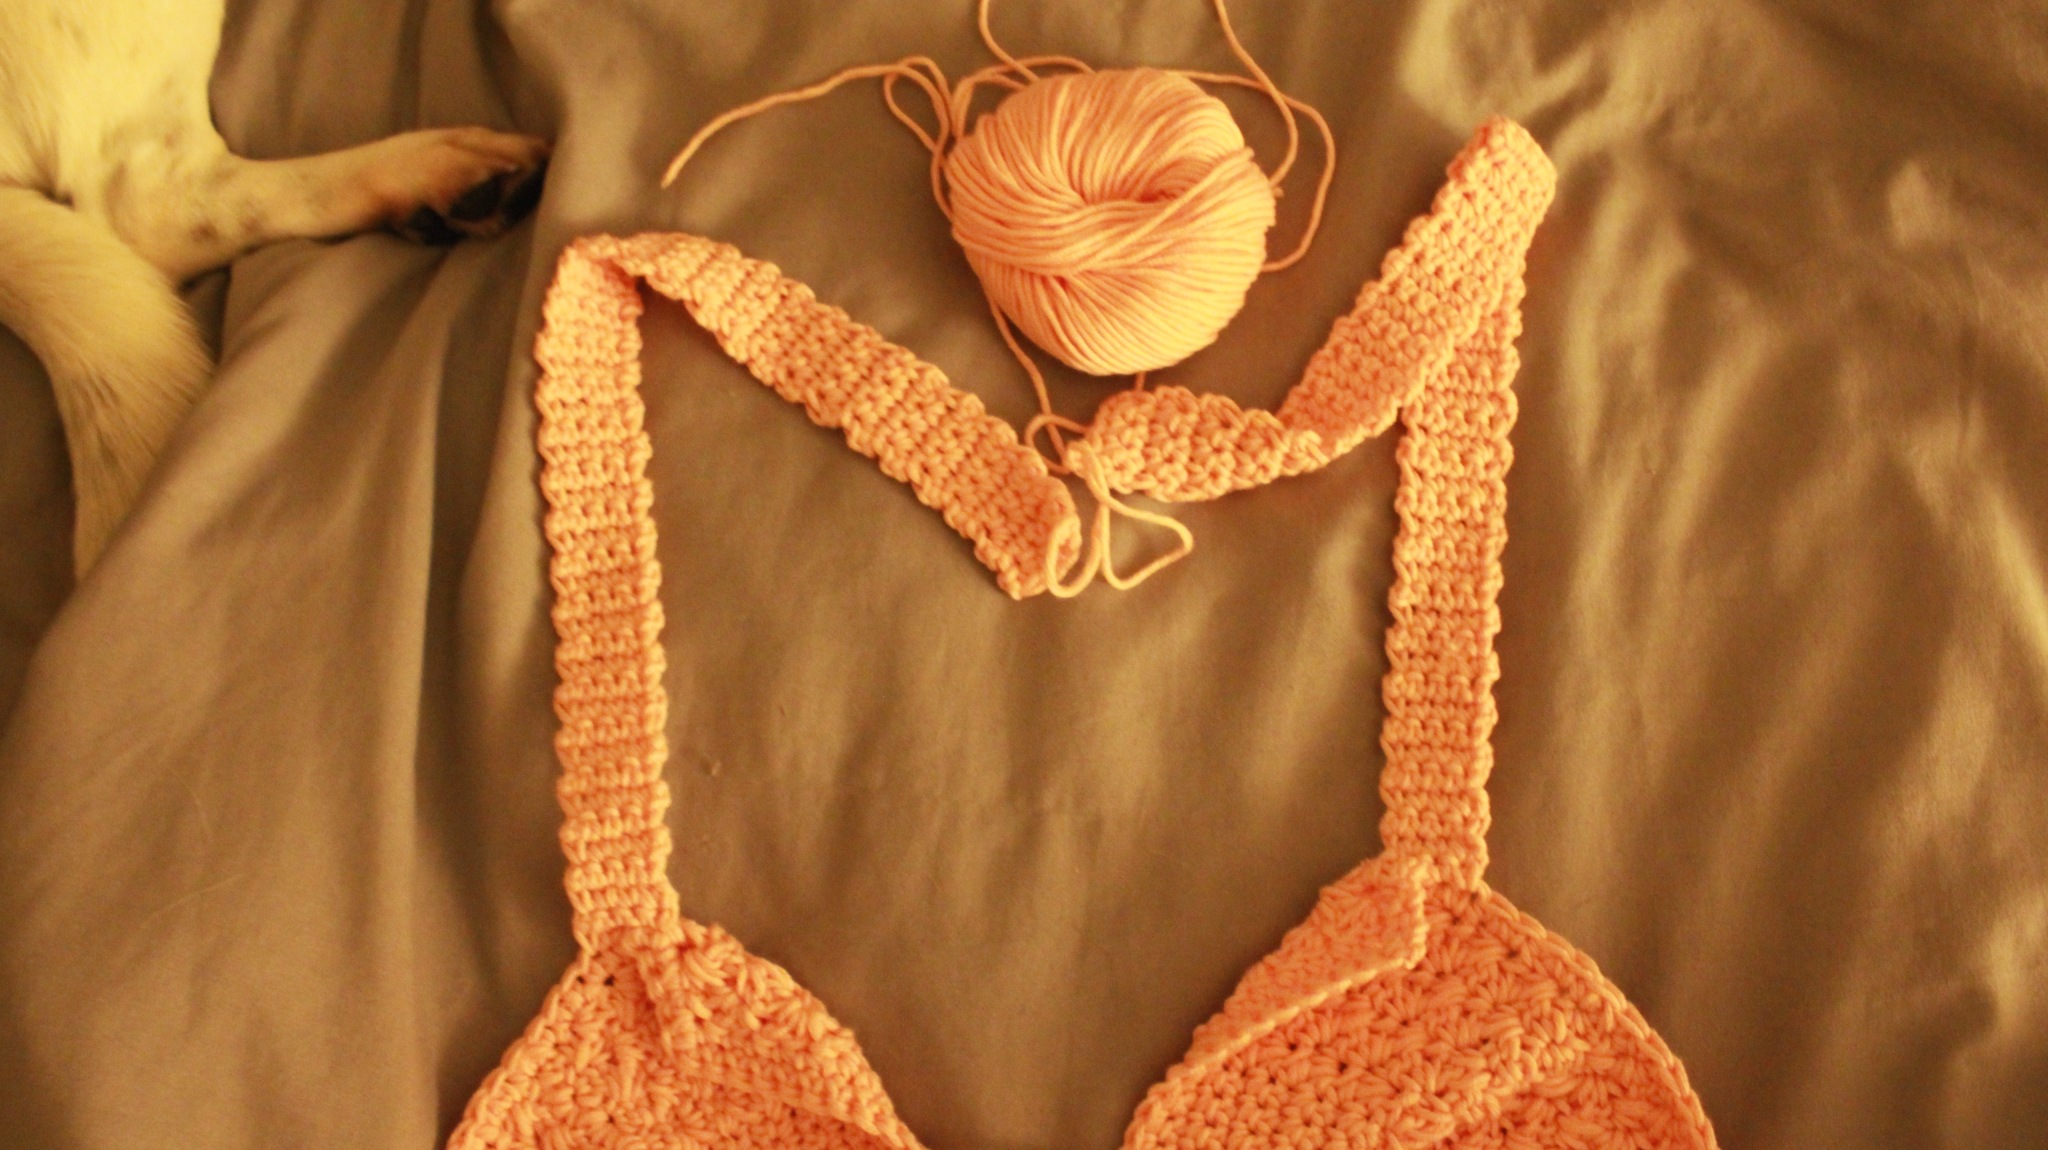
Adding the Straps
Fold the cup's top peak for a Pin Up Sailor look. The Suzette Stitch creates gaps; fold the top so the second gap is at the top. This second gap is where to begin the strap.
Work 1 SC into the 2nd gap and the next three stitches.
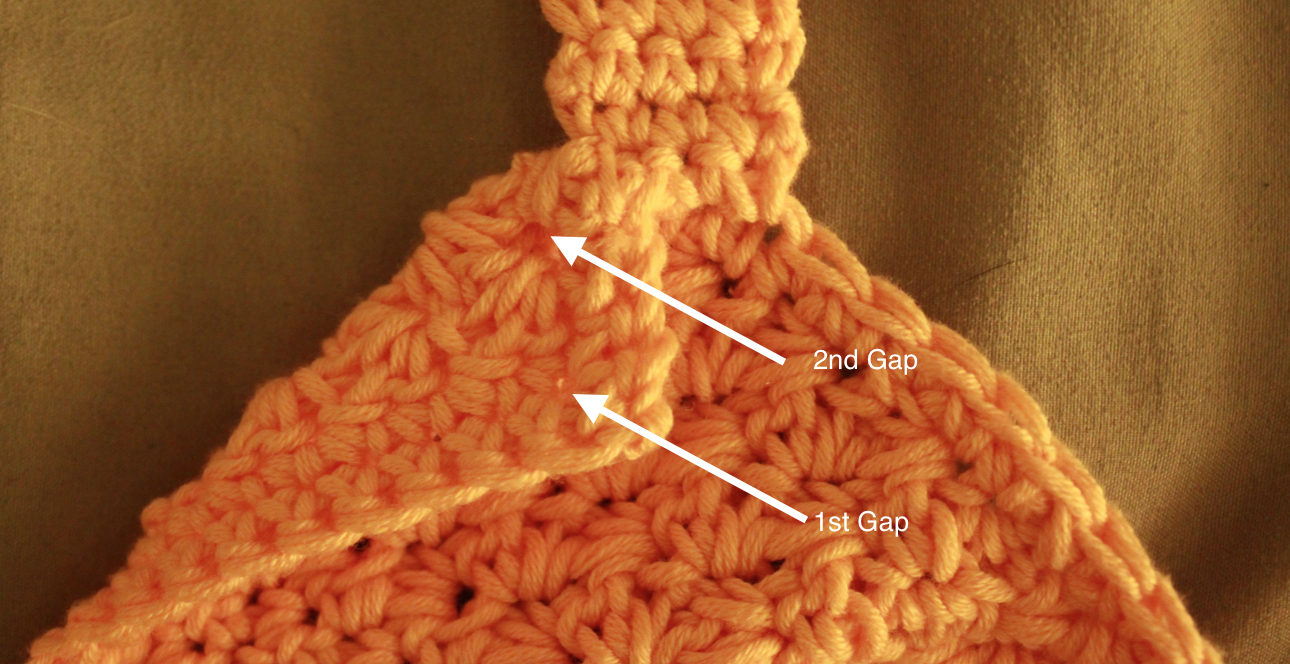
- Chain 1 and turn your work.
- Work 1 SC into each of the 4 stitches.
- Chain 1 and turn your work.
- Repeat steps until the strap fits snugly over your shoulder to the band's top back. (Measure a strap from a bra for length guidance.)
- Sew the strap to the top of the band in the back.
Sewing on the Buttons
Sew the buttons into stitches on the extension corresponding to the holes on the opposite extension. Weave in any ends to finish.
Voilà, your Guinevere Bralette is complete!
