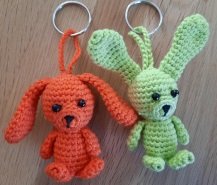
Crochet Adorable Little Bunnies: A Beginner's Guide
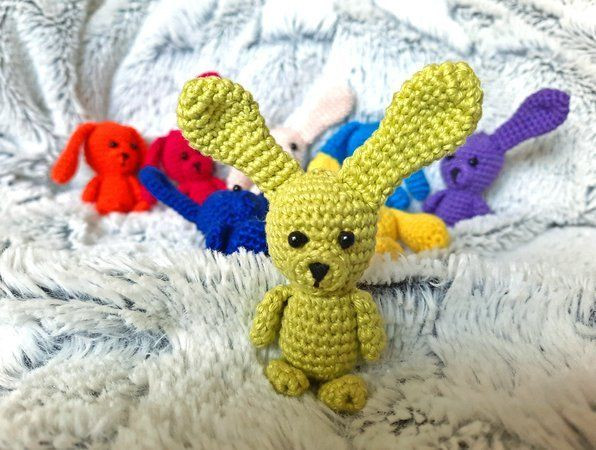
Crocheting little bunnies is such a delightful and heartwarming craft to try! These whimsical creatures bring a touch of charm and sweetness to any handmade project. From their fluffy tails to adorable floppy ears, each bunny holds a unique personality that can brighten up anyone's day. Whether you're a seasoned crocheter or just starting out, creating these cute bunnies is a wonderful way to spread joy and creativity, one stitch at a time.
So grab your yarn, crochet hook, and let's hop into a world of cozy and lovable bunny creations!Materials Needed for Your Crochet Bunny
Following stuff will be needed:
- Yarn in the colors you prefer, I recommend cotton (for example Schachenmayr Catania or Scheepjes Catona)
- Crochet hook: Please use the smallest size which is recommended for your yarn
- Fiber fill
- Sewing needle to sew the pieces together
- Safety eyes or little pearls (or whatever you prefer for the eyes) I used pearls
- Key ring or small snap hook (if you like)
Basic Crochet Abbreviations and Techniques
You will find the following abbreviations in the pattern:
sc = single crochet
sl st = slip stitch
ch (st) = chain (stitch)
st = stitch
MR = Magic Ring
rnd(s) = round(s)
inc. = increase (crochet 2 stitches in one)
dec. = decrease (crochet 2 stitches together so that the number of stitches in the round decreases)
Other Information:
If there is said nothing different, you have to crochet in continuous rounds.
For the start of the rounds I recommend one of the following methods:
1) the Magic Ring
2) crochet 2 chain stitches and the required number of sc in the first ch st.
The number in the brackets at the end of every round/row shows how many stitches the round/row has in total.
The bunnies will be about 11-12 cm (4 inches) high, depending on the yarn and the hook you use.
So, let’s go!!
Crocheting the Bunny: Step-by-Step Instructions
Head and Body
We start with the head.
If you use safety eyes, place them between round 7 and 8 with 5 or 6 stitches between them.
1) MR with 6 SC (6)
2) 6x inc. (12)
3) (1 SC, 1x inc.) x 6 (18)
4) (2 SC, 1x inc.) x6 (24)
5) (3 SC, 1x inc.) x6 (30)
6-10) SC in every st., 5 rnds. in total (30)
11) (3 SC, 1x dec.) x6 (24)
12) (2 SC, 1x dec.) x6 (18)
13) (1 SC, 1x dec.) x6 (12)
- Stuff head. Continue stuffing until the body is finished.
14) SC in every st. (12)
15) (3 SC, 1x inc.) x3 (15)
16) (4 SC, 1x inc.) x3 (18)
17) SC in every st. (18)
18) (5 SC, 1x inc.) x3 (21)
19-21) SC in every st., 3 rnds. in total (21)
22) (5 SC, 1x dec.) x3 (18)
23) (1 SC, 1x dec.) x6 (12)
24) 6x dec. (6)
Close body, finish off and weave in ends.
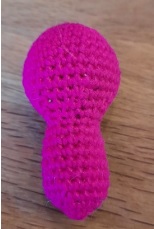
Legs and Arms
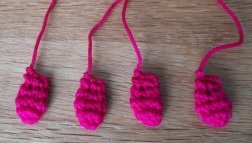
Crochet 4 in total:
1) MR with 6 SC (6)
2) (1 SC, 1x inc.) x3 (9)
3) 1 SC in every st. (9)
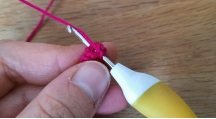
Crochet 1 ch st., press arm/leg together and crochet both sides together with 2-3 SC.
Finish off, leave a long tail for sewing.
Ears
You need 2 ears.
1) MR with 6 SC (6)
2) 6x inc. (12)
3) (3 SC, 1x inc.) x3 (15)
4-6) SC in every st., 3 rnds. in total (15)
7) (3 SC, 1x dec.) x3 (12)
8) SC in every st. (12)
9) (2 SC, 1x dec.) x3 (9)
10-13) SC in every st., 4 rnds. in total (9)
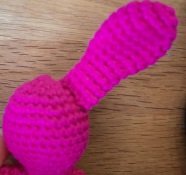
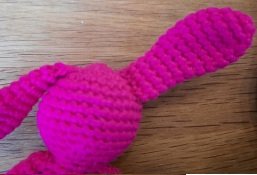
For a standing ear: End with a sl st. Finish off, leave a long tail for sewing.
For a floppy ear: Crochet 1 ch st., press arm together and crochet both sides together with 4-5 SC. Finish off, leave a long tail for sewing.
Muzzle
Crochet muzzle in the preferred color:
1) MR with 6 SC (6)
2) 6x inc. (12)
End with a sl st. Finish off, leave a long tail for sewing.
When the muzzle is finished, you can sew the nose to it:
Sewing Parts Together
Sew the arms to both sides of the body, directly under the head:
Next step is to sew the legs to the body.
Now you can sew the ears to the head. In this case I made a standing ear and a floppy ear:
Now you can sew the muzzle centrical to the face:
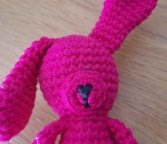
If you didn’t use safety eyes, you can now attach the pearls. I recommend adding a new thread somewhere, using it to sew on both eyes, and ensuring it leaves the body at exactly (!!) the same spot you added it. Then you can make a knot, cut the ends off, and put the knot into the head:
Final Touches
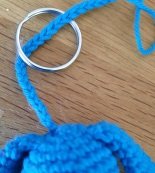
Your Bunny is finished now! You can add a key ring or a little snap hook if you like.
Therefore, crochet a chain with 20-25 ch st. and use it to add the ring:
