CrochetMenScarvesHatsGlovesSweatersCardigansSocksOther clothingWomenScarvesHatsGlovesShawls and cover upSweatersCardigansSocksSlippersBagsOther clothingChildrenScarvesHatsGlovesSweatersCardigansSocksSlippersOther clothingHomeBlankets and plaidsRugsHome decorationsPetsSchemesKnittingOther hand-madeChat
Crochet Adorable Sock

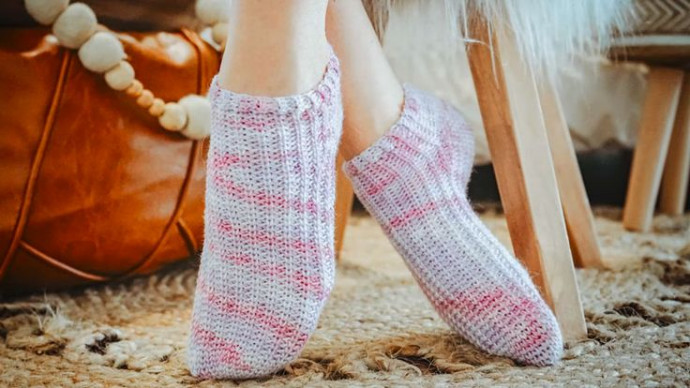
Crocheting adorable socks is such a delightful and charming activity! From choosing the softest yarn to creating intricate patterns, each stitch brings joy and warmth. Whether you're making them as a gift or treating yourself to a cozy pair, the process is always filled with creativity and a touch of whimsy.
Plus, the satisfaction of completing a pair of handmade socks is truly heartwarming. Keep on crocheting those cute socks and spreading comfort one stitch at a time!Materials Needed & Measurements:
- Yarn:
- WeCrochet Stroll Tonal (75% Fine Superwash Merino Wool, 25% Nylon) or any similar fingering-weight yarn.
- Yarn Quantity:
- Ankle Socks: 250 yards (228 meters)
- Mid Calf Socks: 375 yards (343 meters)
- Over the Knee Socks: 775 yards (709 meters)
- Crochet Hooks: 2.5 mm and 3.5 mm crochet hooks.
- Notions:
- Removable stitch markers (if needed)
- Yarn needle to weave in ends
- Scissors
Measurements:
- Gauge: 20 stitches x 25 rows = 10 cm (in established stitch pattern)
- Stitches per inch: 5 stitches
Stitch Abbreviations:
- ch: Chain
- sl st: Slip Stitch
- sc: Single Crochet
- hdc: Half Double Crochet (optional for variations, if used)
- st: Stitch
- sc2tog: Single Crochet 2 Together (decrease)
- FO: Fasten Off
Stitching Instructions for Making the Simple And Best Crochet Sock Pattern:
Cuff:
- Ch 40 (or adjust based on foot size) to start the cuff.
- For a snug fit, you can start with a smaller number of chains, such as 36 or 38.
- Round 1: Join the chain to form a ring with a sl st, making sure the chain is not twisted.
- Round 2: Ch 1 (does not count as a stitch), sc in each stitch around, join with a sl st to the first sc.
- Rounds 3-10 (or desired cuff height): Continue working in a spiral (do not join) or join with sl st after each round. Work sc in each stitch around.
- You can add more rounds for a longer cuff or change stitch patterns (such as hdc for a thicker cuff) if desired.
Heel:
- Switch to a 3.5 mm hook for a firmer heel structure.
- Round 1: After completing the cuff, ch 1, and work sc into the first 20 stitches of the cuff (this creates the heel flap). Turn the work.
- Round 2: Ch 1, sc in each stitch across the 20 stitches, then turn.
- This establishes the back portion of the sock and creates the heel.
- Rounds 3-10: Repeat Round 2 (sc in each stitch, turn).
- Continue working back and forth in rows until the heel flap reaches the desired length. For a standard sock, 10 rounds should be sufficient, but you can adjust the length for a larger or smaller heel.
Foot:
- Round 1: Once the heel flap is complete, you will begin working in the round to form the foot.
- To do this, ch 1, and work sc evenly around the edge of the heel flap. Place 2 sc in the corners where the heel flap meets the cuff to ensure a smooth curve.
- Round 2-20: Work sc evenly around the sock, placing one stitch in each stitch from the previous round.
- Continue working in the round until the sock reaches the desired foot length. For ankle socks, about 20 rounds should suffice, but you can adjust based on foot size.
- Tip: Check your foot length by trying the sock on as you go. It should reach just past your ankle or mid-calf, depending on your preference.
Toe:
- Round 1: Begin decreasing to shape the toe. To decrease, work sc 2 together (sc2tog) at both ends of the round. This will reduce the stitch count gradually.
- For example, if you are working with 40 stitches, decrease by 2 stitches per round by working sc2tog at the start and end of each round.
- Round 2: Continue working sc 2 together at both ends of the round. Now your stitch count will be reduced to 36 stitches.
- Rounds 3-4: Keep decreasing each round, working sc 2 together at both ends of the round. Continue until there are about 12 stitches remaining.
- Round 5: Once you have about 12 stitches left, continue working sc 2 together around the entire round until you have just 6 stitches remaining.
- FO: Once the toe is complete, cut the yarn, leaving a long tail. Thread the tail through a yarn needle and pull through the remaining stitches, securing the toe. Weave in any ends.
Finish:
- Weave in all loose ends with a yarn needle to make the socks tidy.
- If necessary, block your socks to give them a uniform shape. Blocking can help relax the stitches and make them more even.
- Simply wet the socks and lay them flat to dry in the correct shape.
Once your socks are dry, they are ready to wear! Enjoy your comfortable and cozy hand-crocheted socks!
No comments
Write a comment
