CrochetMenScarvesHatsGlovesSweatersCardigansSocksOther clothingWomenScarvesHatsGlovesShawls and cover upSweatersCardigansSocksSlippersBagsOther clothingChildrenScarvesHatsGlovesSweatersCardigansSocksSlippersOther clothingHomeBlankets and plaidsRugsHome decorationsPetsSchemesKnittingOther hand-madeChat
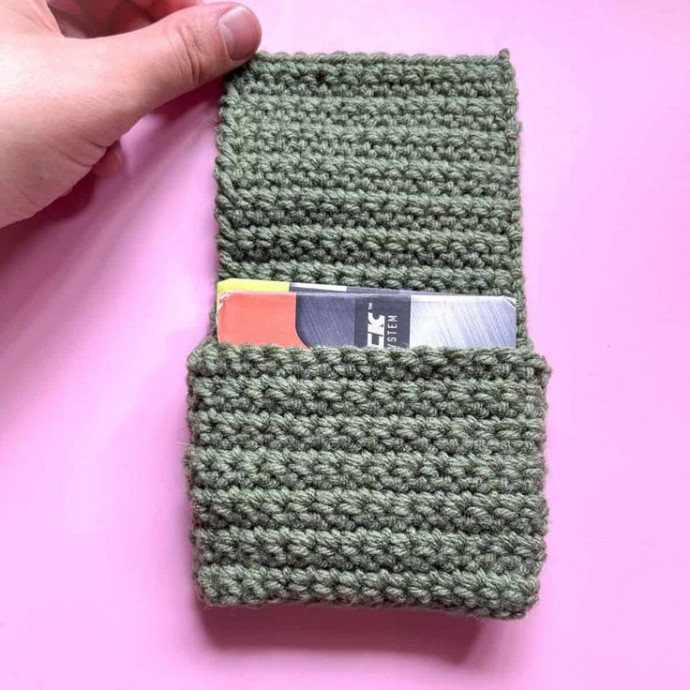
Crochet Adorable Wallet

Crocheting an adorable wallet is not only a fun and creative project but also a practical way to showcase your craftsmanship. From choosing the softest yarn to selecting the perfect color combination, the process of crafting a wallet can be both relaxing and rewarding. Imagine the joy of pulling out your one-of-a-kind crochet creation every time you need to make a purchase – it's sure to bring a smile to your face and admiration from others.
So why not grab your crochet hook, pick out your favorite pattern, and let your creativity shine as you create your very own charming and functional wallet? Happy crocheting!Materials
small ball of sage green yarn
4mm hook
Tapestry needle
Velcro or button for closure
Sewing thread and needle for button/velcro
Abbreviations (US terms)
sc = Single crochet
ch = Chain
Notes
I used acrylic yarn for this crochet wallet pattern. You can opt for acrylic or cotton.
The base pattern involves single crochet (sc) stitches. It results in a wallet that's about 3 inches tall and 4 inches wide. Feel free to customize by adding various appliques or experimenting with different stitches for added variation.
Instructions
This pattern is made in rows.
Row 1: Ch x64 (64) + 1 turning ch (never work in the turning chains, just skip those in the next row)
Row 2: Starting in the second ch from hook, sc in every stitch (64). Ch x1 and turn.
Row 3-13: Sc in every stitch (64). Ch x1 and turn
Row 14-28: Sc x16 (16). Ch x1 and turn. After all the rows are done, fasten off and weave in the tail.
Now that the base of the wallet is done, it is time to fold it and sew it into a wallet!
Lay the piece flat so that the long portion of the wallet is at the bottom, and the shorter rows are in the upper right.
From left to right, fold the bottom portion of the wallet 3 times so that there are 4 walls to the wallet and ultimately you end up with 3 pockets. With yarn and tapestry needle, sew alongside the edges being careful not to sew too far into the wallet that it makes it harder to insert cards.
Once the wallet is sewn together, you can leave it as is or you can add an applique to the top to give it some personality.
To close the wallet. You can either sew a button on or velcro (which is what I did) for secure closing and opening. Use the sewing thread and needle for this part.
As you can see the crochet wallet design is fairly simple and can be completed fairly fast.
No comments
Write a comment
