Crochet Adorable Suncatcher

Crochet Adorable Suncatchers are the perfect way to add a touch of charm and whimsy to any space! These delightful creations not only brighten up a room but also bring a sense of joy and creativity. Whether you hang them in a sunny window or place them outdoors to catch the light, these suncatchers are sure to bring a smile to your face every time you see them. With their intricate designs and vibrant colors, they make wonderful gifts for friends and loved ones who appreciate handmade treasures. So grab your yarn and hooks, and get ready to crochet some magic into your home with these adorable suncatchers!
Materials:
Yellow yarn, I used the Kartopu no:1 antipilling acrylic yarn, I highly recommend it
ch : chain
sl st : slip stitch
sc : single crochet
hdc : half double crochet
dec : decrease
R : round / row
Pattern:
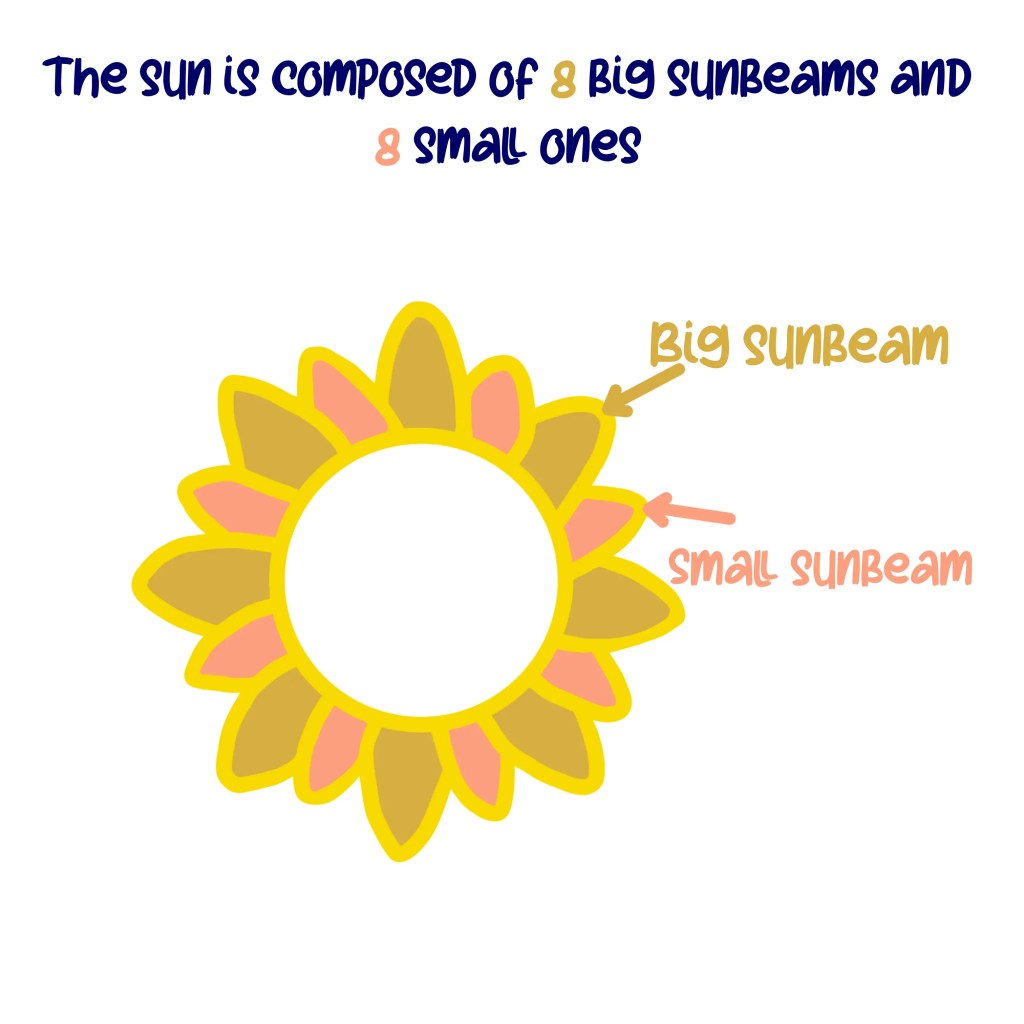
We will crochet the sun around the metal gold circle. The sun is composed of big and small sunbeams, 8 for each of them. We will crochet them one by one, without cutting yarn, until we make them all. Each time we pass to the next sunbeam, we will start all other again to row 2.

Round 1: join yarn with a sc, around the metal circle. Add 111 more sc around the circle. Sl st in the 1st sc at the end of the round (112).
Big Sunbeam
Row 2: ch 1 and starting from the same stitch where we just made our sl st, we will make the 1st big sun’s ray: 8 hdc (8).
Row 3: ch 1 then turn, 8 hdc (8).
R4: ch 1 then turn, hdc dec, 4 hdc, hdc dec (6).
R5: ch 1 then turn, 6 hdc (6).
R6: ch 1 then turn, hdc dec, 2 hdc, hdc dec (4).
R7: ch 1 then turn, 4 hdc (6).
R8: ch 1 then turn, hdc dec x2 (2).
R9: ch 1 then turn, hdc dec (1).
R10: ch 1 then turn, 1 sc in the only stitch, ch1 again, then working on the left side of the triangle, make 7 sc to reach the 1st round again. Once you made the 7 sc on the side, we will move on to a small sunbeam.
Small Sunbeam
Working back in the 1st round’s stitches and starting the first free stitch available:
Row 2: 6 hdc (6).
Row 3: ch 1 then turn, 6 hdc (6).
R4: ch 1 then turn, hdc dec, 2 hdc, hdc dec (4).
R5: ch 1 then turn, 4 hdc (4).
R6: ch 1 then turn, hdc dec x2 (2).
R7: ch 1 then turn, hdc dec (1).
R8: ch 1 then turn, 1 sc in the only stitch, ch1 again, then working on the left side of the triangle, make 5 sc until you reach back the 1st round.
Working back in the 1st round’s stitches and starting the first free stitch available: you make another big sunbeam following the same pattern as we did before.
Repeat big sunbeam and small sunbeam patterns, one after the other, until you reach the end of the 1st round. Once you made your last small sunbeam, sl st in the 1st stitch of round 1. Cut yarn and weave in the ends.
You will now notice that the right side of the sunbeams are uneven and not as straight as the left side (which we straighten away with our single crochets previously).
To remedy this, we will join the yarn again at the base of the sunbeams (so at the level of the 2nd row of each spoke), on their right sides, with a 1 sc. Make 7 sc for the big sunbeams, and 5 sc for the small ones, this way. Then when you reach the top of the triangles, make a ch 1, and an invisible join in the previous ch 1 from the last rows of each triangle, to give it a kind of pointy/rounded. Cut yarn and weave in ends each time you finish a sunbeam.
By now, your sun is ready. Now you have to assemble the prisms and the sun together with a solid gold chain.
Place the biggest prism in the center of the sun. Then separate the small suncatcher in 2, as shown in the photo below. The top part goes to the top of the sun, the bottom part to the bottom of the sun. Connect everything with the gold chain.
When everything is assembled together, the only thing left for you to do is to hang it in front of a window where the sun shines through, and watch your room be filled with rainbows sparkles.
