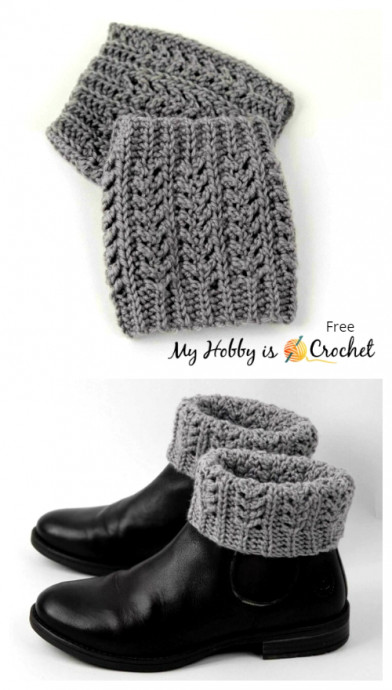
Crochet Textured Boot Cuffs

Crochet Textured Boot Cuffs are a delightful accessory to add flair to your winter outfits! These charming cuffs are not only stylish but also practical, as they keep your legs warm and cozy when paired with your favorite boots. The textured design adds a unique touch, giving your ensemble a lovely handmade feel.
Whether you're strolling through a winter wonderland or simply running errands around town, these boot cuffs are sure to garner compliments and keep you comfortable all day long. So why not treat yourself to a pair of these adorable boot cuffs and take your winter wardrobe to the next level with a touch of handmade charm?SKILL LEVEL: Intermediate
GAUGE: 8 groups of crossed dc = 16 sts = 4 in (10 cm)
approx. 3 panels (12 rows in aran pattern) = 4 in (10 cm)
Note: You will find the term aran panel: this refers to a pattern repeat of 4 rows.
FINISHED SIZE:
Without stretching, the boot cuffs measure 24 cm around at widest point, 20 cm around at ribbing
and inches high= 14 cm
HOW TO CUSTOMIZE TO ANY CUFF SIZE AND BOOT HEIGHT:
The pattern is written for ankle boots (Chelsea boots) toppers, but you can easily customize them for any boot height and also for any cuff size!
Customize the width of the boot cuffs to any size, by working less/more rows in the aran pattern stitch.)
For a higher cuff, start with more chains multiple of 2 + 1 st to turn. Use exactly the same number of yo-slsts for top and bottom ribbing and make more pairs of crossed sts in between the ribbing.
For example here, I have used 26 sts + 1 st to turn = 27 chains to start.
26 sts in the row = 5 sts ribbing top + 16 sts for crossed sts + 5 sts ribbing bottom
SUPPLIES:
- 1 skein of Chic Sheep by Marly Bird yarn (Sterling colorway shown)
Finished project yardage (both cuffs) 62g.
5 mm crochet hook
- tapestry needle to sew in the ends
- stitch markers/ yarn ends
- scissors
ABBREVIATIONS:
(US Terminology used)
- ch: chain
- back bump of chains:
- st: stitch
RS = right side
WS= wrong side
Special Stitches:
1) Yo-slst = yarn over slip stitch: Yarn over (yo) and insert the hook into the indicated st. Yarn over and draw the yarn through the chain. Having the 3 loops on hook, pull/slip the first loop on hook through the next 2 loops on hook to complete a Yarn Over Slip Stitch (yo-slst).
2) Yo-slst-blo: yarn over slip stitch back loops only: work the same as above, but inserting the hook in the back loops of sts.
3) Variations of the Crossed Double Crochet and Crossed Half Double Crochet
By working these variations of the cross stitch, you will get stitches, which although crossed, are not entangled with each other.
3.1) Back Crossed Double Crochet (bcr dc): sk 1 st, work 1 dc into the next st, 1 dc back into skipped st going behind the last dc just made, so as not to catch it.
3.2) Front Crossed Double Crochet variation (fcr dc): sk 1 st, work 1 dc into the next st, 1 dc back into skipped st going in front of the last dc just made, but inserting the hook into the skipped stitch from back of the work to the front. This is an important step to obtain the arrow look of this aran pattern.
3.3) Back Crossed Half Double Crochet (bcr hdc):sk 1 st, work 1 hdc into the next st, 1 hdc back into skipped st going behind the last hdc just made, so as not to catch it.
3.4) Front Crossed Half Double Crochet (fcr hdc): sk 1 st, work 1 hdc into the next st, 1 hdc back into skipped st going in front of the last hdc just made, but inserting the hook into the skipped stitch from back of the work to the front.
NOTE: When written 1bcr dc or any of the crossed sts, it is meant 1 group of 2 sts; 1bcr dc = 2 dc sts crossed.
INSTRUCTIONS:
Ch 27.
Row 1 (RS) : working into back bump of chains, yo-slst in 2nd ch from hook and yo-slst in each ch across, turn(26 st)
Row 2 (WS): ch1, 1 yo-slst-blo in each st across, turn (26 sts)
Row 3 (RS): ch1, 1 yo-slst-blo in each of next 5 sts, work 1 bcr hdc over next 2 sts, 6 bcr dc over next 12 sts, 1 bcr hdc over next 2 sts, yo-slst-blo in each of next 5 sts, turn (26 sts)
Row 4 (WS): ch1, 1 yo-slst-blo in each of next 5 sts, work 1 fcr hdc over next 2 sts, 6 fcr dc over next 12 sts, 1 fcr hdc over next 2 sts, yo-slst-blo in each of next 5 sts, turn (26 sts)
Row 5 (RS): ch 1, 1yo-slst-blo in each of next 5 sts, work 1 yo-slst ( inserting hook into both top loops) in each of next 16 sts, yo-slst-blo in each of next 5 sts, turn (26 sts)
Row 6 (WS): ch1, 1 yo-slst-blo in each st across, turn (26 sts)
Repeat rows 3-6 until desired width, ending with a row 4 repeat.
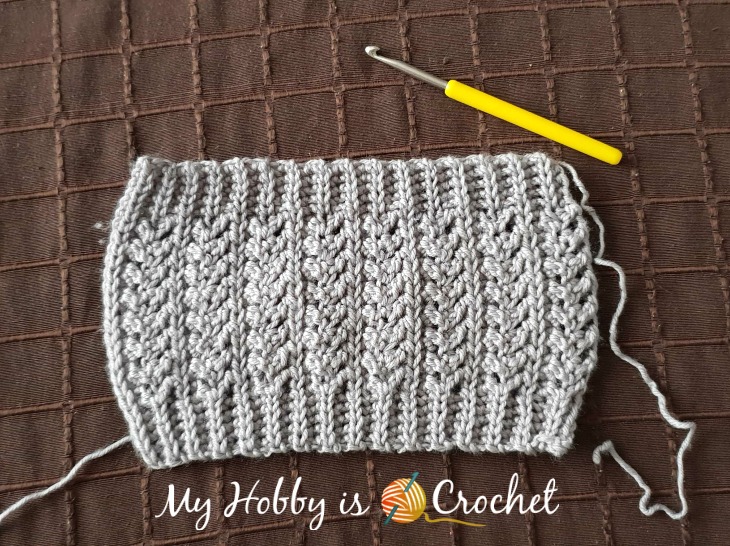
I have made 8 aran panels, as seen below:

Cut yarn living a yarn tail that will be used to sew the sides together. Fasten off.
FINISHING:
On the wrong side, fold the boot cuffs in half so that the endings are on top of each other. Thread yarn needle with the yarn tail and using the Mattress stitch sew along the sides.
Weave in all ends.
