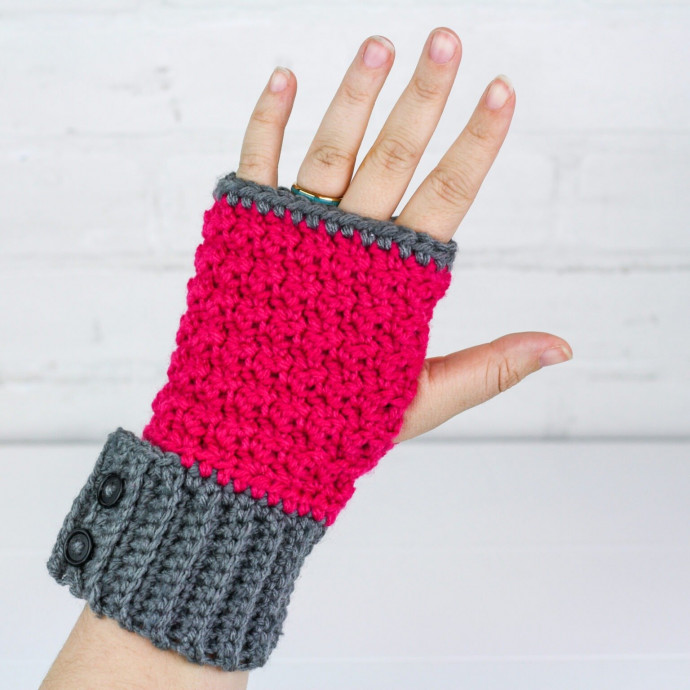
Crochet Fingerless Gloves

Crochet fingerless gloves are not only practical but also stylish accessories that can keep your hands warm while allowing your fingers to remain free. They come in a variety of colors, patterns, and designs, making them versatile and fun to wear. Whether you're looking to add a pop of color to your outfit or simply keep your hands cozy during the chilly seasons, fingerless gloves are a trendy choice.
Plus, they are great for day-to-day activities like typing on your phone, working on crafts, or simply adding an extra layer of warmth. So go ahead and give your hands a treat with a pair of crochet fingerless gloves – you'll be both fashionable and comfortable all at once!Materials Needed
1.2 oz or 66 yds of Red Heart Heat Wave, Bikini
1 oz or 55 yds of Red Heart Heat Wave Radio
Size H 5mm Crochet Hook
Yarn Needle
Scissors
4 – 1/2″ Buttons
Stitches and Abbreviations
CH – Chain
SC – Single Crochet
HDC – Half Double Crochet
DC – Double Crochet
BLOSC – Single Crochet into the Back Loop Only
ST(s) – Stitch(es)
SLST – Slip Stitch
Gauge and Size
Gauge
8 BLOSC x 8 Rows = 2 Inches
Size
Each glove measures 7.5 inches long and 8 inches around.
Crochet Fingerless Gloves Pattern (Make 2)
Notes:
-Written in US terms.
– The turning chain does not count as a stitch.
With Grey, CH 11
Row 1: SC in 2nd CH from hook, SC in next 9 CH. (10 SC)
Row 2: CH1, turn, SC in next 2 STs, CH1, Skip ST, SC in next 4 STs, CH1, Skip ST, SC in last 2 STs. (6 SC, 2 CH1 Space)
Row 3 – 35: CH1, turn, BLOSC in next 10 STs. (10 SC)
Row 36: CH1, turn so you are working down the sides of Row 1-35. Work 1 SC into the side of each row. (35 SC)
Row 37 and the first half of Row 38 are worked into Row 36. The last half of row 38 is worked into Row 36 and 37.
Row 37: Turn, SLST into the first 16 STs.
Row 38: Change to Pink, CH2, Working the same direction, Work a HDC into the same ST as your last SLST of Row 37. HDC into next 19 STs. From here take your cuff and fold it in half so that you can work into Row 36. Skip the first 5 SLST and work a HDC into the next 10 STS. (30 HDC)
This should bring you right back to the place where you started using the pink yarn.
Row 39-51: CH2, Turn, HDC into first ST, *(SC, DC) into next ST, Skip next ST* repeat from *to* a total of 14 times. HDC into last ST.
Starting on Row 40 you will be working your (SC, DC) into the DCs of the previous Row.
Row 52: Change to Grey, CH2, Turn, HDC into next 30 STS. Fasten off.
Sewing it Together
Once both gloves are made. Lay them done next to each other. Position them so that the button flaps are on the outside of your wrists and the opening for the thumb is on the inside of the gloves. You may need to turn one glove inside out to accomplish this.
Using pink yarn and a whip stitch, sew the top and bottom of the open side together following the diagram below. Feel free to try on the glove and adjust the thumb opening to your liking. Sew two buttons onto the side of each cuff and your fingerless mitts are ready to enjoy.
