CrochetMenScarvesHatsGlovesSweatersCardigansSocksOther clothingWomenScarvesHatsGlovesShawls and cover upSweatersCardigansSocksSlippersBagsOther clothingChildrenScarvesHatsGlovesSweatersCardigansSocksSlippersOther clothingHomeBlankets and plaidsRugsHome decorationsPetsSchemesKnittingOther hand-madeChat
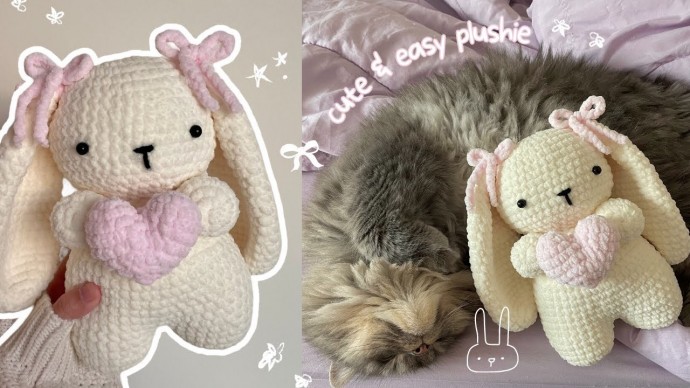
Crochet Amigurumi Bunny Holding A Heart

Imagine a sweet crochet amigurumi bunny holding a heart in its tiny paws - it's the epitome of cuteness! This delightful creation combines the charm of amigurumi with the symbol of love, making it a perfect gift for someone special or a lovely addition to your own décor. The intricate detailing of the bunny's fluffy fur and the heart it tenderly cradles adds warmth and whimsy to any space.
Handcrafted with love and skill, this adorable bunny brings a touch of handmade magic to brighten your day and spread joy to those around you.Materials:
- Any yarn (fluffy, cotton, or acrylic)
- Hook size appropriate for the yarn (4.5mm hook recommended)
- Plastic needle
- Stitch marker or bobby pin
- Safety eyes
- Stuffing (old cushions or pillows recommended)
Preparations:
- Yarn Choice: You can find a selection of recommended yarns on the video creator's Amazon storefront.
- Hook Size: Use a hook size that matches your yarn for appropriate tension.
- Previous Guide: If it's your first time making an amigurumi plushie, watching the previous guide to amigurumi video is advised.
Step by step Pattern
Magic Ring Alternative:
- Make a slip knot.
- Chain 4 (ch 4).
- Insert your hook into the very first chain, slip stitch to form a circle.
- Identify and mark the circle between the chains as your magic ring.
Round 1:
- Inside the magic ring, insert 8 single crochets (sc).
- Mark the first sc with a stitch marker or a bobby pin.
Round 2:
- Increase by inserting two single crochets in every stitch around.
- You should have 16 sc at the end of this round.
Round 3:
- Follow a pattern of one single crochet and then an increase in every stitch around.
- Remember the increase means 2 sc in the same stitch.
Subsequent Rounds:
- Continue increasing each round by following the pattern provided in the video, where you add more single crochets between each increase to gradually enlarge the round while maintaining a flat circle. The pattern typically involves adding an additional single crochet to the sequence before each increase as you progress through the rounds (e.g., Round 4: 2 sc then an increase, Round 5: 3 sc then an increase, etc.).
- Perform repeat rounds by inserting one single crochet in each stitch around once you've achieved the desired size for your bunny's head. This builds the sides of the head.
Body:
- Start with the magic ring or slip knot and ch 4 method as above for the head.
- The pattern for the body and legs involves similar increases to form the base then straight rounds for length, followed by decreases to taper off.
Joining Legs and Body:
- After completing the legs, you'll join them by slip stitching and continue crocheting around both to form the body, ensuring to count your stitches to maintain symmetry.
Decreases for Shaping:
- You'll use invisible decreases to shape the bunny, particularly after building up the body and before fastening off to close the top.
Ears and Tail:
- The ears are made separately, starting with a magic ring, then increasing and straight rounds, before being flattened and sewn onto the head.
- The tail can be a simple small pom or a small round crocheted piece attached to the bunny.
Assembly and Finishing Touches:
- Assembly: Sew the body parts together, ensuring the stitch counts match for symmetry.
- Eyes: Attach the safety eyes before fully closing the head.
- Stuffing: Stuff all parts before closing.
- Sewing: Finish by sewing all parts together, ensuring the ear placement matches and the body proportions are correct.
No comments
Write a comment
