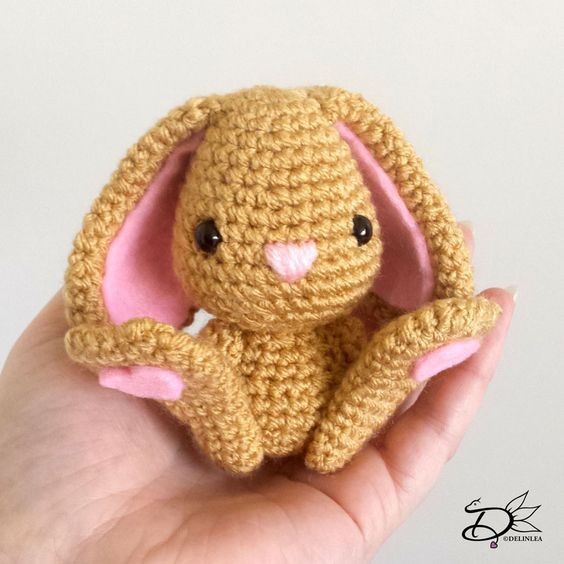
Crochet Easter Bunny

Crocheting an Easter bunny is such a delightful and charming project to work on during the Easter season! The soft pastel yarn and intricate stitches come together to create a cuddly and adorable bunny that can bring a touch of handmade love to your Easter decorations. From the fluffy tail to the floppy ears, crafting your own crochet Easter bunny allows for a personal touch and a sense of accomplishment as you see your creation come to life stitch by stitch.
Whether you're making it as a gift for a loved one or as a whimsical addition to your home decor, the process of crocheting an Easter bunny is sure to fill your heart with joy and creativity during this festive time of year.For this DIY you’ll need:
♥ Yarn in the colors; Light Brown and Cream. (I used Stylecraft Special DK)
♥ Crochet Hook (I used a 2,5mm hook).
♥ Stuffing.
♥ Scissors.
♥ Sewing Pins.
♥ Yarn Needle.
♥ Safety eyes, 6mm.
♥ Pink Felt.
♥ Fabric Glue.
Stitches used (US Terms):
Magic Ring.
Ch = Chain.
SC = Single Crochet.
ST = Stitch.
Inc = Increase.
Dec = Decrease.
(…) = Repeat the space in brackets the given number of times.
[…] = Total number of stitches.
Pattern
The Body and Head will be the same as the Boho Duckling. Use the Light Brown color for this.
For the nose you can use either pink felt or embroider it on. Just what you think is best.
Ears (Make 2)
Use the color Light brown.
1: 6SC in Magic Ring. [6]
2: 2SC in each st around. [12]
3: (1SC, inc) 6 times. [18]
4: (2SC, inc) 6 times. [24]
5: 24SC. [24]
6: 24SC. [24]
7: 24SC. [24]
8: (6SC, dec) 3 times. [21]
9: 21SC. [21]
10: (5SC, dec) 3 times. [18]
11: 18SC. [18]
12: (4SC, dec) 3 times. [15]
13: 15SC. [15]
14: 15SC. [15]
15: 15SC. [15]
16: (3SC, dec) 3 times. [12]
17: 12SC. [12]
18: 12SC. [12]
19: 12SC. [12]
Fasten off and leave a long tail for sewing. Out of Pink felt, cut the inner ear. This you will glue on with fabric glue.
Feet (make 2)
Use the color Light Brown.
1: 6SC in Magic Ring. [6]
2: (1SC, inc) 3 times. [9]
3: 9SC. [9]
4: 9SC. [9]
5: 9SC. [9]
6: (2SC, inc) 3 times. [12]
7: 12SC. [12]
8: 12SC. [12]
9: (3SC, inc) 3 times. [15]
10: 15SC. [15]
11: (4SC, inc) 3 times. [18]
12: 18SC. [18]
13: 3SC, dec, 7SC, dec, 4SC. [16]
14: 3SC, dec, 6SC, dec, 3SC. [14]
15: 2SC, dec, 5SC, dec, 3SC. [12]
Fasten off and leave a long tail for sewing.
Sew the top part, the opening, close.
Cut a heart out pink felt and glue this to the feet.
Arms and Tail (Make 3)
Use the color Light Brown for the arms (2). Use the color Cream for the tail.
1: 6SC in Magic Ring. [6]
2: (1SC, inc) 3 times. [9]
Fasten off and leave a long tail for sewing.
Assembling.
I always use sewing pins to place all parts first, before sewing. This way you can easily move all parts around until you are happy with the outcome.
Sew the body to the head. After that sew on the arms. Now you can reach them well.
The order doesn’t really matter, but sew on the ears, feet and tail on as well. And you are already done!
