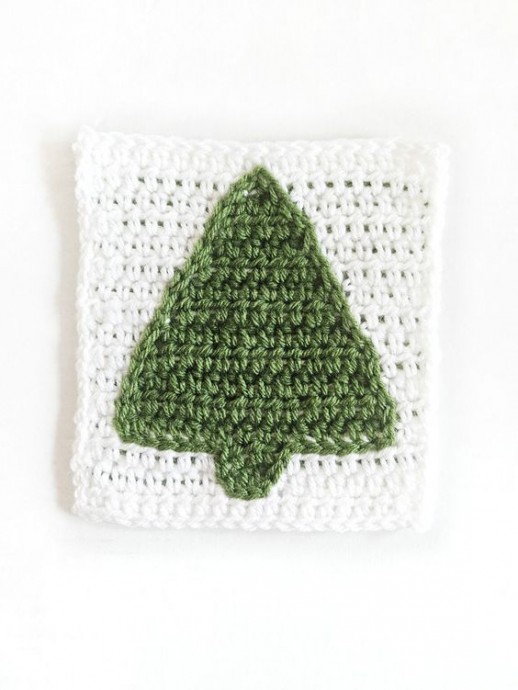
Crochet Winter Tree Square Pattern

The Crochet Winter Tree Square is a delightful pattern that captures the cozy essence of the winter season. With its intricate details and charming design, this square adds a touch of warmth and charm to any crochet project. The tree motif is perfect for creating a festive atmosphere in your cozy blankets, scarves, or even wall hangings. Whether you're a beginner or a seasoned crocheter, this pattern is sure to bring a smile to your face as you craft your way through the winter months. So grab your favorite yarn, a cup of hot cocoa, and let's crochet some wintery magic together!
Skill Level
Easy
Materials Needed
- Lion Brand Yarn Vanna’s Choice (Color A: White and Color B: Kelly Green) or any four weight yarn
- I-9 5.5 mm crochet hook
- Yarn needle (aka tapestry needle)
- Stitch marker
Stitches Used
- Half Double Crochet (hdc)
- Chain (ch)
- Slip Stitch (sl st)
Notes
- This square pattern is written in US standard terms.
- Always turn your work at the end of the row and chain 1 at the beginning of the row.
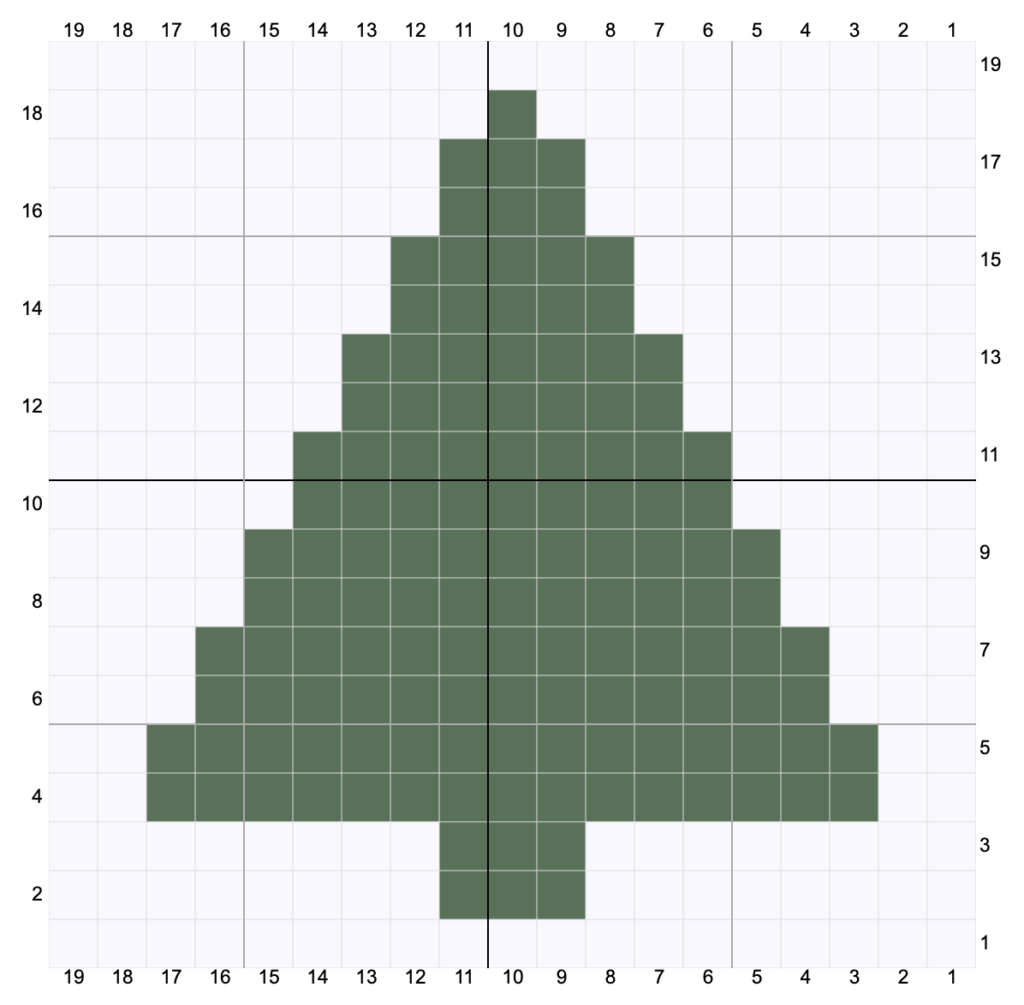
- Use the yarn color chart as a visual aid to help know when to change colors in the square.
The Pattern
Size: 6″ x 6″
Foundation Row: with White chain 20
Row Instructions
Row 1: starting in the second chain from the hook hdc, hdc into each chain across, turn. (19)
Row 2: Chain 1, with (White) hdc x 8, (Green) x 3, (White) x 8, turn. (19)
Continue with the pattern below, remembering to chain 1 at the beginning of each row and turning your work at the end, ending with 19 total stitches for each row.
Row 3: (White) x 8, (Green) x 3, (White) x 8
Row 4: (White) x 2, (Green) x 15, (White) x 2
Row 5: (White) x 2, (Green) x 15, (White) x 2
Row 6: (White) x 3, (Green) x 13, (White) x 3
Row 7: (White) x 3, (Green) x 13, (White) x 3
Row 8: (White) x 4, (Green) x 11, (White) x 4
Row 9: (White) x 4, (Green) x 11, (White) x 4
Row 10: (White) x 5, (Green) x 9, (White) x 5
Row 11: (White) x 5, (Green) x 9, (White) x 5
Row 12: (White) x 6, (Green) x 7, (White) x 6
Row 13: (White) x 6, (Green) x 7, (White) x 6
Row 14: (White) x 7, (Green) x 5, (White) x 7
Row 15: (White) x 7, (Green) x 5, (White) x 7
Row 16: (White) x 8, (Green) x 3, (White) x 8
Row 17: (White) x 8, (Green) x 3, (White) x 8
Row 18: (White) x 9, (Green) x 1, (White) x 9
Row 19: (White) x 19
Finishing
- Continue with White around the outside of the square using a sl st to make a border edging with sl st, chain 1, sl st in each corner.
- Next, with Green, surface slip stitch along the outside of the pine tree design. Follow along with this tutorial on how to surface slip stitch if you need some guidance.
- Once you’ve finished the square, use the yarn needle to weave in the ends.
Voilà, you’ve got a cozy, winter-inspired crochet square ready to be incorporated into blankets, cushions, or whatever you fancy.
Yarn Color Chart

