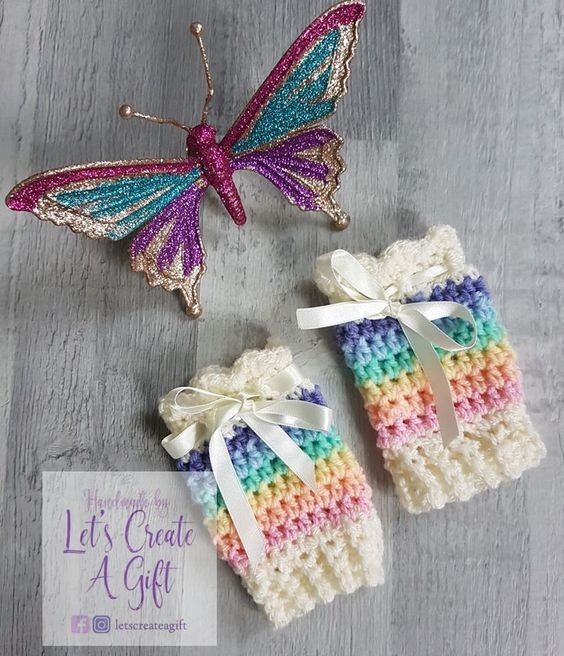
Crochet Baby Leg Warmers

Crochet baby leg warmers are not only adorable but also practical for keeping your little one cozy and stylish. These cute accessories come in a variety of colors and patterns, perfect for adding a pop of color to any outfit. They are incredibly soft and gentle on the delicate skin of babies, ensuring comfort while also providing warmth during cooler days.
Whether you're looking to match them with a cute onesie or layer them over pants, these leg warmers are a versatile and charming addition to any baby's wardrobe. Plus, they make for a thoughtful handmade gift that shows you care. So, why not add some flair to your baby's wardrobe with these charming crochet leg warmers?You will need
Size G/6 (UK 4mm) crochet hook
Light Worsted/DK yarn (I started with Stylecraft Cream and then used a selection of other yarn ends, all DK but various makes and colours)
Needle for sewing in your ends
1 meter of ribbon (if you don’t have this they can be made without)
Scissors
Terminology
CH - Chain
SC – Double Crochet
HDC – Half Double Crochet
BLO – back loops only
SK – Skip a stitch
SS – Slip stitch
Let’s create some baby leg warmers
Creating the cuff
Ch5, Turn, SC in the 2nd Ch from the hook. SC in each (4)
*Ch1, SC in BLO in each stitch* (4) Repeat for 20 rows (add extra rows if you need it bigger or fewer rows if its for very skinny legs) If you’re not confident to do Back loops only you can SC in the stitch as normal but you won’t get the ribbed effect.
Join the 2 ends together using a slip stitch and then SC through BOTH ends to join the ends and create the ribbed cuff.
Creating the leg warmer.
No need to tie off from creating the cuff
Row 1 - Ch1, SC around the edge of the ribbed cuff, 1 SC in each row (20)
If you want to change colour from the cuff colour now’s the time to do it.
Row 2 - *CH2, HDC in each stitch around* Repeat * to * (20) SL to join.
Repeat row 2 6 more times for a total of 7 rows of HDC
If you want to change back to the cuff colour now’s the time to do it.
Row 8 – CH1, SC in each stitch around
Row 9 – CH2, *HDC, CH1, SK1* Repeat * to * all the way around SL to the top of the CH2 to join (10 spaces)
Row 10 – CH1, SC in the top of the HDC, SC in the CH space from the previous round. Continue around and SL to the CH1 to complete (20)
Row 11 - CH1, *SC, (HDC TC HDC), SC * Repeat another 4 times to make 5 shell shapes for the top boarder. Tie off and weave in your ends.Alternative Row 11 – If you don’t want the shell shape on the top you can also just CH2 and HDC all the way around (20) and tie off.
Cut your 1 meter ribbon in to half and then use 50cm to weave in and out of the HDC spaces you made on Row 10. Tie with a Bow and finish. If you don’t have any ribbon you could also make a chain 50cm long and use this to weave in and out if preferred.
