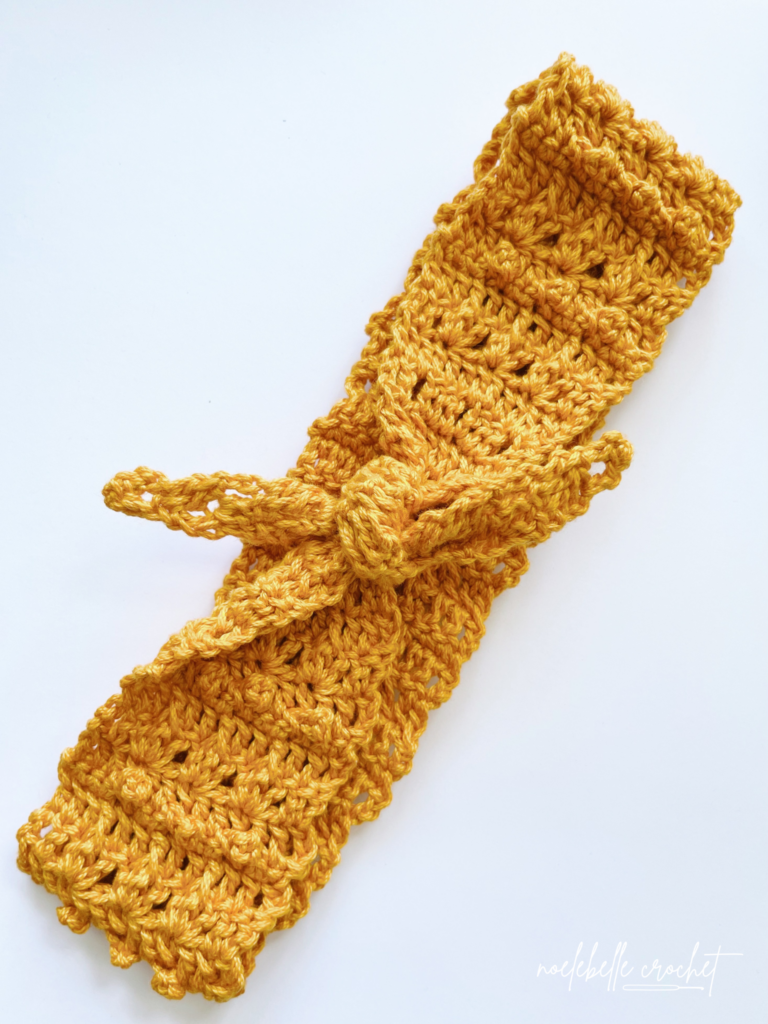
Crochet Adorable Headwrap
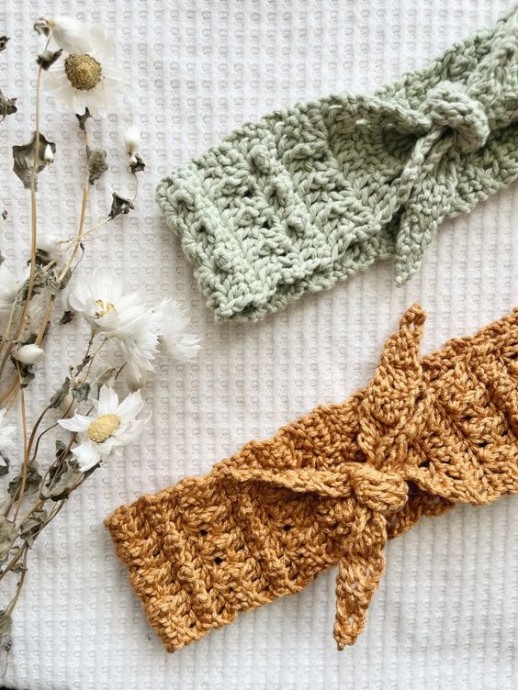
If you're looking to add a sprinkle of cuteness to your outfits, consider crocheting an adorable headwrap! Not only will it keep your hair in place and cozy during chilly days, but it's also a fun and stylish accessory to showcase your creativity. You can choose from a wide range of yarn colors and textures to make it uniquely yours. Whether you're a crochet pro or just starting out, crafting a headwrap is a fantastic way to relax and unleash your inner crafting genius. So grab your crochet hook, pick out your favorite yarn, and get ready to create a charming headwrap that will have everyone asking where you got it!
Materials:
CROCHET HOOK: 4.0mm or size needed to obtain gauge
EXTRAS: Scissors, yarn needle
YARN: Worsted/Aran weight cotton
- Estimated yardage: Approximately 40 yards (smallest size, skinny version) to 70 yards (largest size, wide version)
- Recommended yarn: 24/7 Cotton from Lion Brand
- Alternative recommendations: Paintbox Yarns Cotton Aran, Hobbii Rainbow Cotton 8/8, Hobbii Friends Cotton 8/8
Gauge:
2” x 2” (5cm x 5cm) DC swatch = 11 sts x 5.33 rows
Stitch Key:
CH: Chain
CH SP: Chain Space
DC: Double Crochet
DC2TOG: Double Crochet 2 Stitches Together
FPDC: Front Post Double Crochet
SC: Single Crochet
SK: Skip
SL ST: Slip Stitch
ST/STS: Stitch/Stitches
DEC: Decrease
INC: Increase
RS: Right Side
WS: Wrong Side
FO: Fasten Off
Special Stitches:
This summer crochet pattern uses a combination of DC, FPDC, PICOT, and CH stitches.
For the PICOTS in this pattern, please follow: CH 4, SL ST into the 1st CH to close your PICOT.
Notes:
- Crochet skill level: Intermediate
- This pattern is written in US crochet terms
- Information is listed in the following order: Baby (Toddler, Child, Adult Small, Adult Large)
- The stitch count at the end of each row is shown in brackets [ ]
- All STS are included in stitch counts (CH, SC, DC, FPDC, PICOT)
- The CH 1 at the beginning of each row does NOT count as a stitch. (Do not skip the first ST on these rows)
- The CH 3 at the beginning of each row DOES count as a stitch. (Skip the first ST on these rows)
- When you see a number directly in front of the stitch (2DC) work 2 double crochet stitches into the same stitch.
- When a number is written after the stitch (DC 2) work 1 double crochet into each of the next 2 stitches.
- Even-numbered rows are the right side (RS), odd-numbered rows are the wrong side (WS)
| Size | Head Circumference. | Headband Length (Including Ties)* | Headband Length (NOT Including Ties)* |
| Baby | 14-16″(35.6-40.6cm) | 23″(58.4cm) | 13.5″ (34.3cm) |
| Toddler | 16-18″ (40.6-45.7cm) | 24.4″ (62cm) | 14.9″ (37.8cm) |
| Child | 18-20″ (45.7-50.8cm) | 25.8″ (65.5cm) | 16.25″ (41.3cm) |
| Adult Small | 20-22″ (50.8-55.9cm) | 27.1″ (68.8cm) | 17.6″ (44.7cm) |
| Adult Large | 22-24″ (55.9-61cm) | 29.9″ (75.9cm) | 20.4″ (51.8cm) |
The finished headwrap has about 3-4″ (7.6-10.2cm) of negative ease. The ties provide extra room for adjusting the headwrap to fit the wearer perfectly!
*Each tie measures about 4.75″ (12.1cm)
This summer crochet pattern also features two width options: Skinny or Wide. The Skinny version is about 1.8″ (4.6cm) wide. The Wide version is about 2.4″ (6.1cm) wide.
All measurements are rounded to the nearest hundredth or tenth of an inch/centimeter.
Pattern Structure:
This pattern is broken down into two sections: WIDE VERSION, and SKINNY VERSION. Each version is broken down into three sections: INCREASING TIE SECTION, HEADBAND SECTION, and DECREASING TIE SECTION.
Pattern – Wide Version:
This portion of the pattern is for the Wide Version, about 2.4″ (6.1cm) wide. This version is best for Child, Adult Small, and Adult Large sizes, but it can be used for any size. The Skinny Version is best for Baby/Toddler sizes (or any size if you’d prefer a thinner headband).
INCREASING TIE SECTION
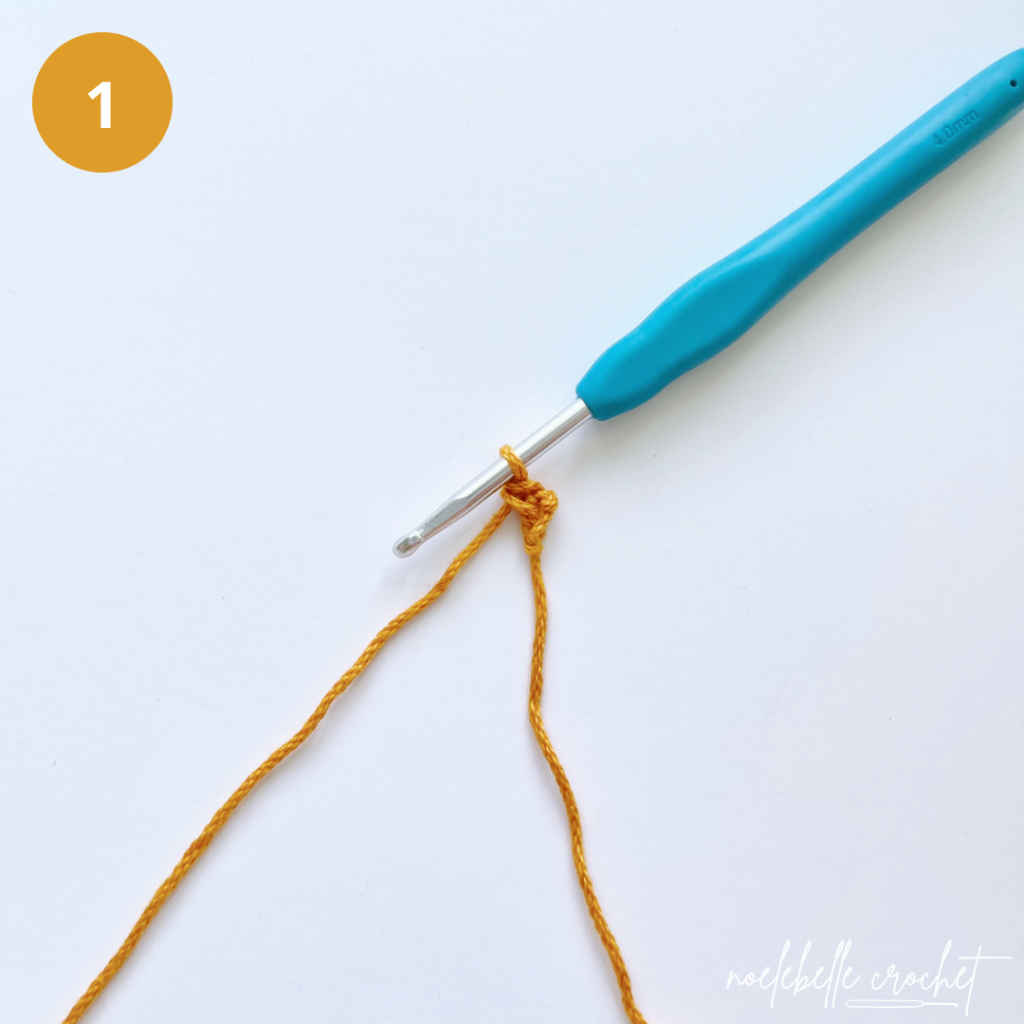
CH 2 (2, 2, 2, 2)
Row 1: SC in 2nd CH from hook [1 (1, 1, 1, 1)]
Row 2: Turn, CH 3 (counts as DC throughout pattern),
DC 1 in SC from previous row [2 (2, 2, 2, 2)]
Row 3: Turn, CH 3, DC 1 in same ST (INC made),
DC 1 in top of CH 3 from previous row [3 (3, 3, 3, 3)]
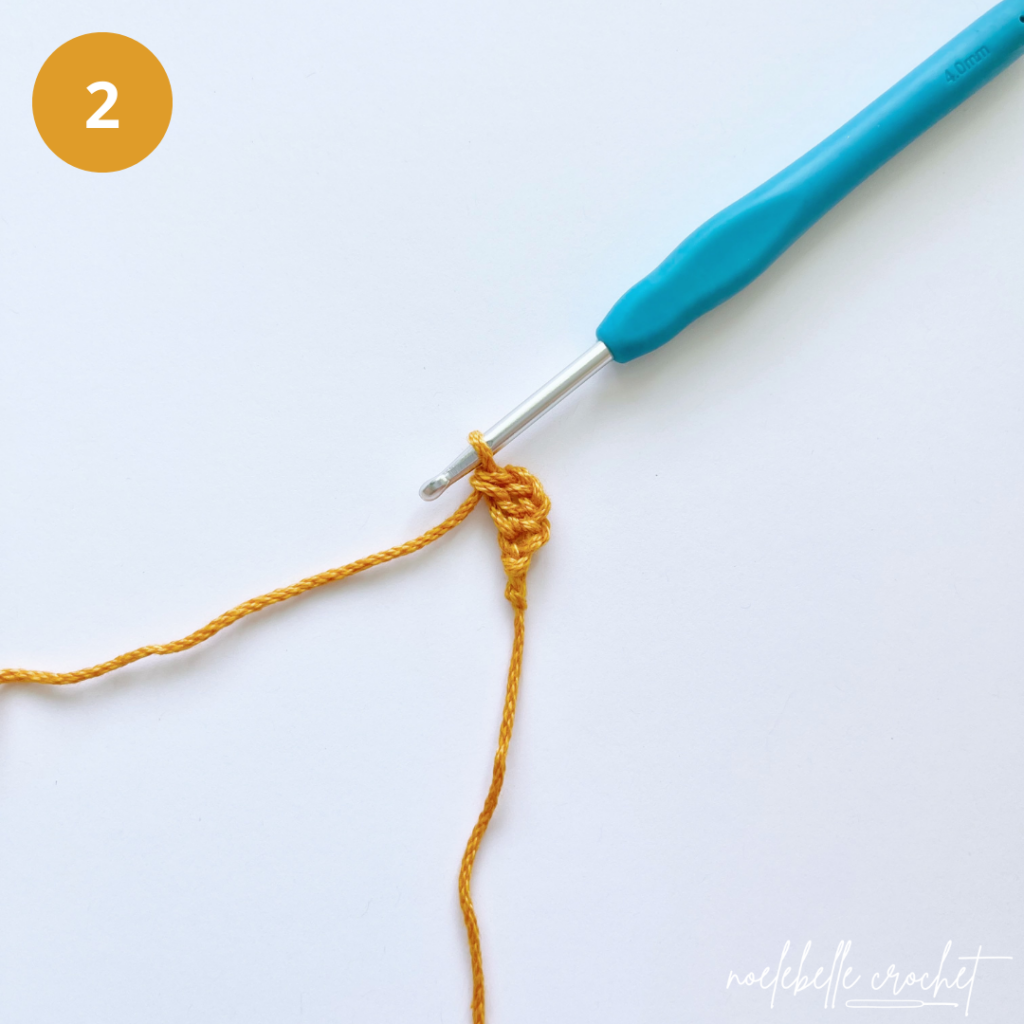
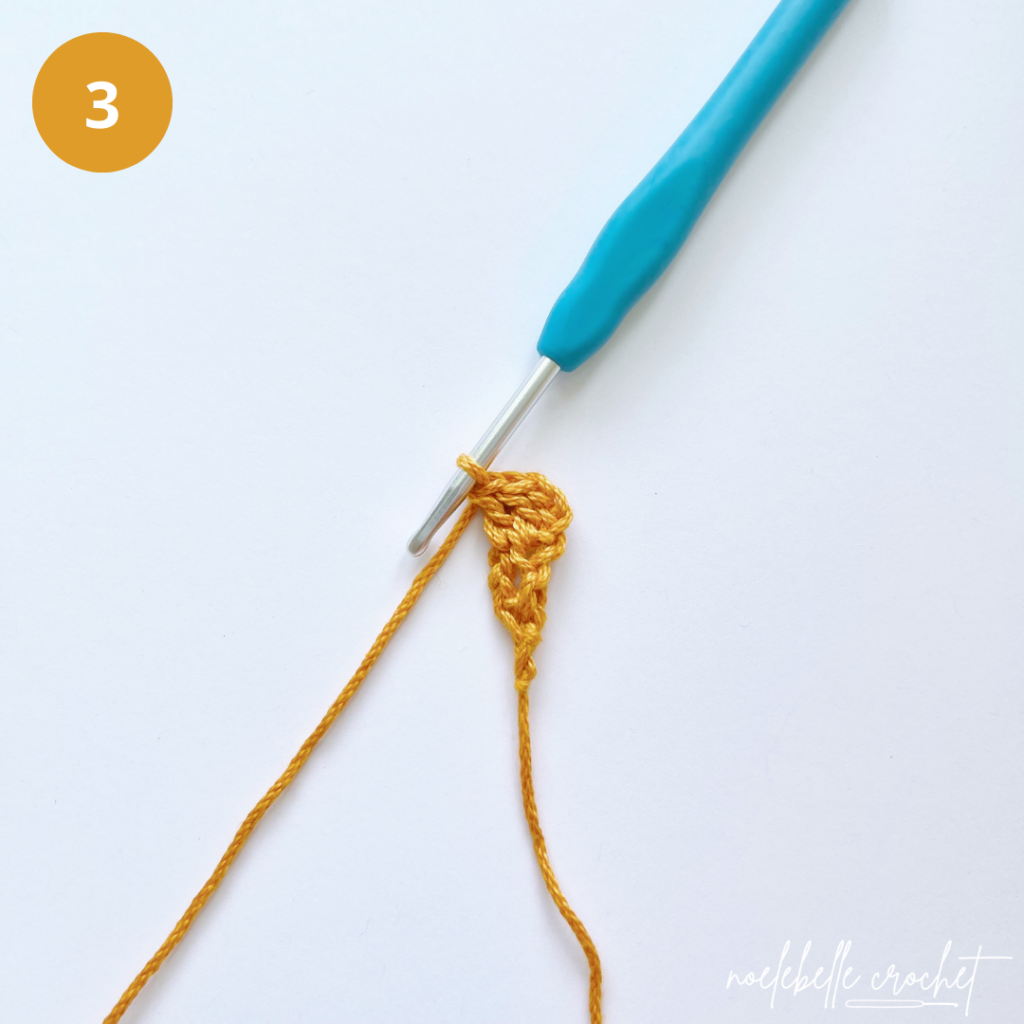
Row 4: Turn, CH 3, 2DC in next ST (INC made),
DC 1 in top of CH 3 from previous row [4 (4, 4, 4, 4)]
Row 5: Turn, CH 3,
DC 1 in next ST, CH 1 (INC made), DC 1,
DC 1 in top of CH 3 from previous row [5 (5, 5, 5, 5)]
Note: The CH 1 here will serve as the INC for this row just as the 2DC did in the previous row. We will continue to follow the same increasing pattern until our headband reaches the correct width.
Row 6: Turn, CH 3, DC 1 in next ST,
2DC in CH SP,
DC 1, DC 1 in top of CH 3 from previous row [6 (6, 6, 6, 6)]
Row 7: Turn, CH 3,
DC 2, CH 1, DC 2,
DC 1 in top of CH 3 from previous row [7 (7, 7, 7, 7)]
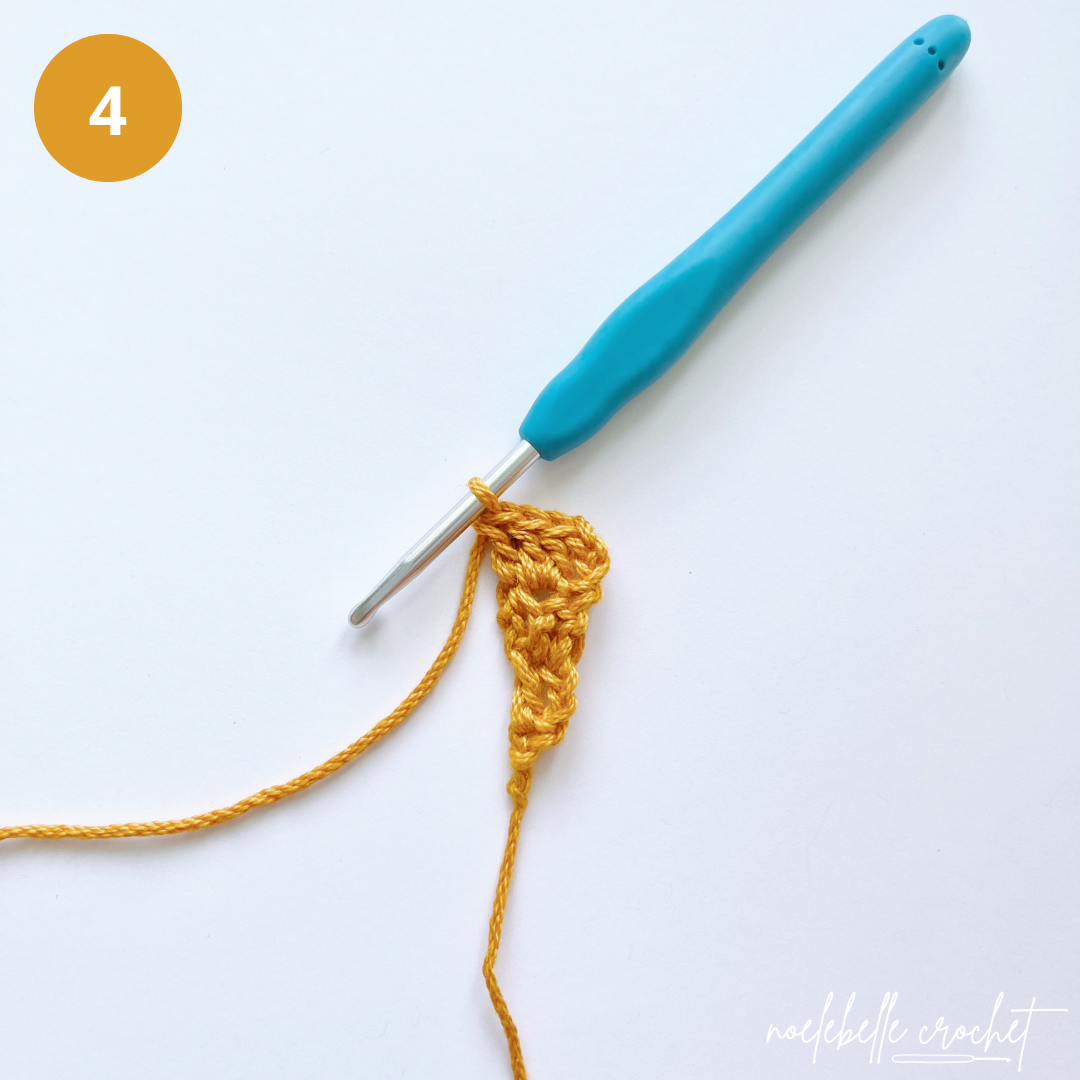
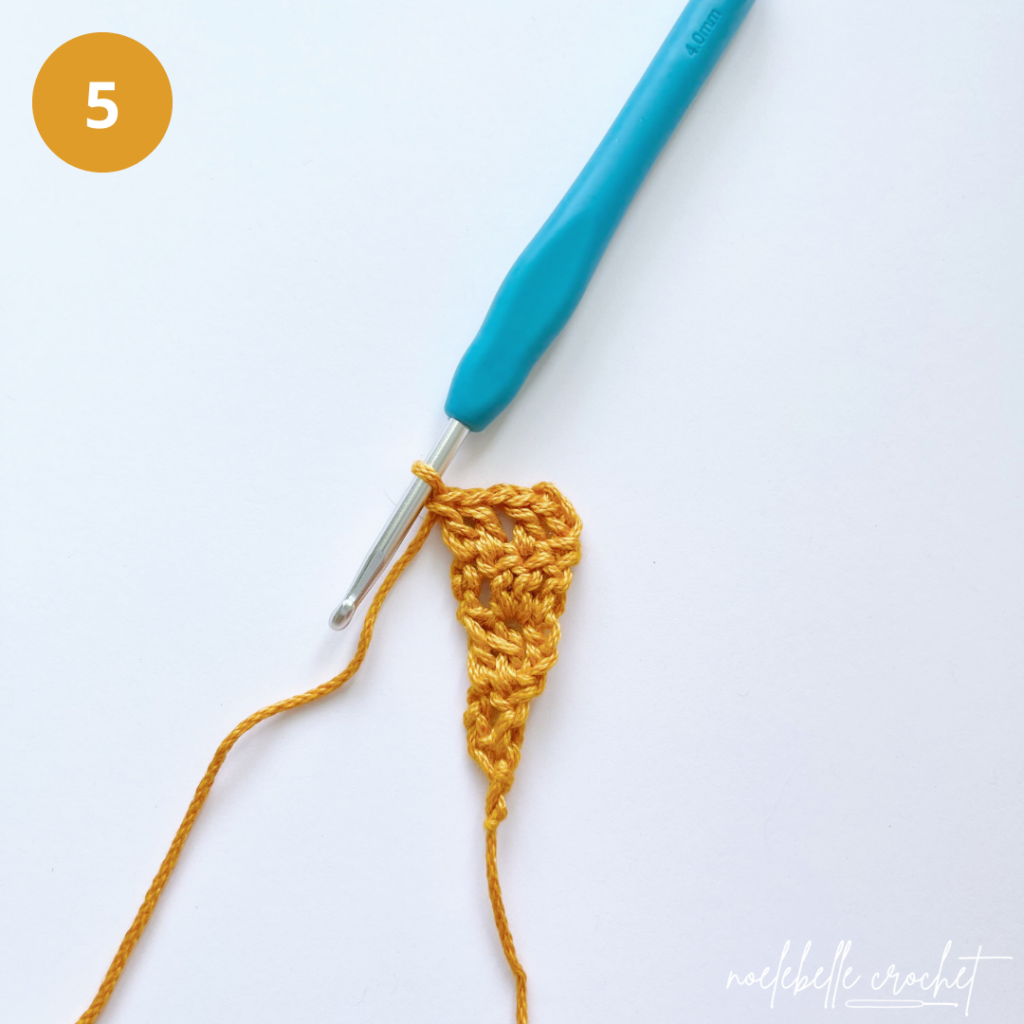
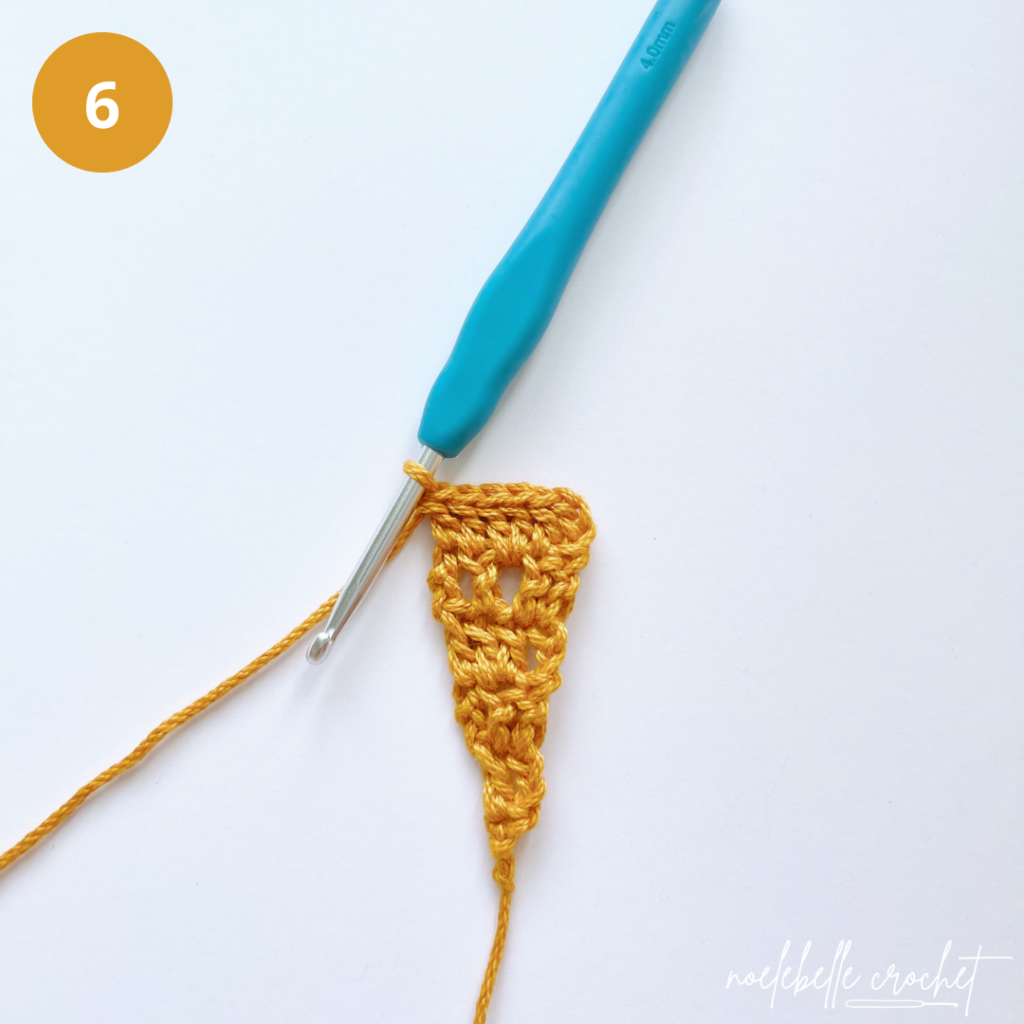
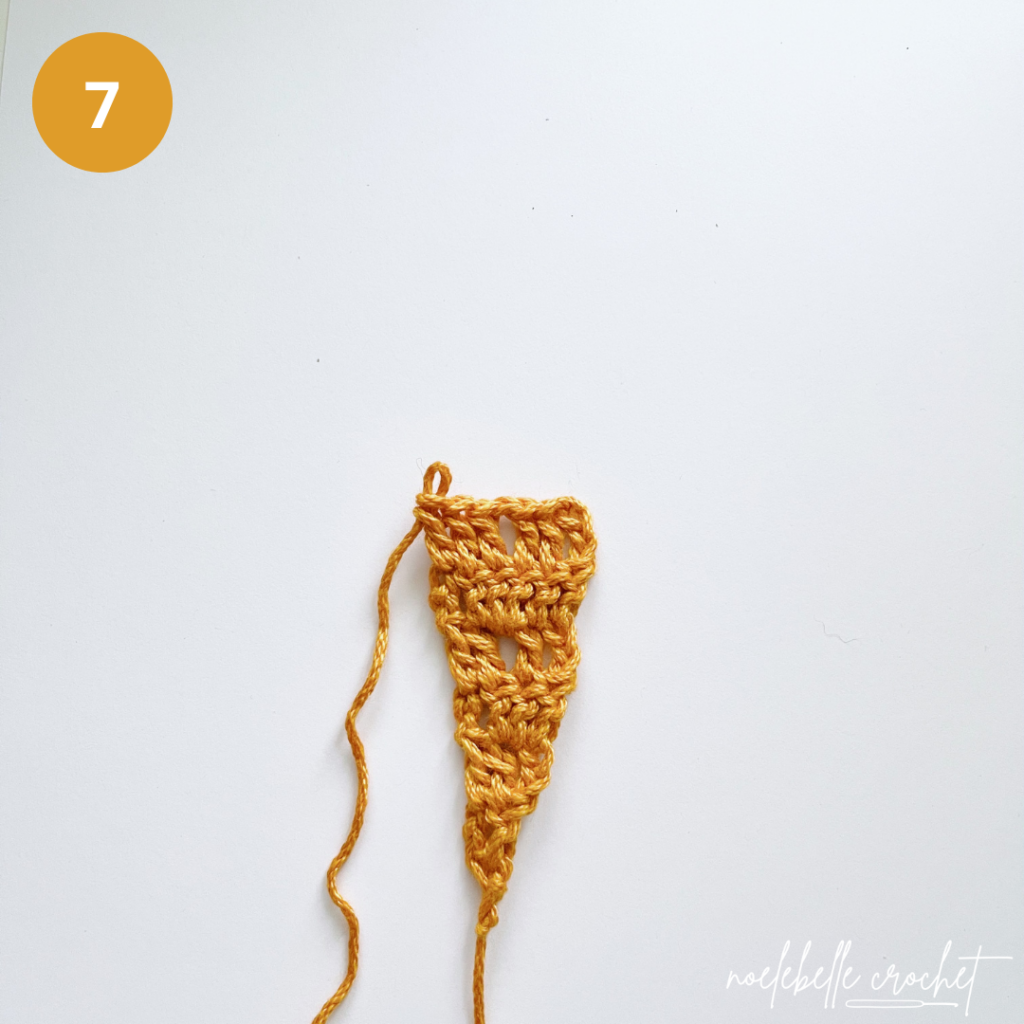
Row 8: Turn, CH 3, DC 1 in next ST,
CH 1 + SK 1,
2DC in CH SP,
CH 1 + SK 1,
DC 1, DC 1 in top of CH 3 from previous row [8 (8, 8, 8, 8)]
Note: The CH 1 + SK 1 pattern will continue throughout the tie sections to create eyelets for a more open and airy tie.
Row 9: Turn, CH 3, DC 1 in next ST,
CH 1 + SK 1,
DC 1, CH 1, DC 1,
CH 1 + SK 1,
DC 1, DC 1 in top of CH 3 from previous row [9 (9, 9, 9, 9)]
Row 10: Turn, CH 3, DC 1 in next ST,
CH 1 + SK 1,
DC 1, 2DC in CH SP, DC 1,
CH 1 + SK 1,
DC 1, DC 1 in top of CH 3 from previous row [10 (10, 10, 10, 10)]
Row 11: Turn, CH 3, DC 1 in next ST,
CH 1 + SK 1,
DC 2, CH 1, DC 2,
CH 1 + SK 1,
DC 1, DC 1 in top of CH 3 from previous row [11 (11, 11, 11, 11)]
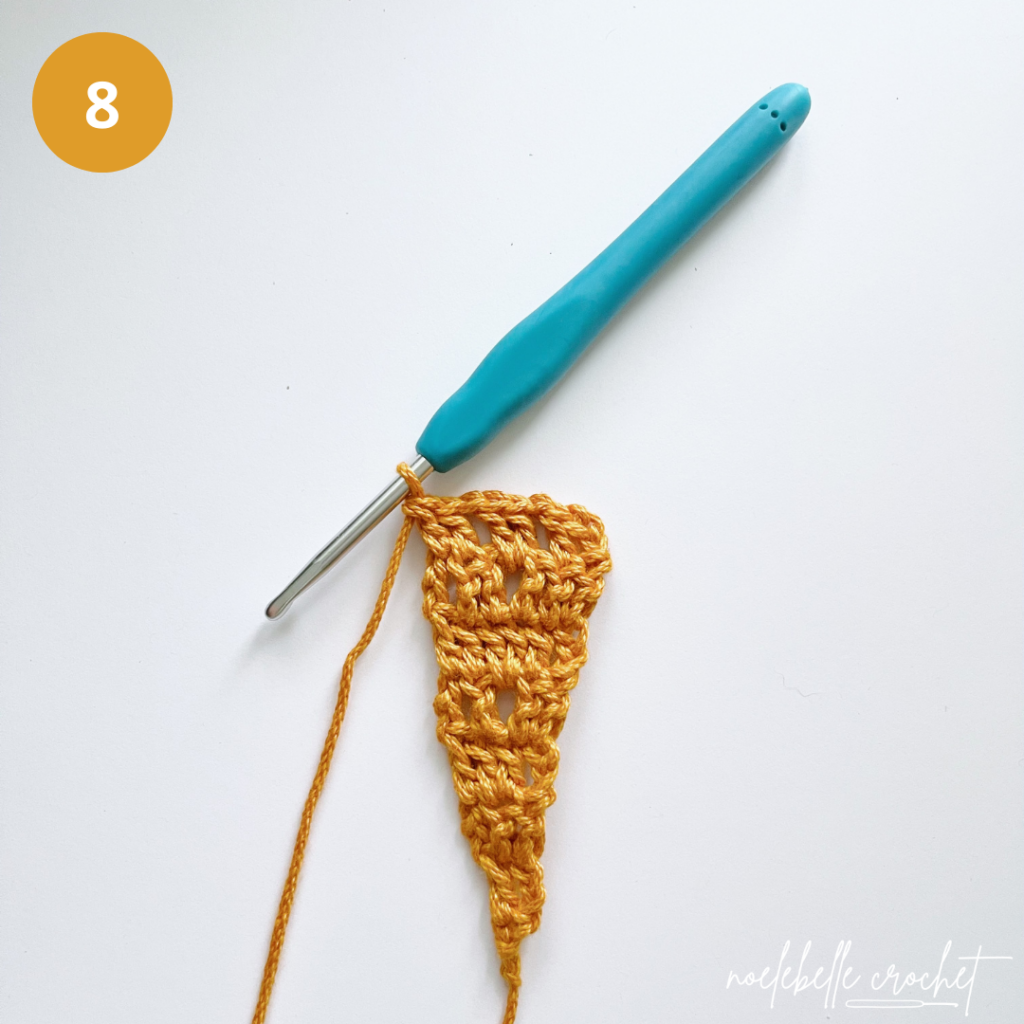
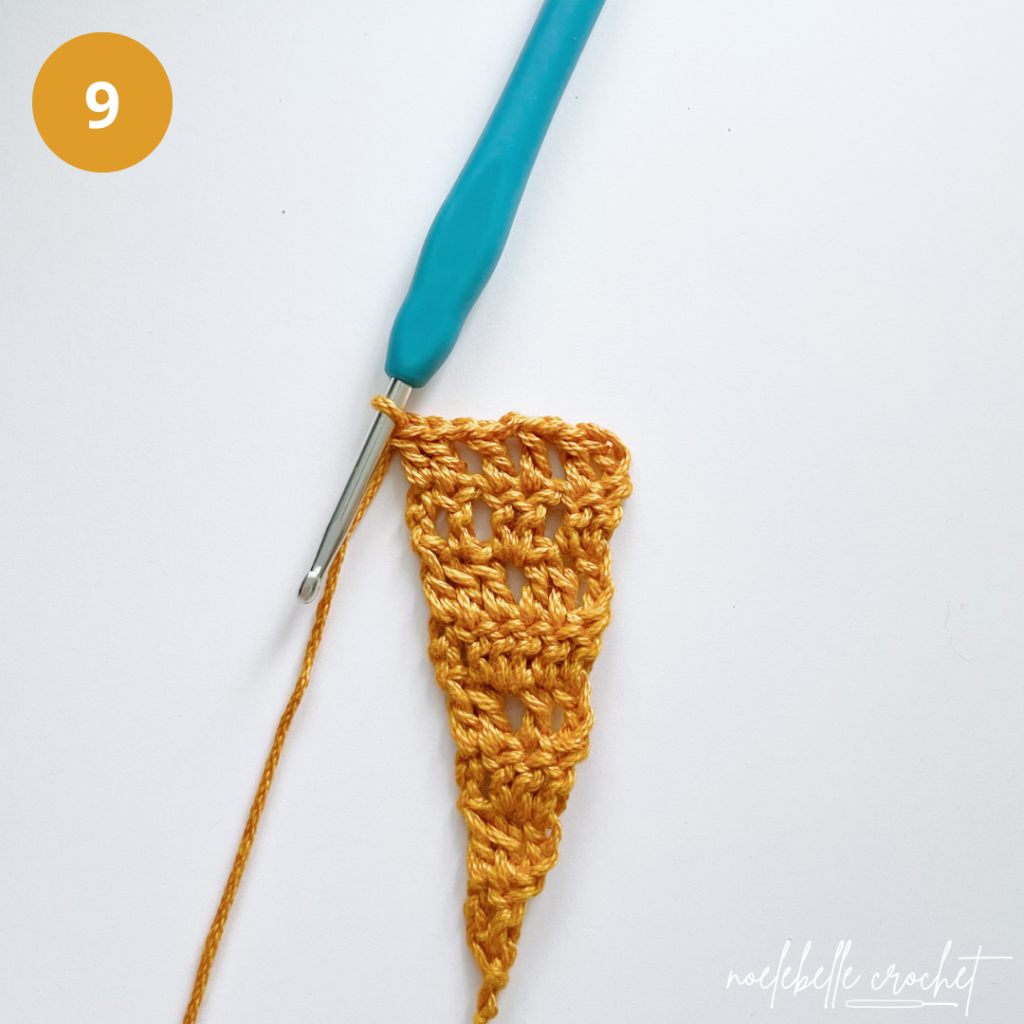
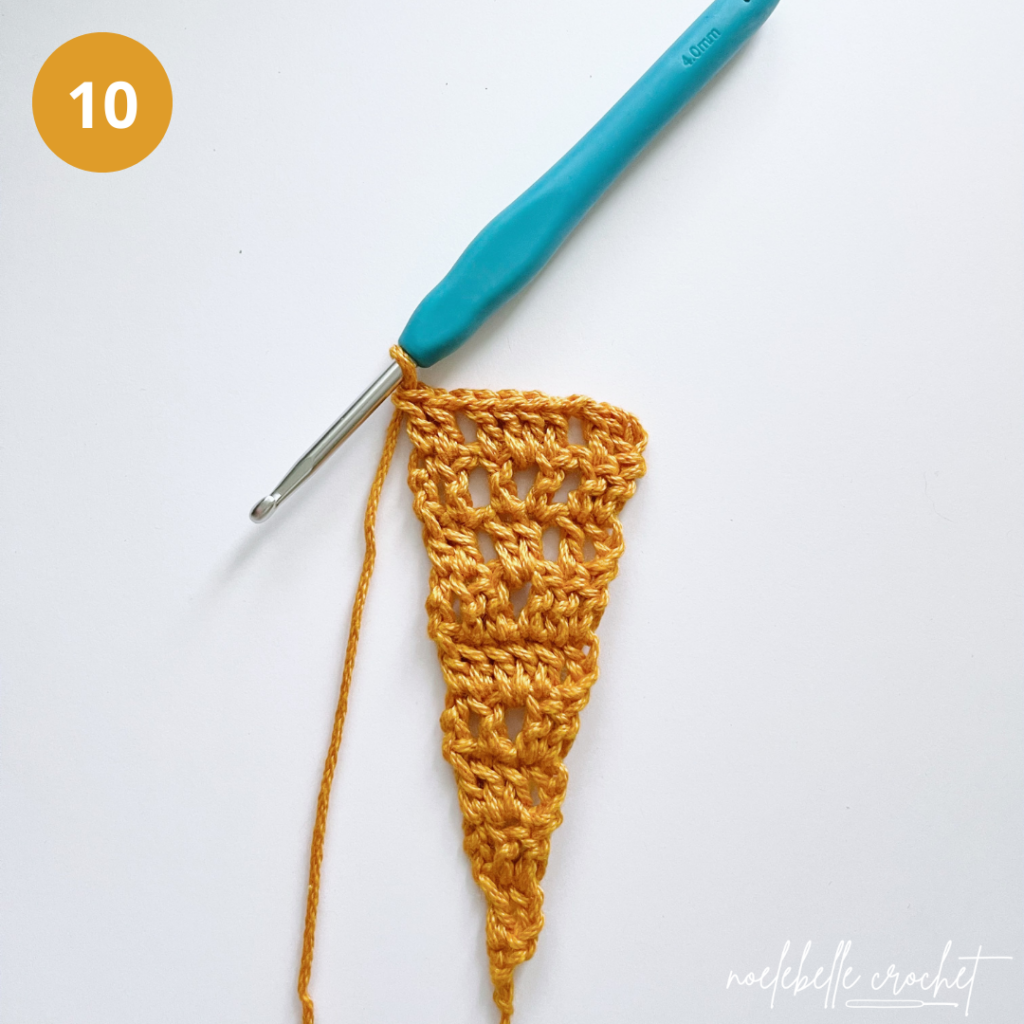
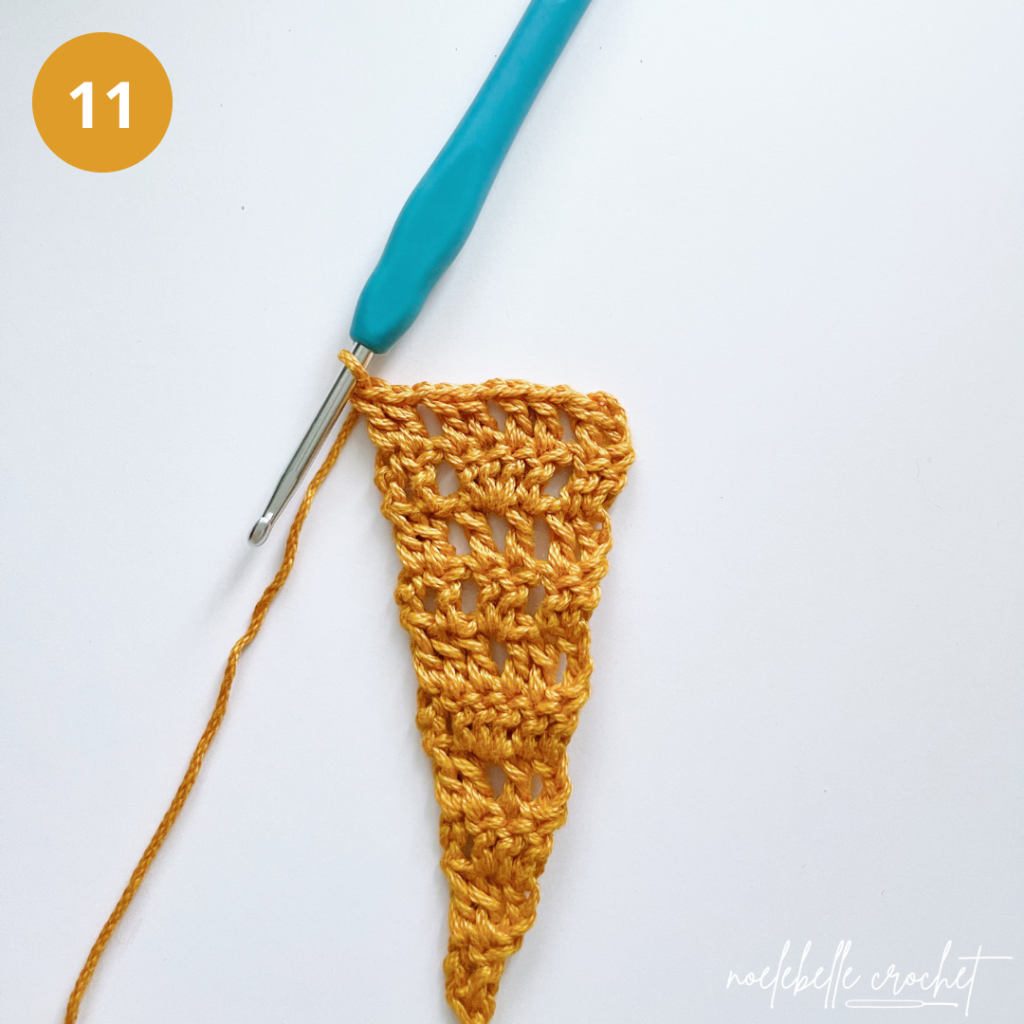
Row 12: Turn, CH 3, DC 1 in next ST,
CH 1 + SK 1,
DC 2, 2DC in CH SP, DC 2,
CH 1 + SK 1,
DC 1, DC 1 in top of CH 3 from previous row [12 (12, 12, 12, 12)]
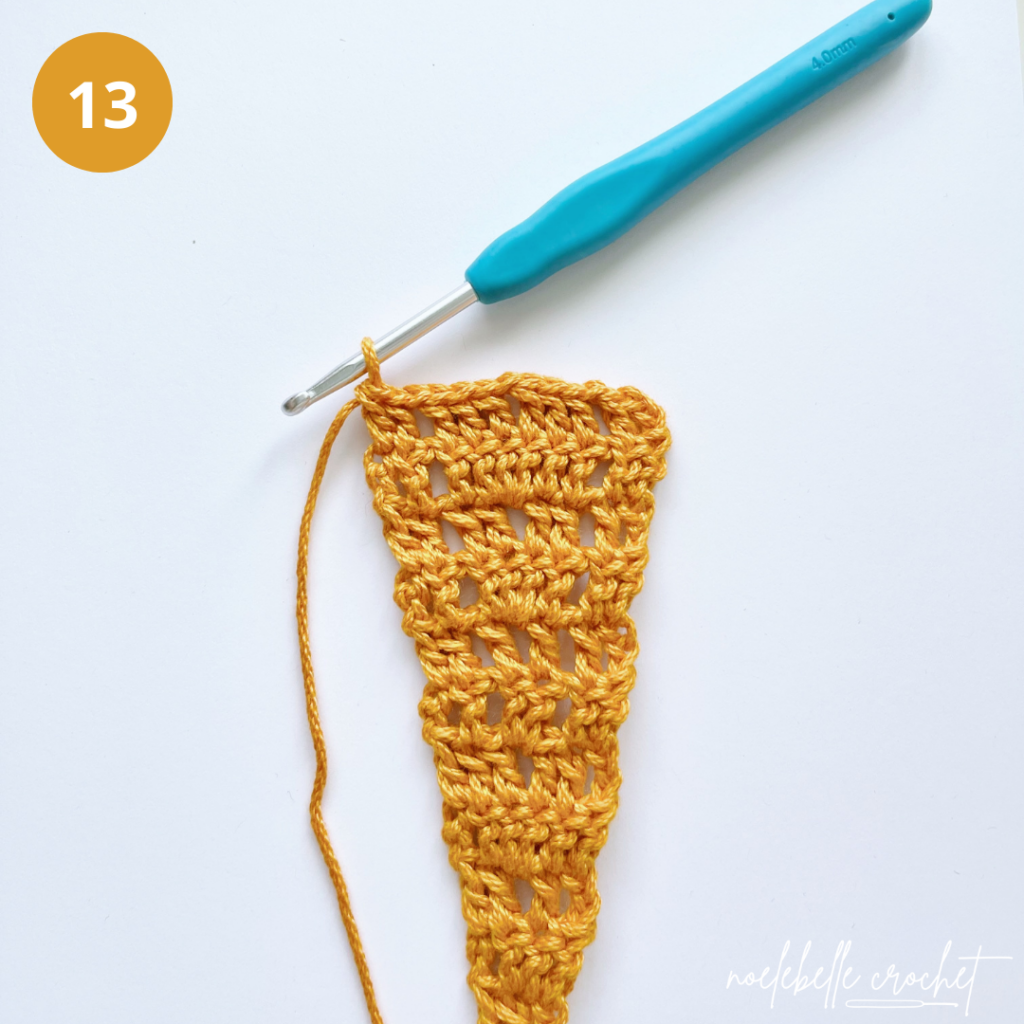
Row 13: Turn, CH 3, DC 1 in next ST,
CH 1 + SK 1,
DC 3, CH 1, DC 3,
CH 1 + SK 1,
DC 1, DC 1 in top of CH 3 from previous row [13 (13, 13, 13, 13)]
HEADBAND SECTION
Row 14: Turn, CH 3, DC 1 in next ST,
*DC 1 in CH SP, DC 3*
Repeat from * to * 1 more time,
DC 1 in CH SP,
DC 1 in next ST, DC 1 in top of CH 3 from previous row [13 (13, 13, 13, 13)]
Row 15: Turn, CH 3,
DC 1 in next ST, SK 1,
*3DC, SK 2*
Repeat from * to * 1 more time
3DC, SK 1,
DC 1, DC 1 in top of CH 3 from previous row [13 (13, 13, 13, 13)]
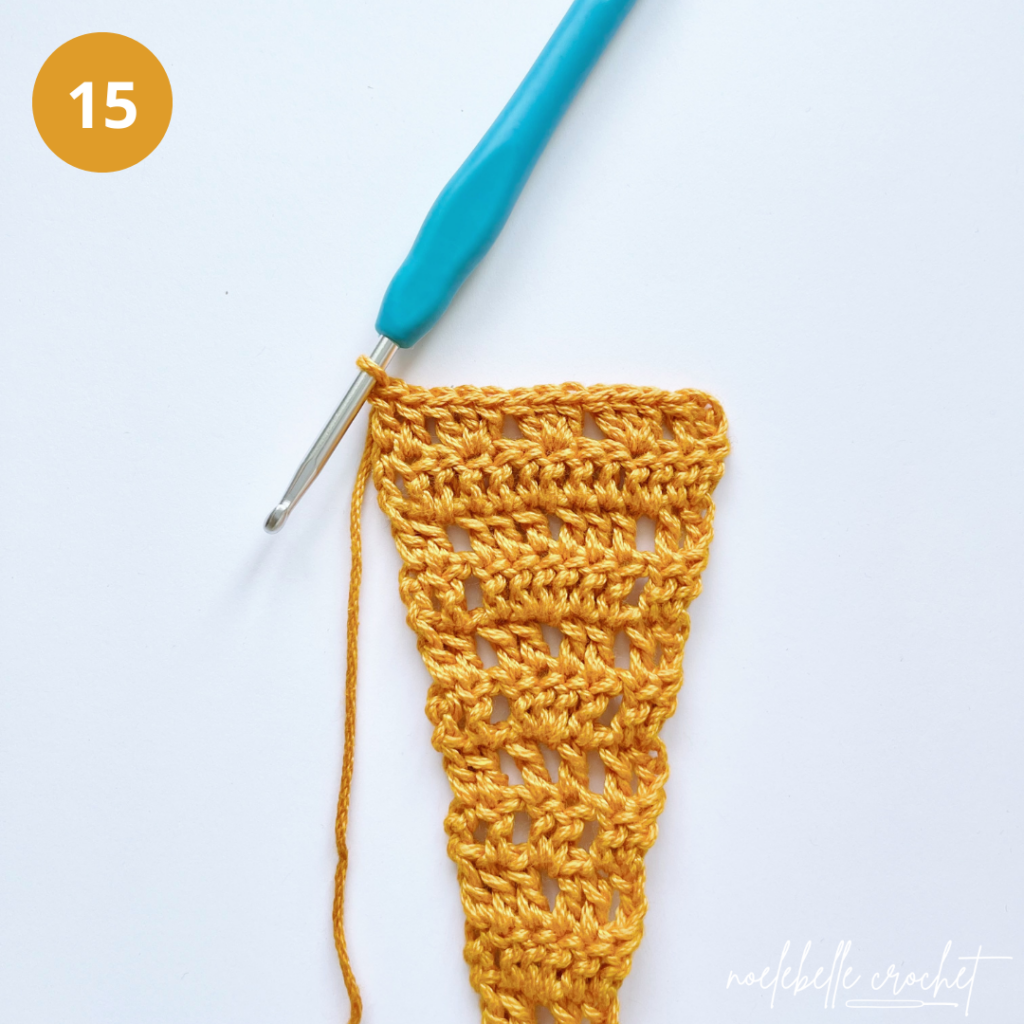
Row 16: Turn, CH 3, DC 2,
*FPDC in next ST, DC 2*
Repeat from * to * 2 more times,
DC 1 in top of CH 3 from previous row [13 (13, 13, 13, 13)]
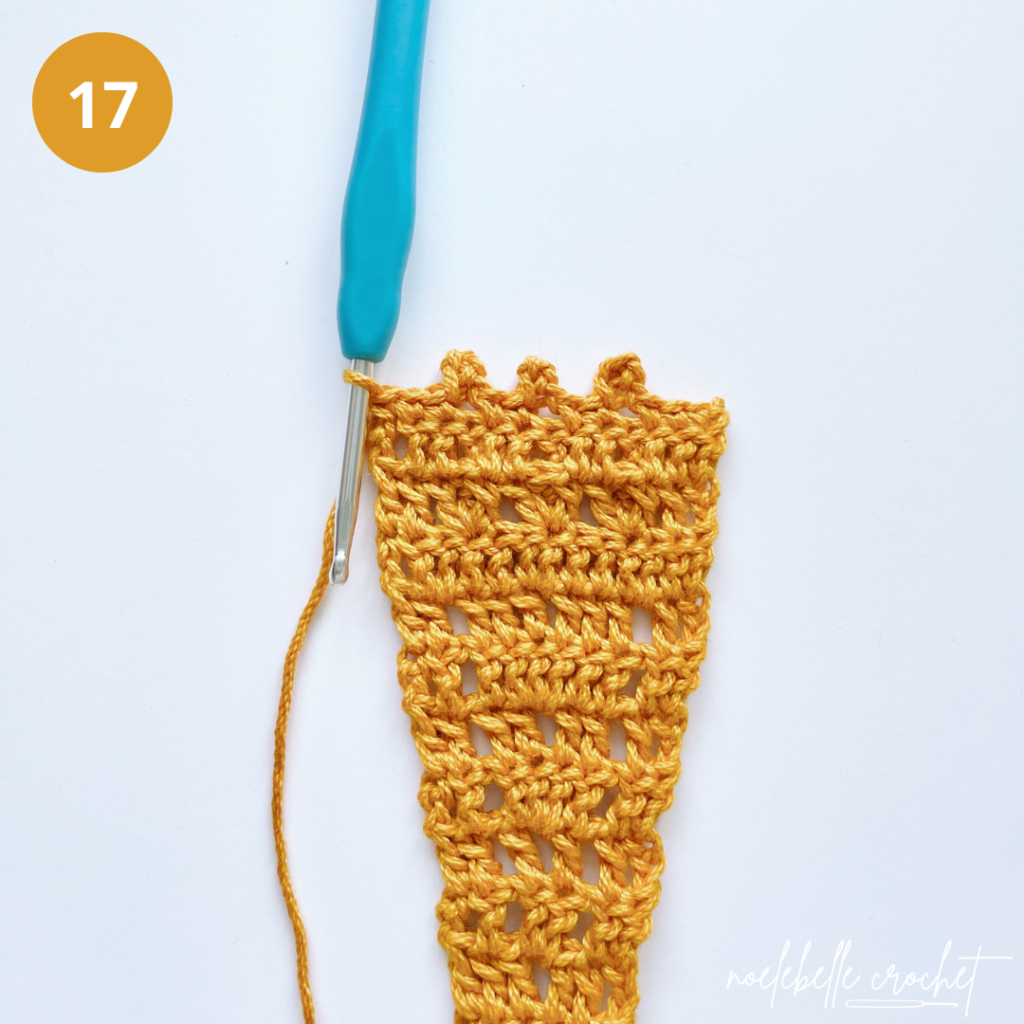
Row 17: Turn, CH 1, SC 1 in 1st ST,
SC 2, *PICOT + SK 1, SC 2*
Repeat from * to * 2 more times,
SC 1 in top of CH 3 from previous row [13 (13, 13, 13, 13)]
Note: You should have a gap under each of your PICOT STS.** We will be crocheting into the ST below your picots in the next row.
**Recall from the NOTES section – PICOT: CH 4, SL ST into the 1st CH to close your PICOT.
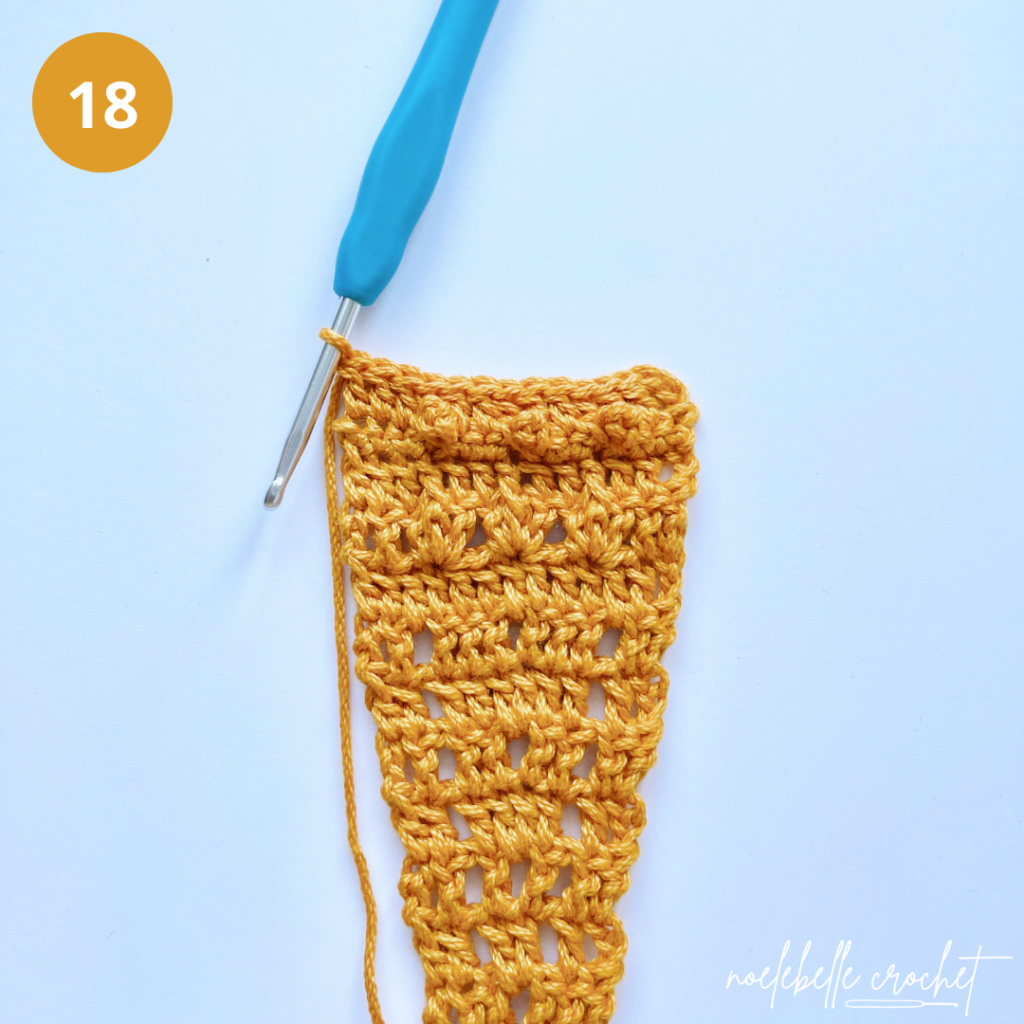
Row 18: Turn, CH 3,
*DC 2, DC 1 behind PICOT into the skipped ST below*
Repeat from * to * 2 more times,
DC 3 [13 (13, 13, 13, 13)]
Note: The skipped STS you’ll be working into are the FPDC STS from ROW 16
Note: This row is worked on the RS of your headband. You want to make sure your PICOTS from ROW 17 are sticking out on top of ROW 18.
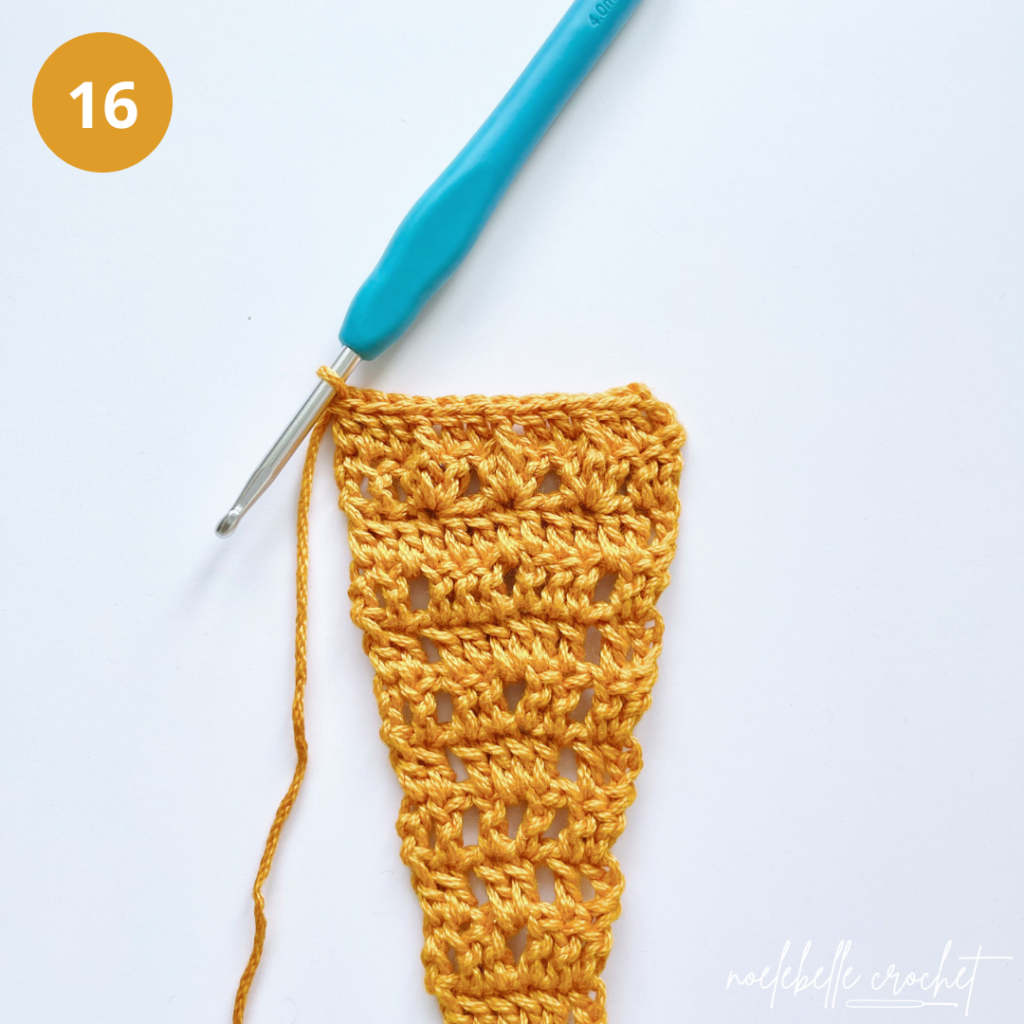
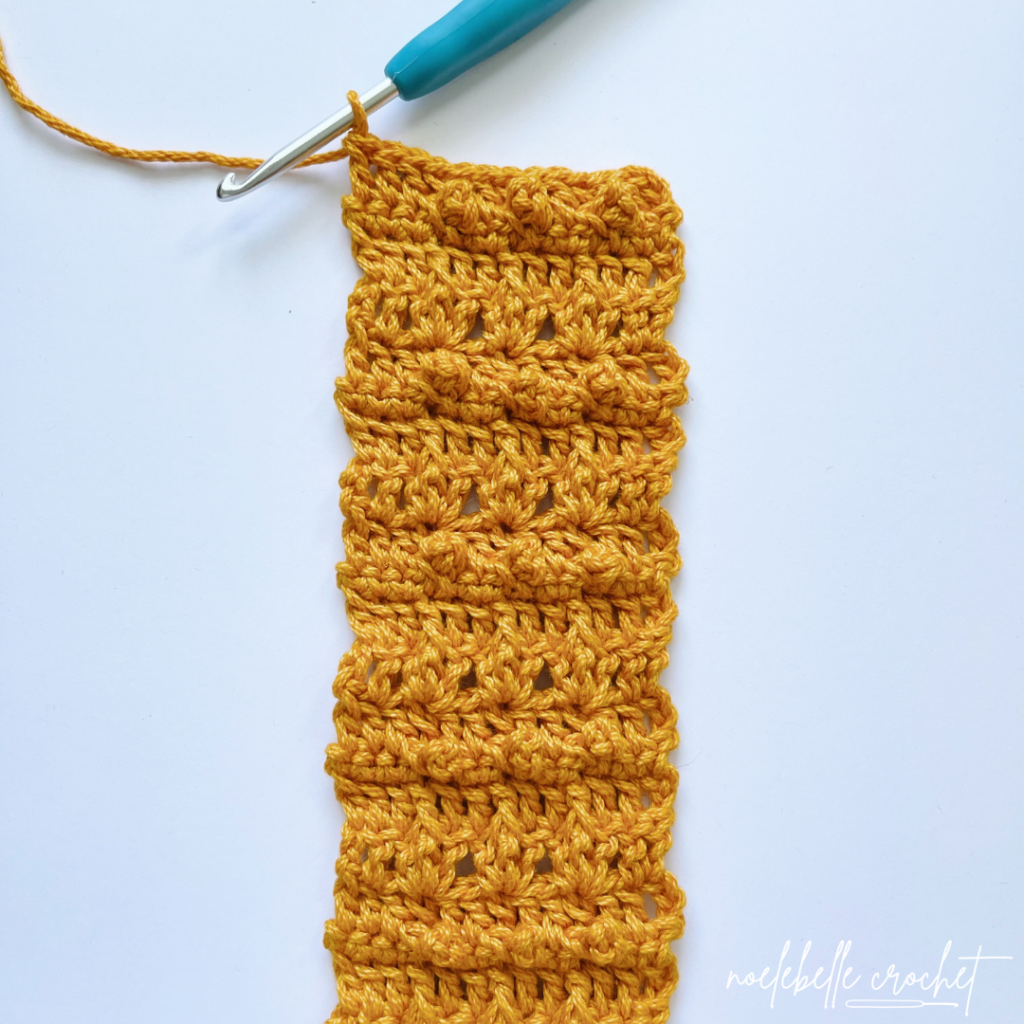
Repeat Rows 15-18 an additional 8 (9, 10, 11, 13) times.
Note: You should end up with a total of 9 (10, 11, 12, 14) PICOT rows.
Note: Double-check that the HEADBAND SECTION (not including ties) is long enough to wrap completely around your head. If necessary, continue to repeat rows 15-18 until your headband reaches the desired length.
Next Row: Repeat Row 15
Next Row: Repeat Row 16
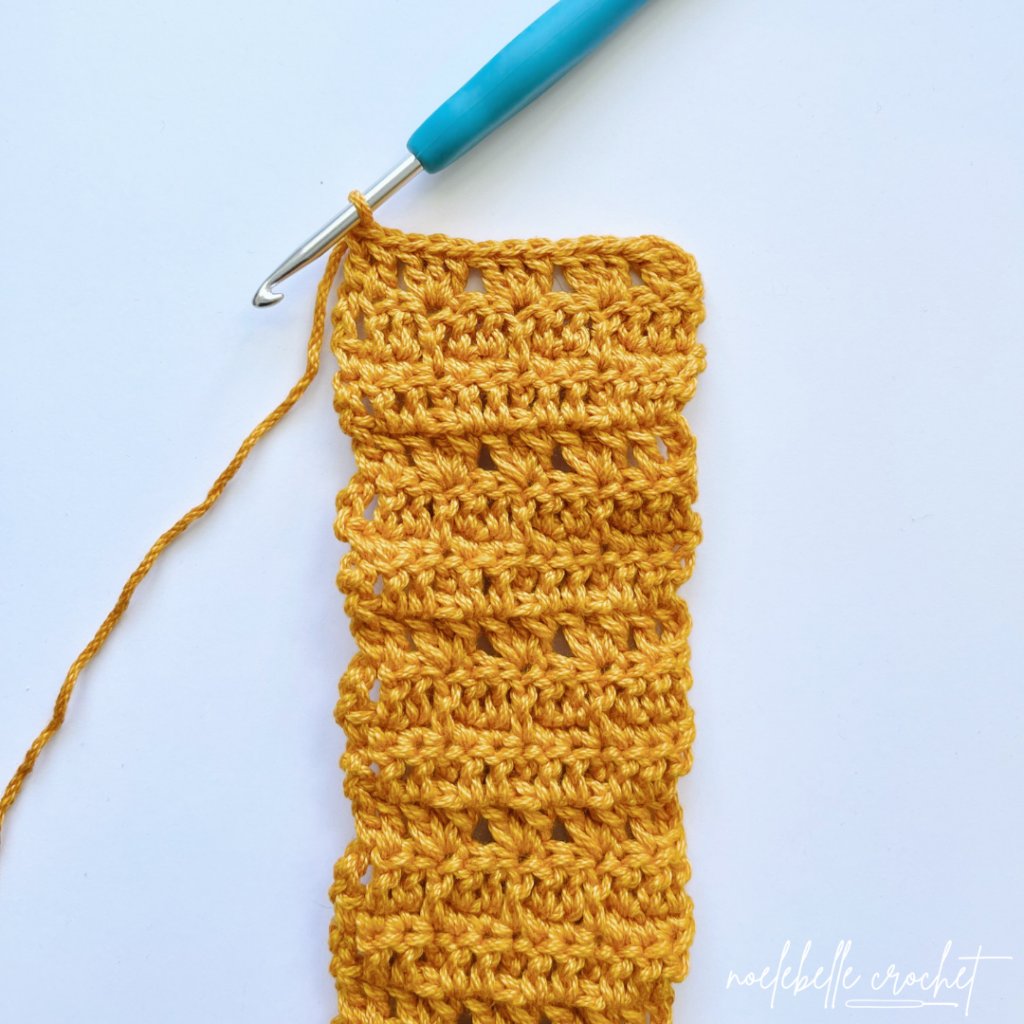
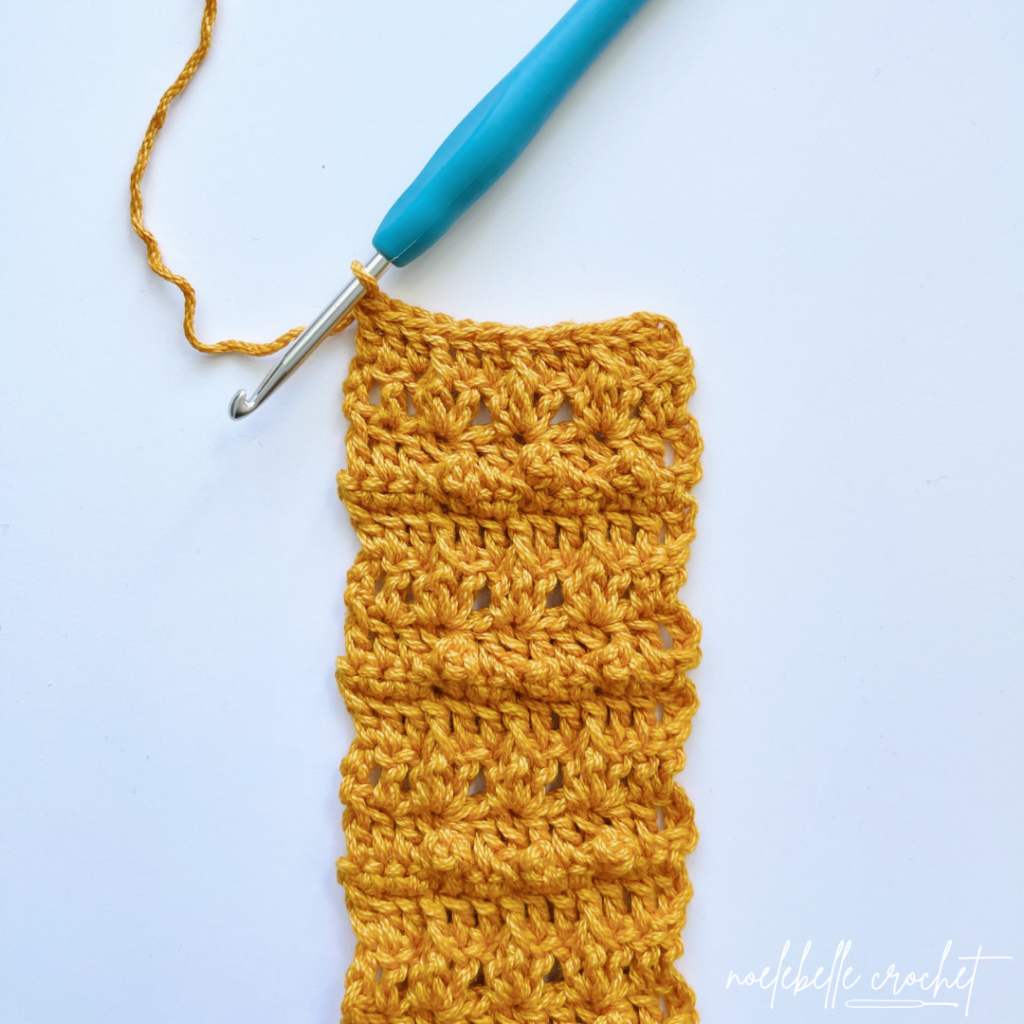
DECREASING TIE SECTION
Next Row: Turn, CH 3, DC 1 in next ST,
CH 1 + SK 1,
DC 3, SK 1 (dec made), DC 3,
CH 1 + SK 1,
DC 1, DC 1 in top of CH 3 from previous row [12 (12, 12, 12, 12)]
Next Row: Turn, CH 3, DC 1 in next ST,
CH 1 + SK 1,
DC 2, DC2TOG (dec made), DC 2,
CH 1 + SK 1,
DC 1, DC 1 in top of CH 3 from previous row [11 (11, 11, 11, 11)]
Note: We will continue to follow the same decreasing pattern from these last two rows until our headband reaches an ending point.
Next Row: Turn, CH 3, DC 1 in next ST,
CH 1 + SK 1,
DC 2, SK 1, DC 2,
CH 1 + SK 1,
DC 1, DC 1 in top of CH 3 from previous row [10 (10, 10, 10, 10)]
Next Row: Turn, CH 3, DC 1 in next ST,
CH 1 + SK 1,
DC 1, DC2TOG, DC 1,
CH 1 + SK 1,
DC 1, DC 1 in top of CH 3 from previous row [9 (9, 9, 9, 9)]
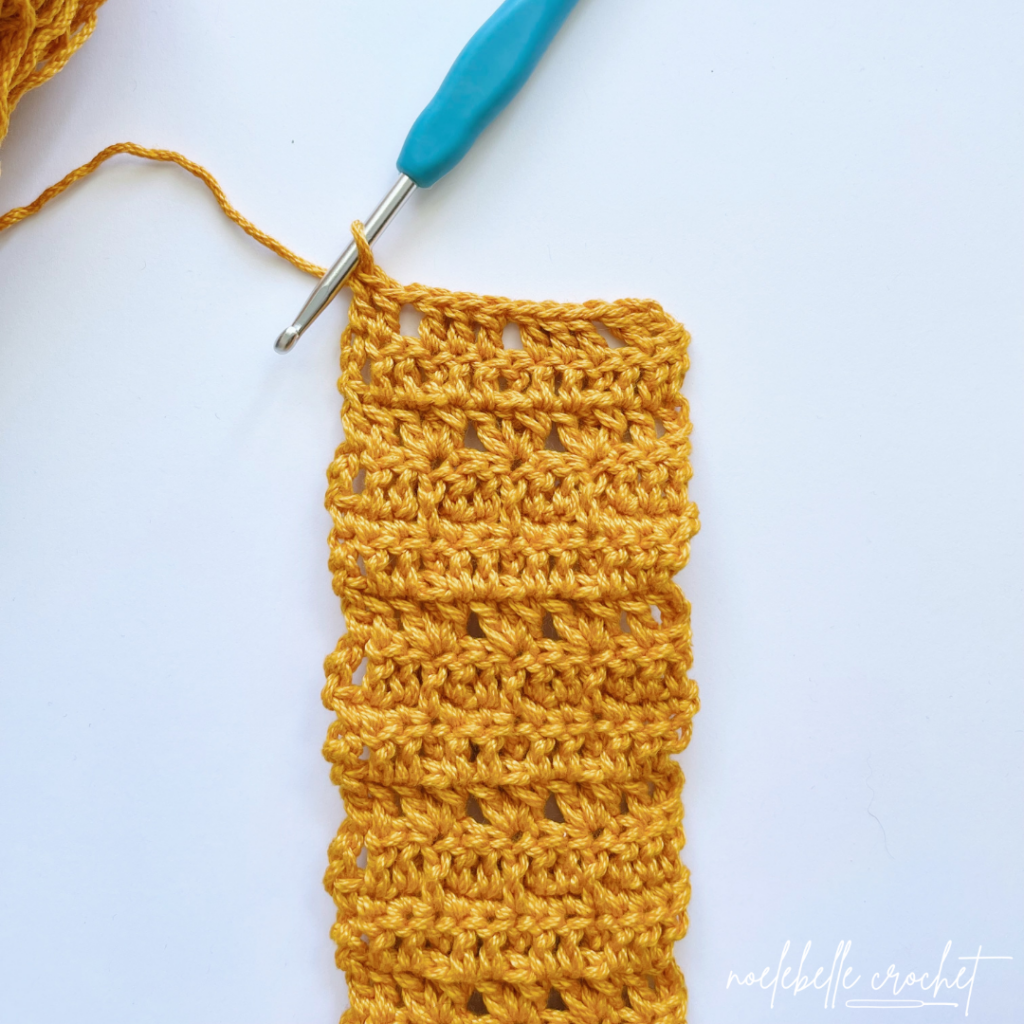
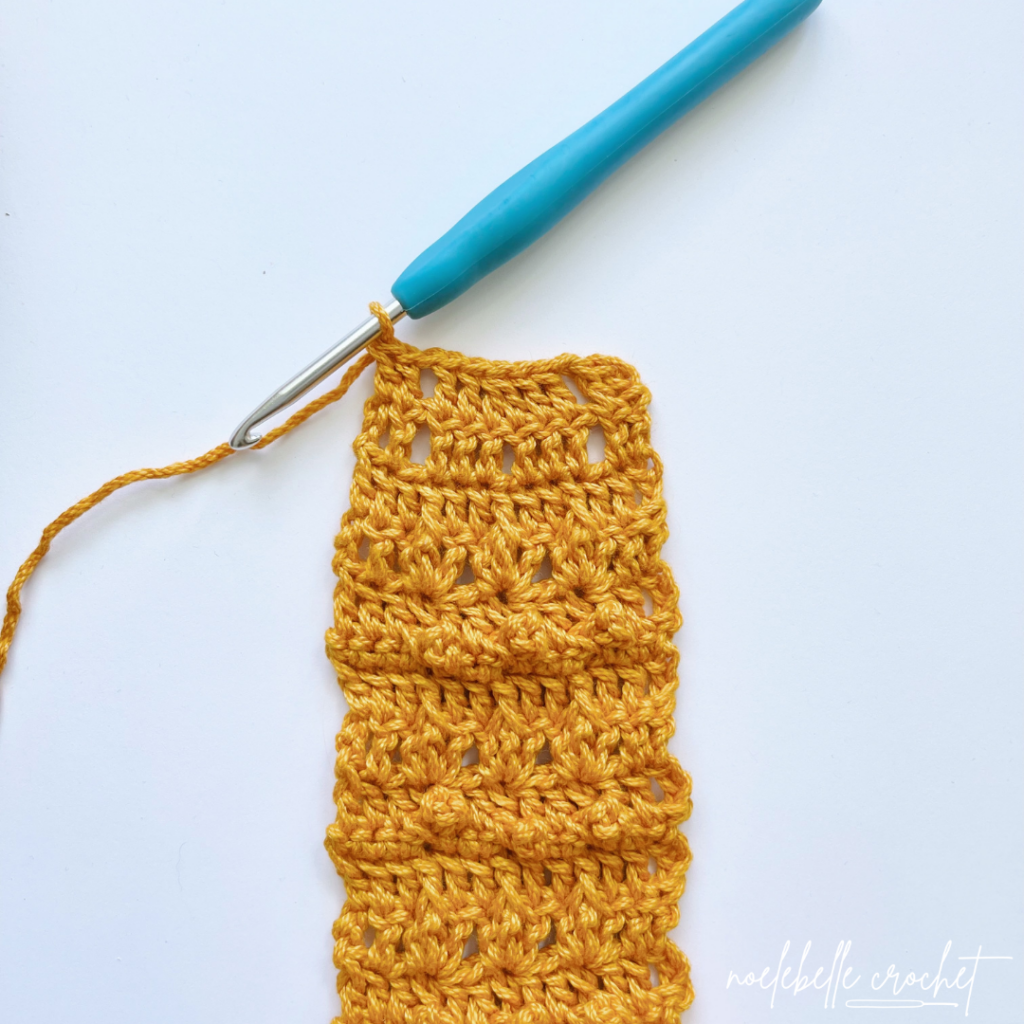
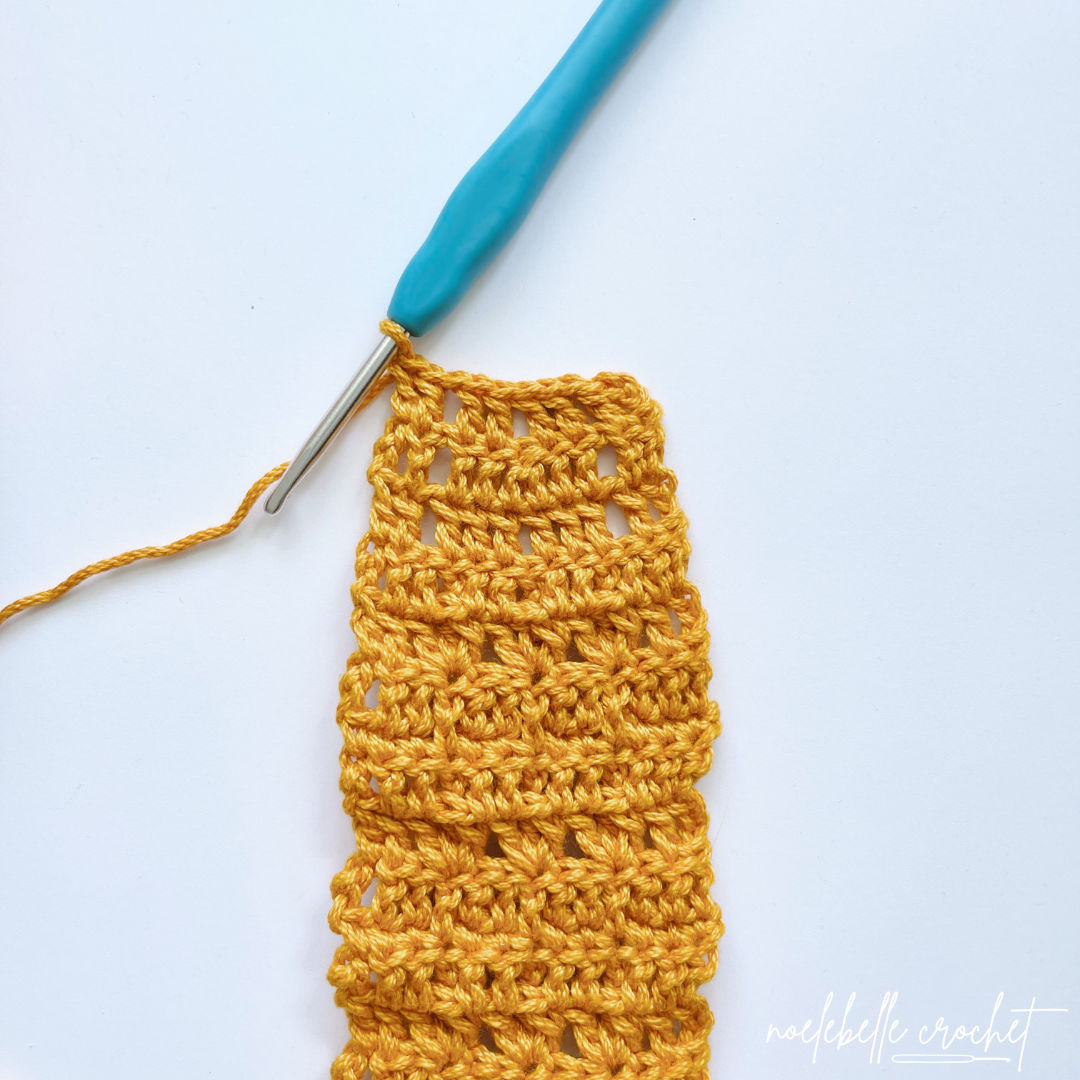
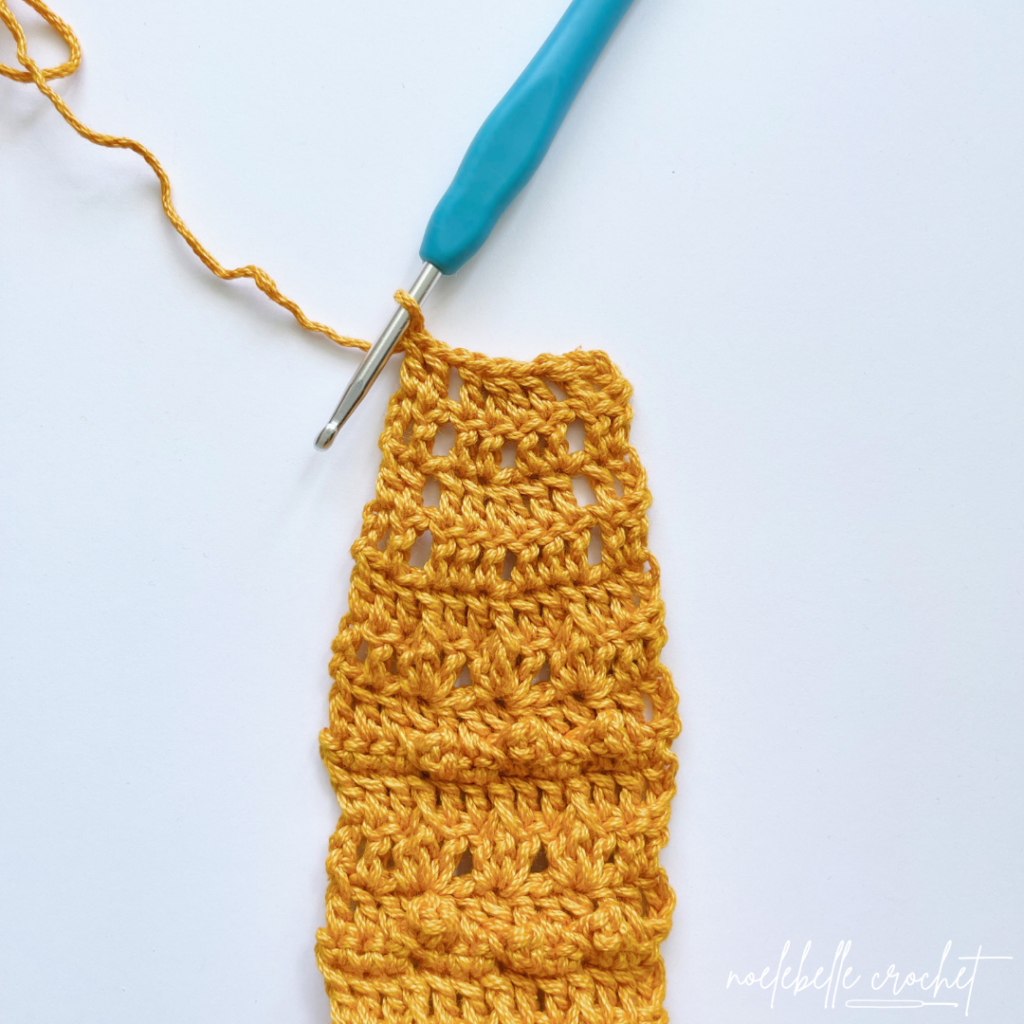
Next Row: Turn, CH 3, DC 1 in next ST,
CH 1 + SK 1,
DC 1, SK 1, DC 1,
CH 1 + SK 1,
DC 1, DC 1 in top of CH 3 from previous row [8 (8, 8, 8, 8)]
Next Row: Turn, CH 3, DC 1 in next ST,
CH 1 + SK 1,
DC2TOG,
CH 1 + SK 1,
DC 1, DC 1 in top of CH 3 from previous row [7 (7, 7, 7, 7)]
Next Row: Turn, CH 3, DC 1 in next ST,
DC 1 in CH SP,
SK 1,
DC 1 in CH SP,
DC 1, DC 1 in top of CH 3 from previous row [6 (6, 6, 6, 6)]
Next Row: Turn, CH 3, DC 1 in next ST,
DC2TOG,
DC 1, DC 1 in top of CH 3 from previous row [5 (5, 5, 5, 5)]
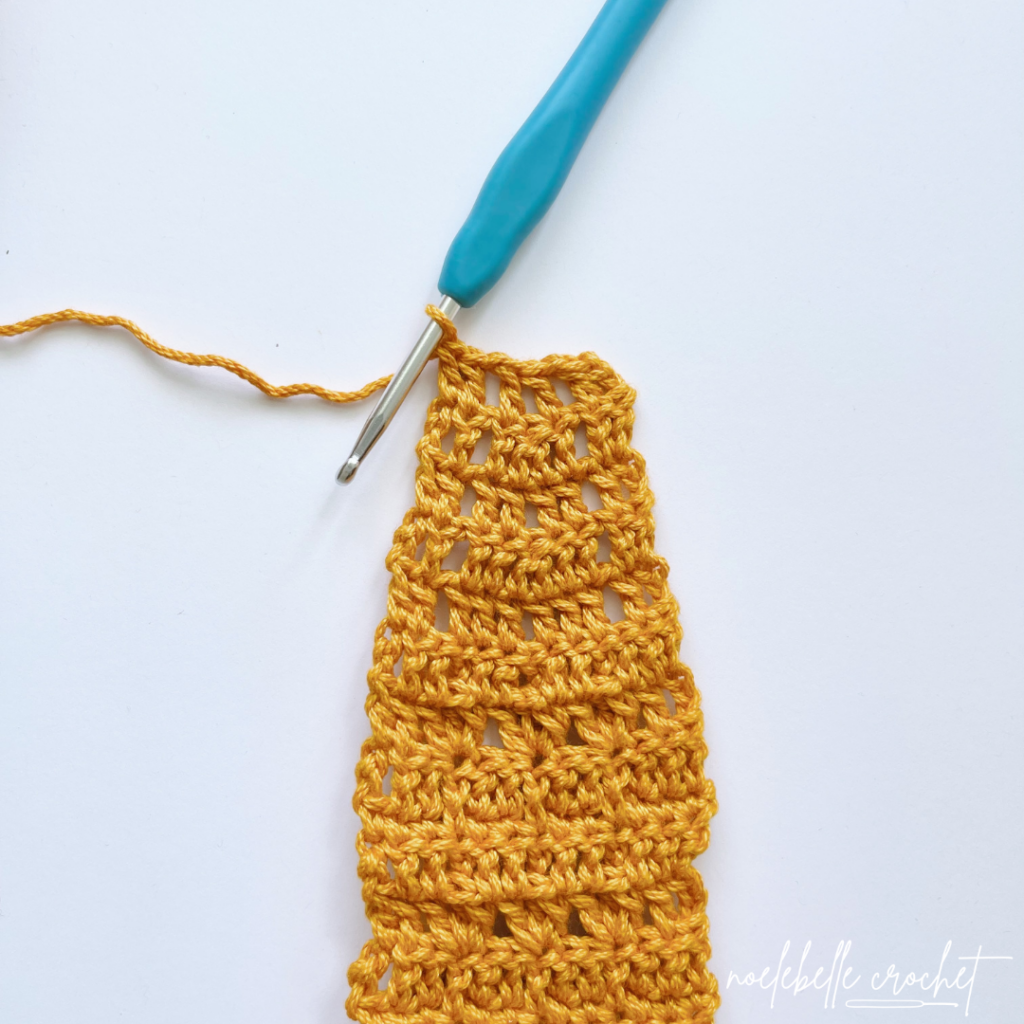
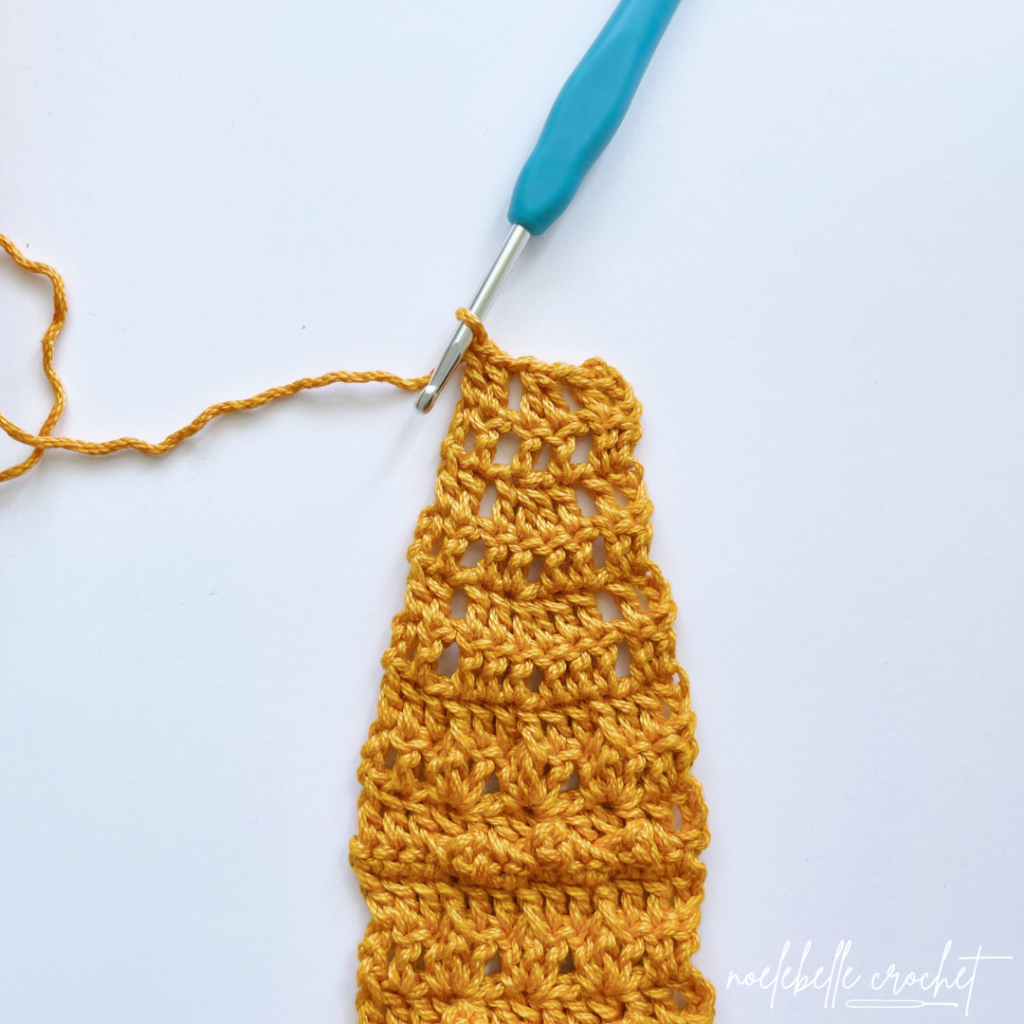
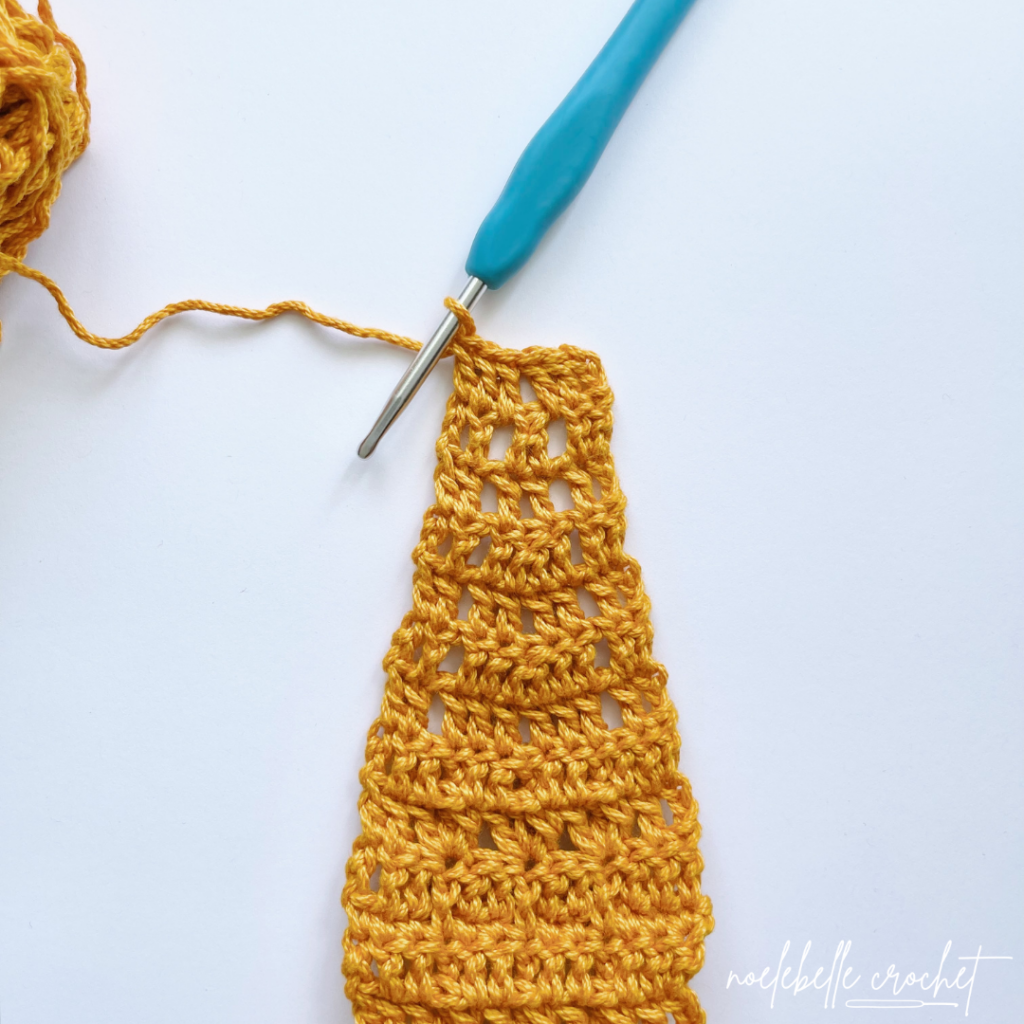
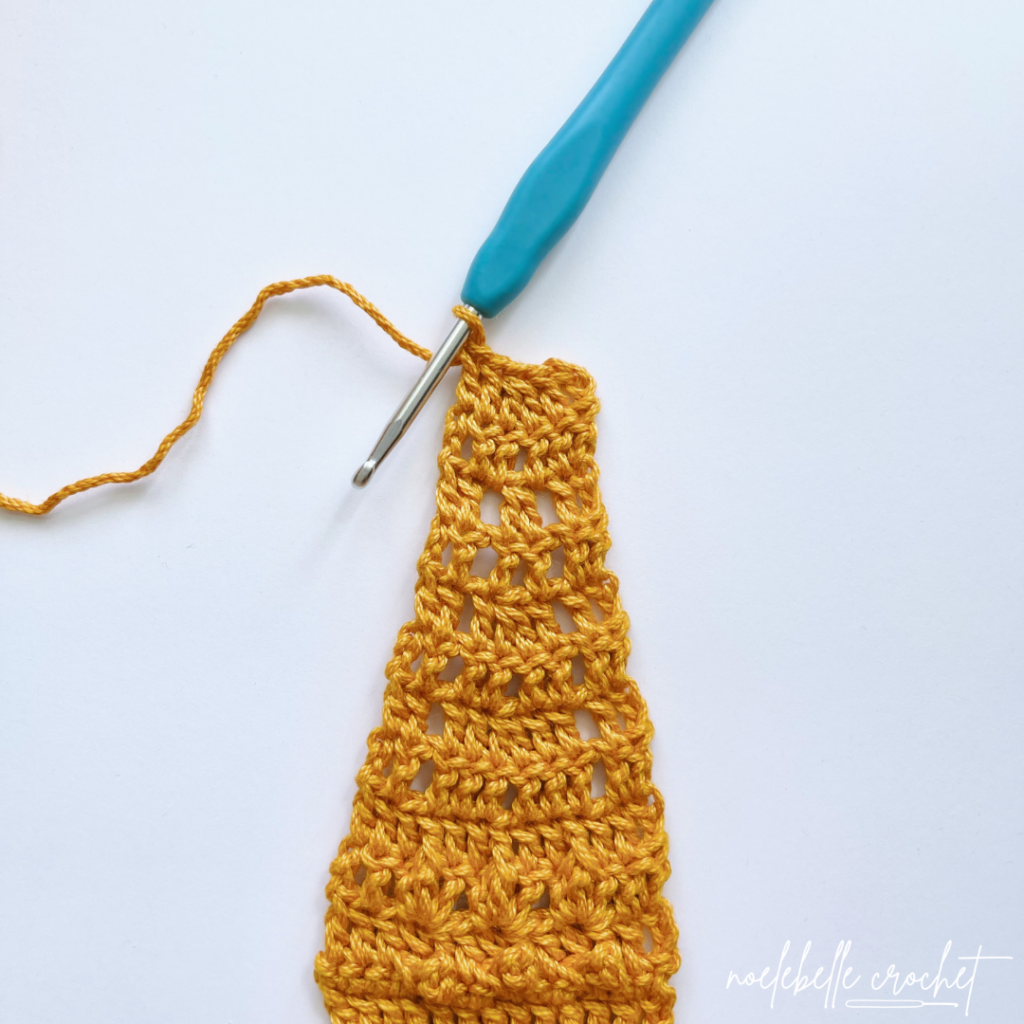
Next Row: Turn, CH 3, DC 1 in next ST,
SK 1,
DC 1, DC 1 in top of CH 3 from previous row [4 (4, 4, 4, 4)]
Next Row: Turn, CH 3,
DC2TOG,
DC 1 in top of CH 3 from previous row [3 (3, 3, 3, 3)]
Next Row: Turn, CH 3,
SK 1,
DC 1 in top of CH 3 from previous row [2 (2, 2, 2, 2)]
Next Row: Turn, CH 1,
SC 1 in top of CH 3 from previous row [1 (1, 1, 1, 1)]
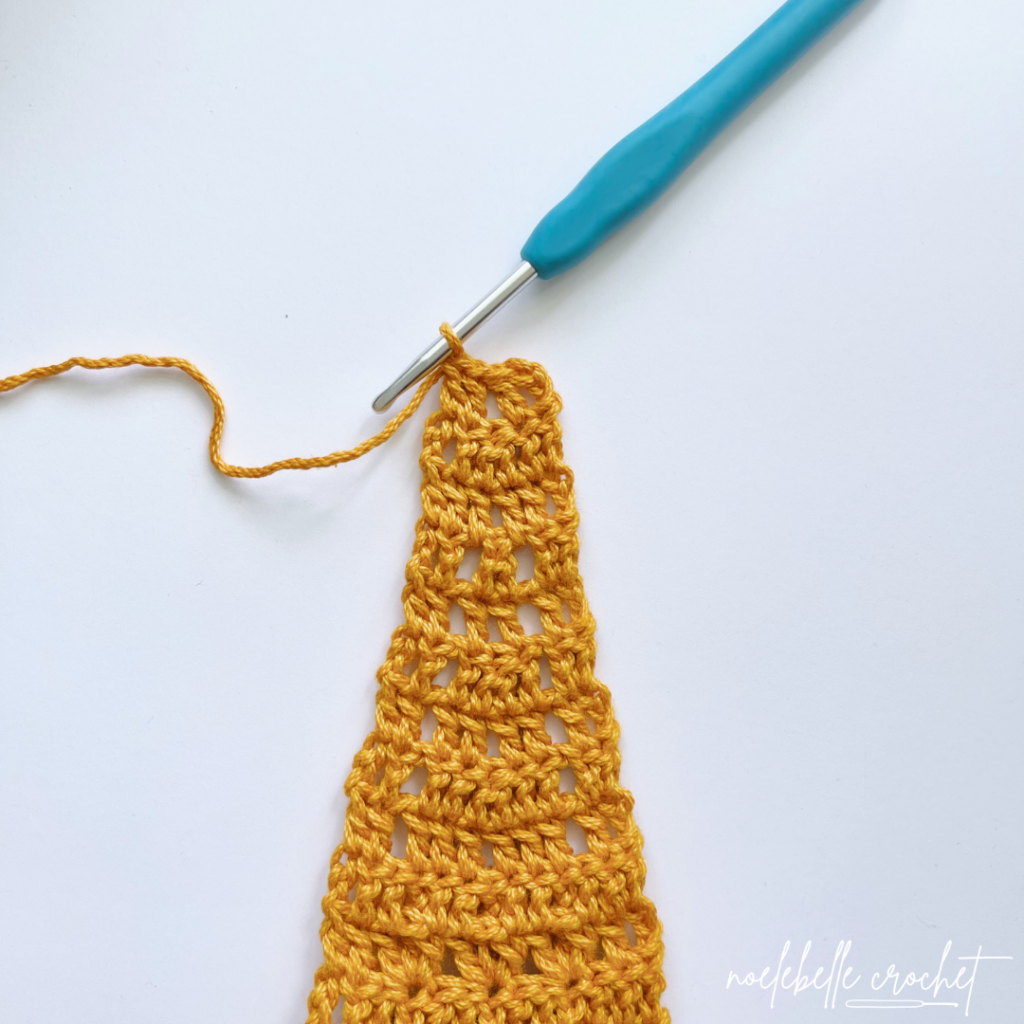
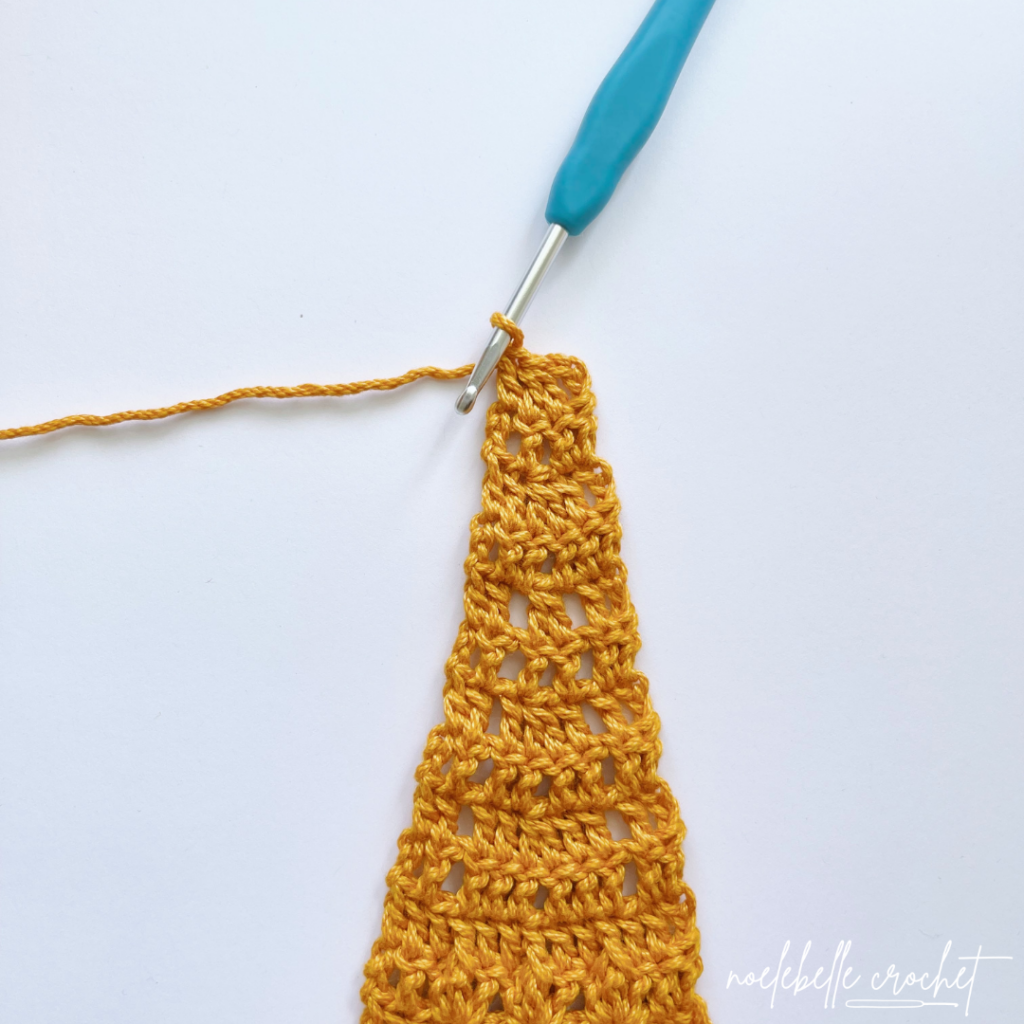
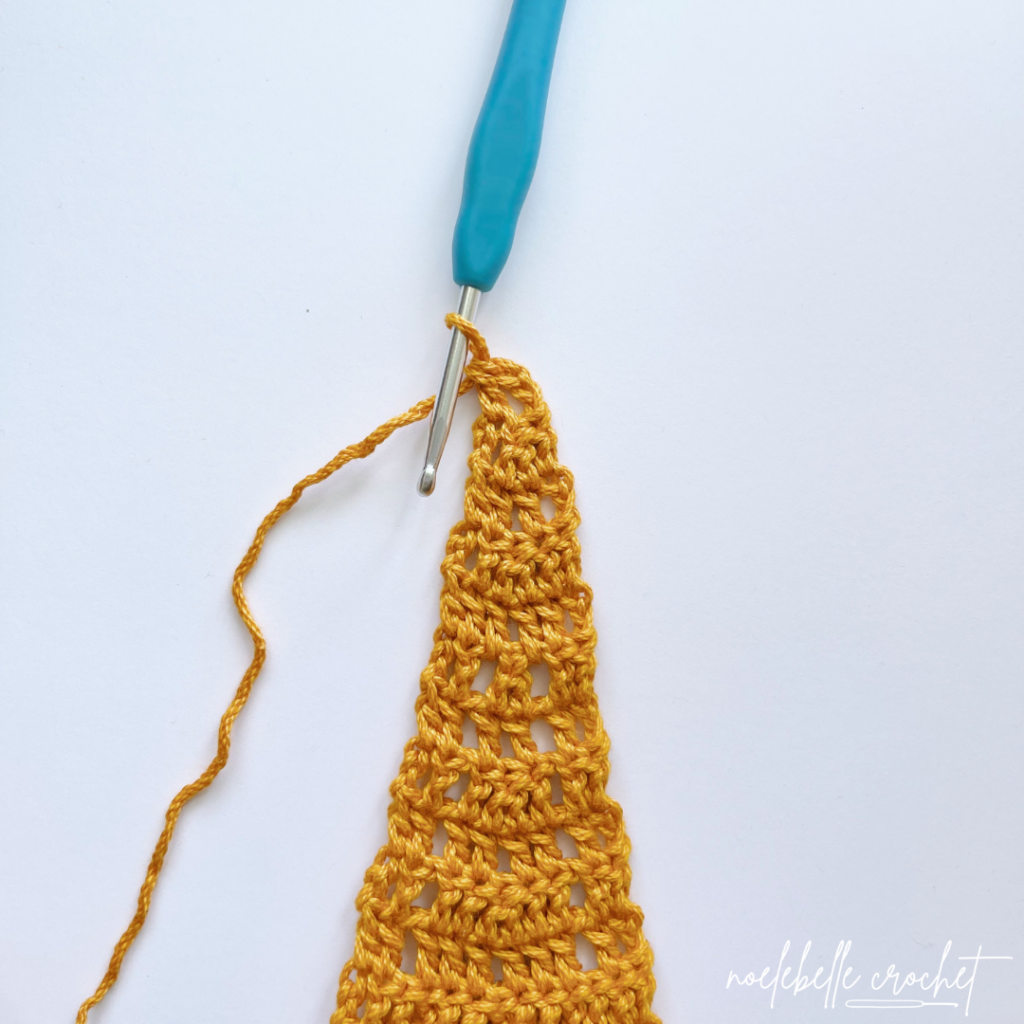
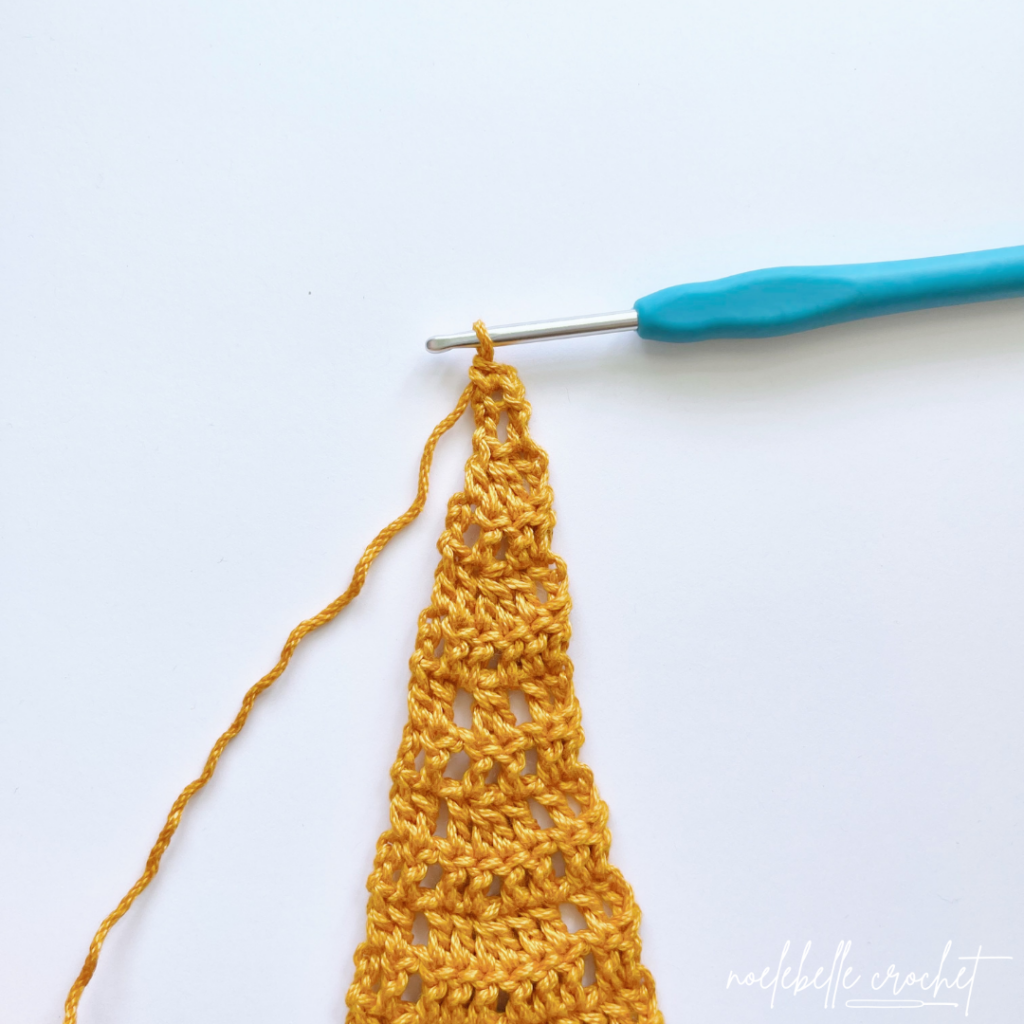
FO and weave in ends
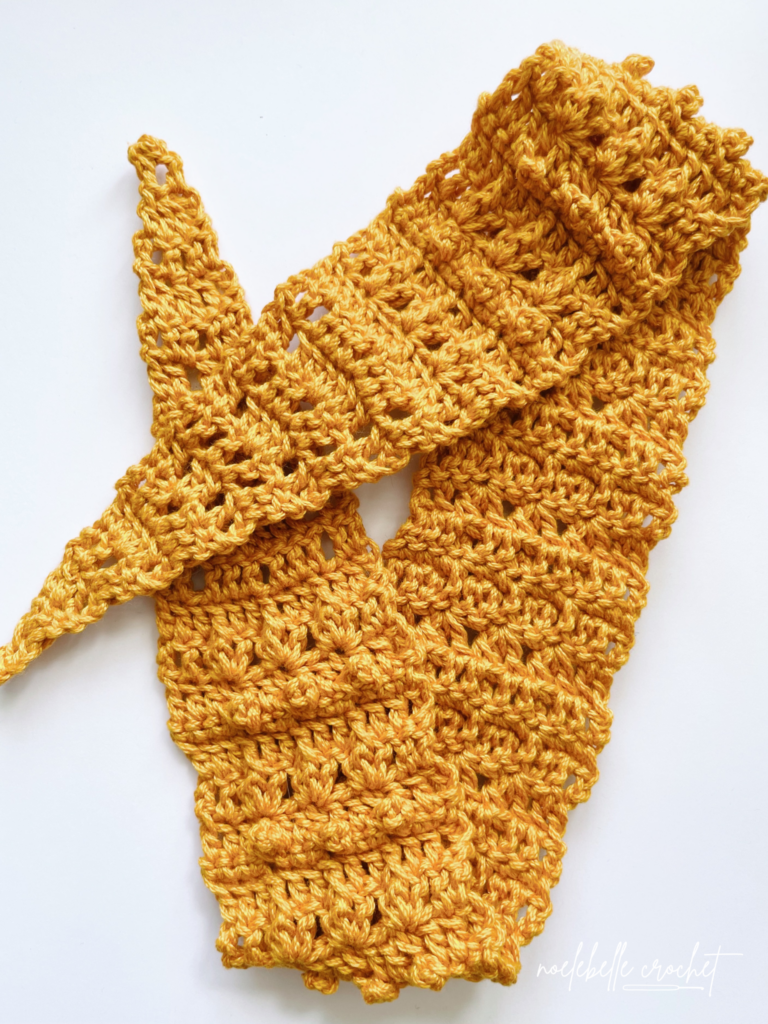
To finish assembling your headband, wrap it around your head and tie it in a double knot at a point that fits you comfortably.
Tip: When tying your knot, fold your ties like a taco before tying them together.
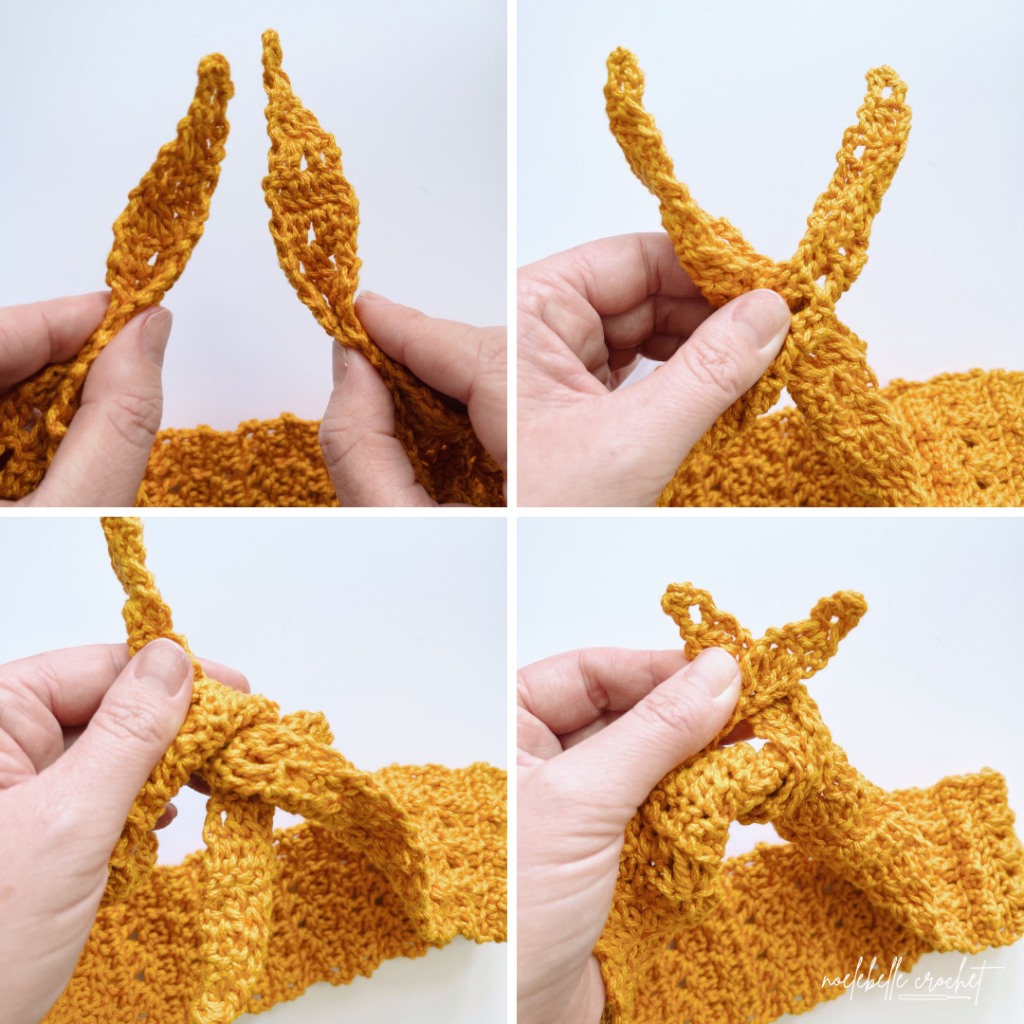
You’re all done!
