How to Crochet Your Own Plush The Fox from The Little Prince

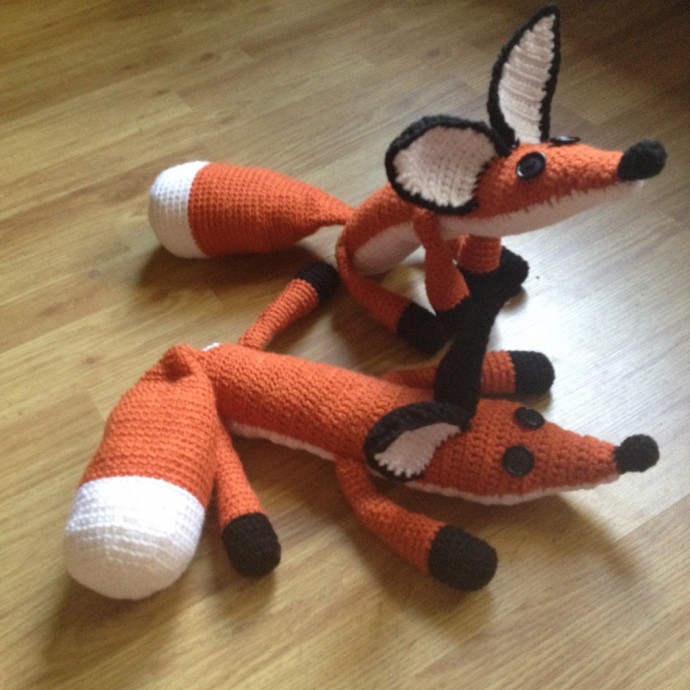
Create your very own handmade version of the beloved character, The Fox, from The Little Prince by crocheting a plush toy. With its distinctive orange fur, pointy ears, and wise eyes, this crochet project will bring a touch of whimsy and nostalgia to your home. By following a crochet pattern inspired by the iconic character, you can customize the size, shape, and details of your Fox plush to make it truly unique.
Materials and Supplies
Gather the following materials before starting your crochet project:
- Size F crochet hook
- Stitch marker (optional but recommended for marking your rounds)
- Yarn needle
- Worsted weight yarn in red-orange, white, and black
- Stuffing material
- Two (2) 3/4" buttons, or whatever size preferred
- Black thread
- Sewing needle
- Stuffing tool (optional but can make it easier to stuff the skinny part of the legs)
Skills and Abbreviations
Familiarize yourself with the following skills and abbreviations:
- ch: chain
- sl: slip stitch
- sc: single crochet
- st/sts: stitch/stitches
- rnd/rnds: round/rounds
- Working flat and in the round
- Changing colors
- Seaming
- Stitching parts together
All rounds are continuous and worked in BACK LOOPS ONLY. Standard crochet should be fine and shouldn't greatly affect the gauge. Gauge is not that important anyway. Total number of stitches per row and round is denoted by parentheses.
Body
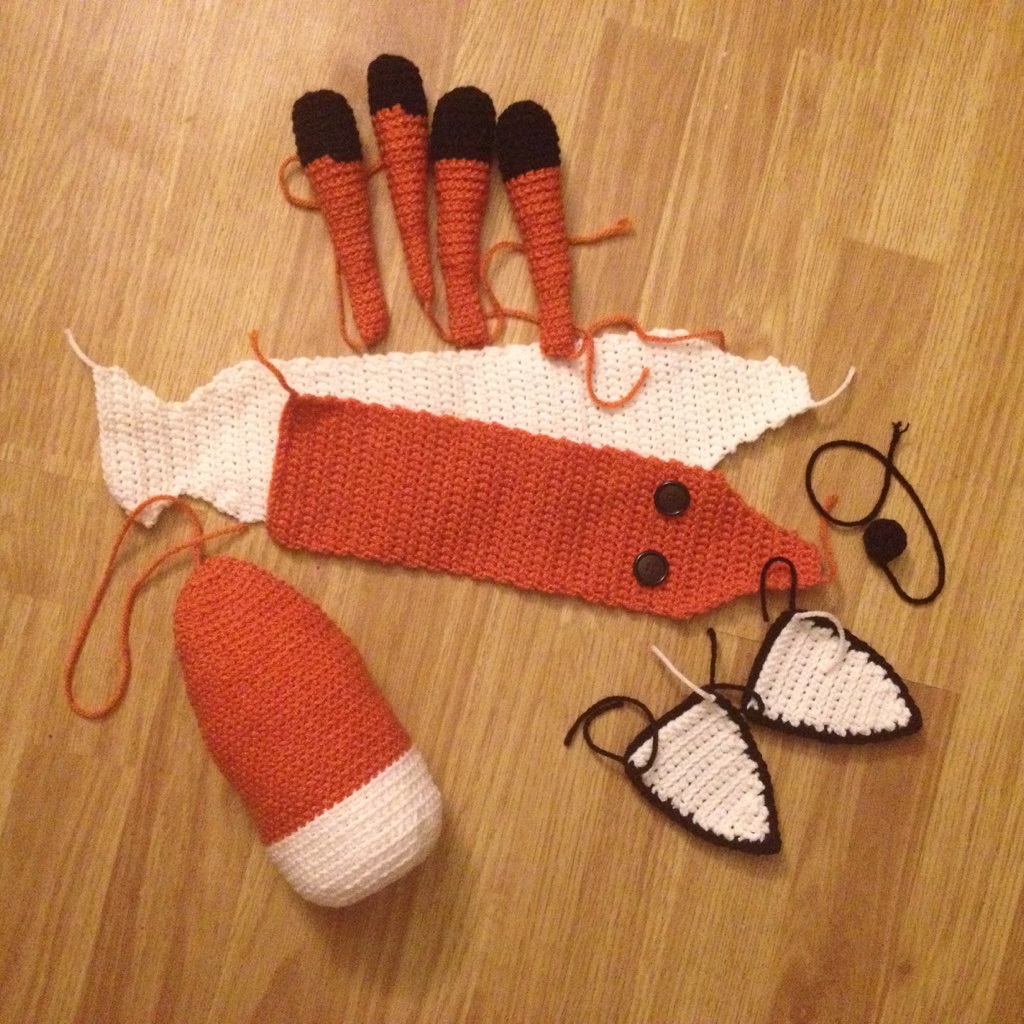
The body consists of two parts, the upper orange part and the white belly. For the top, starting at the nose part of the head with orange:
Row 1: ch 6;
Row 2: sc in 2nd ch from hook and across (5), ch 1, turn;
Row 3: sc across (5), ch 2, turn;
Row 4: sc in 2nd ch from hook and across, inc in final sc (7), ch 1, turn;
Row 5: sc across (7), ch 1, turn;
Row 6: sc across (7), ch 2, turn;
Row 7: sc in 2nd ch from hook and across, inc in final sc (9), ch 1, turn;
Row 8: sc across (9), ch 2, turn;
Row 9: sc in 2nd ch from hook and across, inc in final sc (11), ch 2, turn;
Row 10: sc in 2nd ch from hook and across, inc in final sc (15), ch 2, turn;
Row 11: sc in 2nd ch from hook and across, inc in final sc (17), ch 1, turn;
Rows 12-48: sc across (17), ch 1, turn until row 48, at which point you do not ch 1, turn but instead break off.
It's easier to sew the eyes on before you assemble the body. They should be placed between rows 12 and 13 with 2-3 stitches between them.
For the bottom, starting at the nose part of the head with white, repeat rows 1-48, just as above, but do not break off after row 48. Instead, ch 1, turn and continue below:
Row 49: dec, sc 13, dec (15), ch 1, turn;
Row 50: dec, sc 11, dec (13), ch 1, turn;
Row 51: dec, sc 9, dec (11), ch 1, turn;
Row 52: dec, sc 7, dec (9), ch 1, turn;
Row 53: sc across (9), ch 2, turn;
Row 54: sc in 2nd ch from hook and across, inc in final st (11), ch 2, turn;
Row 55: sc in 2nd ch from hook and across, inc in final st (13), ch 2, turn;
Row 56: sc in 2nd ch from hook and across, inc in final st (15), ch 2, turn;
Row 57: sc in 2nd ch from hook and across, inc in final st (17), ch 1, turn;
Row 57 will be attached to row 48 of the top part of the body. Next, you’ll need to stitch small darts into the corners to make the rear slightly rounded. Seam the top and bottom of the body together and stuff to your desired firmness. A tight whip stitch is recommended.
Ears
Make two (2) ears with orange (or black) yarn and two (2) with white yarn. Start with a chain of 14, leaving a long tail for joining to the head later.
Row 1: sc in 2nd ch from hook and across (13), ch 1, turn;
Rows 2-5: sc across (13), ch 1, turn;
Row 6: dec, sc 9, dec (11), ch 1, turn;
Rows 7-9: sc across (11), ch 1, turn;
Row 10: dec, sc 7, dec (9), ch 1, turn;
Row 11: sc across (9), ch 1, turn;
Row 12: dec, sc 5, dec (7), ch 1, turn;
Row 13: dec, sc 3, dec (5), ch 1, turn;
Row 14: dec, sc, dec (3), ch 1, turn;
Row 15: skip 1st st, dec over remaining 2 sts (1).
Join an orange ear piece and a white ear piece together using black yarn. Single crochet around the two sides, leaving the bottom open, ensuring the front of your work is the white inside part of the ears. Stitch the ears into place, about 3 rows behind the eyes, curving them slightly as desired.
Nose
Using black, create the nose:
Rnd 1: ch 2, work 8 sc in 2nd ch from hook (8);
Rnd 2: * sc, inc, repeat from * around (12);
Rnd 3: sc around (12);
Rnd 4: * sc, dec, repeat from * around (8), break off, leaving tail for attaching.
Stuff the nose with a small amount of stuffing and join it to the end of the face.
Legs
Make four (4) legs, starting at the foot, with black:
Rnd 1: ch 2, work 8 sc in 2nd ch from hook (8);
Rnd 2: inc in each around (16);
Rnds 3-7: sc around (16), switch to orange at the end of rnd 7;
Rnds 8-12: sc around (16), begin stuffing and continue stuffing as you go;
Rnd 13: * sc 2, dec, repeat from * around (12);
Rnds 14-18: sc around (12);
Rnd 19: * sc 2, dec, repeat from * around (9);
Rnds 20-25: sc around (9), break off after rnd 25, leaving a long tail to stitch to the body.
Stuff to desired firmness, and seam the top edge flat. Stitch the front legs about 3-4 rows behind the backs of the ears (about row 23-24), and attach the back legs to the corners of the bottom of the orange body.
Tail
Starting at the end with white:
Rnd 1: sc 2 work 8 sc in 2nd ch from hook (8);
Rnd 2: inc around (16);
Rnd 3: * sc, inc, repeat from * around (24);
Rnd 4: * sc 2, inc, repeat from * around (32);
Rnd 5: * sc 3, inc, repeat from * around (40);
Rnd 6: sc around (40);
Rnd 7: * sc 4, inc, repeat from * around (48);
Rnds 8-12: sc around (48), switch to orange at the end of rnd 12;
Rnds 13-24: sc around (48);
Rnd 25: * sc 4, dec, repeat from * around (40);
Rnds 26-28: sc around (40), begin stuffing and continue as you go;
Rnd 29: * sc 3, dec, repeat from * around (32);
Rnds 30-32: sc around (32);
Rnd 33: * sc 2, dec, repeat from * around (24);
Rnds 34-35: sc around (24);
Rnd 36: * sc, dec, repeat from * around (16);
Rnd 37: sc around (16);
Rnd 38: dec around (8), break off, leaving a tail for attaching to body.
Attach the tail to the center of the butt end where the orange and white meet.

