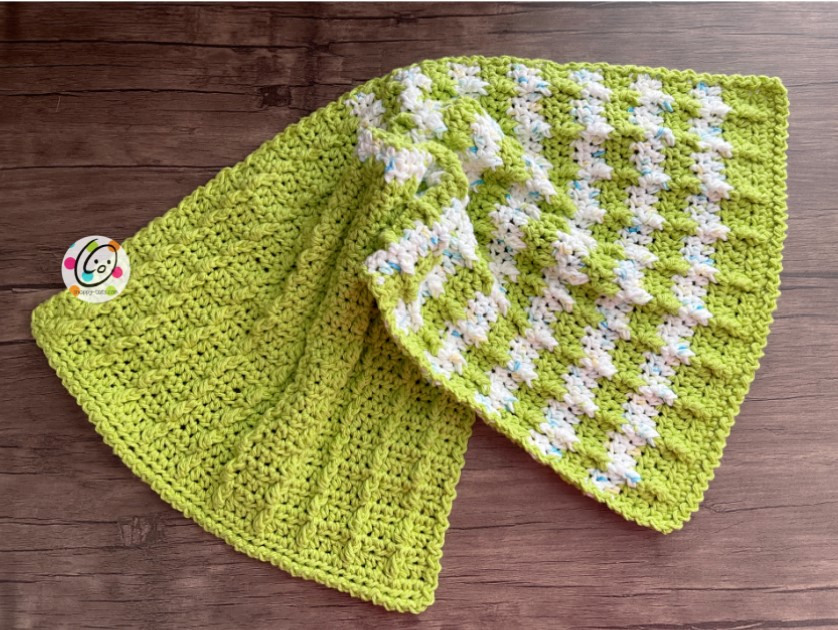
Crochet Lucky Hanging Towel

Create your very own lucky hanging towel with the art of crochet! This unique and charming towel will not only add a touch of handmade beauty to your kitchen or bathroom, but it will also bring you good luck every time you use it. Crocheting a hanging towel is a fun and rewarding project that allows you to showcase your creativity and skill.
You can choose your favorite colors and patterns to make it truly one-of-a-kind. Crocheting a lucky hanging towel is a great way to add a personal touch to your home decor or to create a thoughtful gift for a friend or family member. The process of crocheting involves using a hook and yarn to create intricate stitches that form a beautiful and functional piece of fabric. By following a simple pattern and using basic crochet techniques, you can easily create a lovely hanging towel that will bring joy and luck into your daily routine. So grab your crochet hook and yarn, and get ready to make your very own lucky hanging towel today!Materials and Details
- Yarn: 200 yards ww cotton (1-2 colors)
- Crochet Hook: I (5.5mm)
- Notions: Yarn needle for weaving in ends
- Measurement: 12.5” wide x 24” long
Tips
- Numbers at the beginning of each line may refer to steps and not indicate number of rows.
- Stitch count remains the same for entire cloth.

Special Stitch: FPDC Cluster
YO, insert hook around the next post, YO and pull up a loop, YO and pull through 2 loops on hook. YO, insert hook around the same post, YO and pull up a loop, YO and pull through 2 loops on hook, YO and pull through all 3 loops on hook.
See help photos at the end of this pattern if needed.
Directions
Stripes
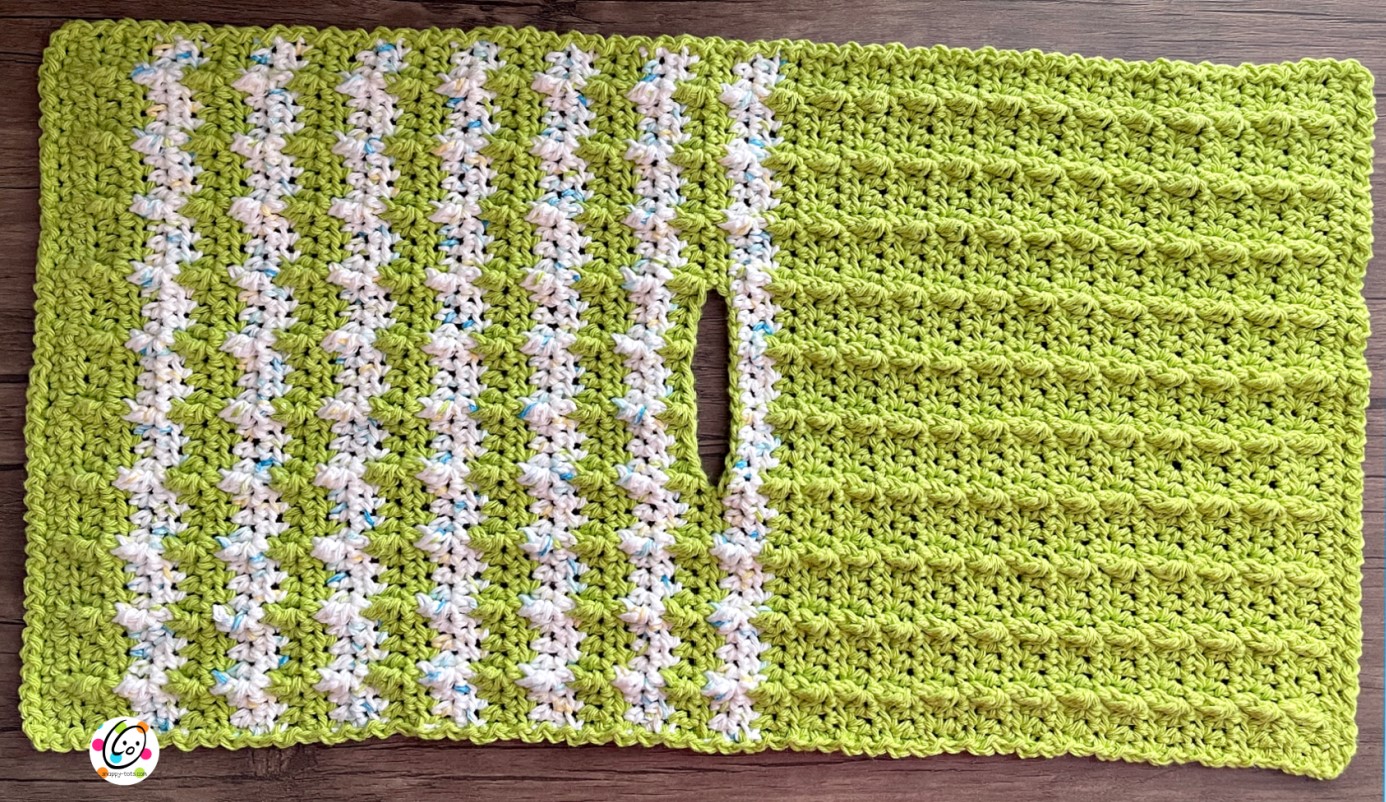
The instructions are written for a cloth with stripes on one half and solid on the other as shown in the main sample. Adjust/substitute colors as desired.
Different stripe sequence:
If you would like your cloth to be striped, here are some suggestions:
- Change colors after the hdc rows. This way the different color will emphasize the post cluster sts.
- Change colors every two rows and carry the unused yarn up the side of the cloth. You won’t have to weave in a bunch of tails and the border from step 6 will cover the yarns running up the side.
- To get the beginning and ending stripes close to the same width, I started with green and changed to white for the second row of cluster stitch. After the last white stripe, I worked one cluster row, one hdc row, one cluster row, one sc row. I then added the border.
1. With an I hook and main color (lime green in sample), ch 43, sc in the 2nd ch from hook and in each ch across. (42sts)
2. Ch 2, turn, hdc in the same st and in each st across.
3. Ch 2, turn, hdc in the same st, hdc in the next st, *sk 1, FPDC cluster (see “special stitch” above), hdc in same st as cluster, hdc 2*, repeat to end of row. (42sts)
Tip: you will not be working into the skipped st. Leave it empty.
4. Ch 2, turn, hdc in the same st and in each st across.
5. Change yarn color (white speckled in sample). Do not finish off the unused yarn until instructed. Ch 2, turn, hdc in the same st, hdc in the next st, *sk 1, FPDC cluster (see “special stitch” above), hdc in same st as cluster, hdc 2*, repeat to end of row. (42sts)
6. Ch 2, turn, hdc in the same st and in each st across.
7. Change back to main yarn color (lime green in sample). Do not finish off the unused yarn until instructed. Ch 2, turn, hdc in the same st, hdc in the next st, *sk 1, FPDC cluster (see “special stitch” above), hdc in same st as cluster, hdc 2*, repeat to end of row. (42sts)
8. Ch 2, turn, hdc in the same st and in each st across.
9. Repeat steps 5-8 until cloth is 11-11.5”. For the sample I finished my sixth stripe of the white variegated yarn before moving on to the next step.
10. Change back to main yarn color (lime green in sample). Do not finish off the unused yarn. Ch 2, turn, hdc in the same st, hdc in the next st, *sk 1, FPDC cluster, hdc in same st as cluster, hdc 2*, repeat to end of row. (42sts)

11. This step creates the keyhole opening in the middle of the cloth. Continue with the same color. Ch 2, turn, hdc in the same st, hdc 14, ch 12, sk 12, hdc 15.
12. Change yarn color (white speckled in sample). Do not finish off the unused yarn. Ch 2, turn, hdc in the same st, hdc in the next st, *sk 1, FPDC cluster, hdc in same st as cluster, hdc 2*, repeat two more times, hdc in the next st, hdc in each ch (12), hdc 3, *sk 1, FPDC cluster, hdc in same st as cluster, hdc 2*, repeat two more times. (42sts)
13. Ch 2, turn, hdc in the same st and in each st across. Finish off the current yarn.
14. Change back to main yarn color (lime green in sample). Ch 2, turn, hdc in the same st, hdc in the next st, *sk 1, FPDC cluster, hdc in same st as cluster, hdc 2*, repeat to end of row. (42sts)
15. Ch 2, turn, hdc in the same st and in each st across.
16. Repeat steps 14-15 until overall cloth is 23” long. Make sure to end with an hdc row.
17. This step is worked around the outer edge of the cloth. Ch 1, turn. Make sure you are now working on the RS (ridges from post clusters). Sl st in same st, *ch 1, sl st in next st*, repeat around entire rectangle, evenly spacing the sts when working across the edges.
TIP: This should create a rick rack look around the edge.
Think of this as working a sl st in every st, with a ch 1 between the sts. You are not skipping a stitch between sl sts.
Finish off and weave in ends.
